Adding Employees
To add an employee:
-
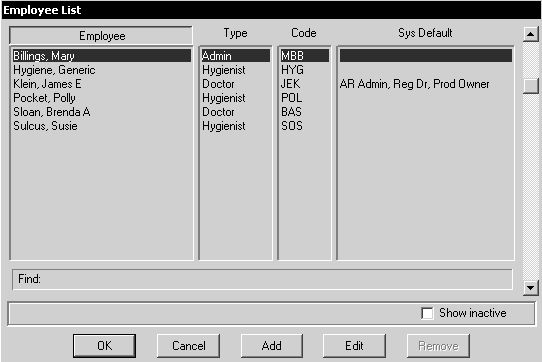
Select Lists > Employees. The Employee List window is displayed.

-
Click Add. The Employee Properties window is displayed with the General tab selected.

-
Type information in the fields and select the attributes you want the employee to have. Click herehere for an explanation of each attribute.
Can be a patient’s primary doctor—Select this option if the employee is a doctor who provides regular service to certain patients. If this is the default doctor for the practice, select Sys default.
Can own transactions/production—Select this option if the employee owns his or her own production, can own someone else’s production, or owns the clipboards of the patients on whom work is performed. If this employee is the default producer for your office, select Sys default.
Can have production—Select this option for an employee who performs procedures on a patient. Each billed procedure indicates who performed the treatment. The system tracks the amount of treatment produced by an employee for a particular time period.
Can have appointments—Each appointment has a producer assigned to it. This is the person who performs most of the dentistry during an appointment. Select this option if this employee is the producer on any appointment.
Can administer accounts—Select this option for an employee who needs a separate deposit slip. If this employee is the default provider in your practice, select Sys default.
Inactive—Select this option to inactivate an employee. New treatment cannot be posted for this person, but records of treatment performed are retained.
New employee (training help)—Used in conjunction with the Automation Expert, a new employee receives customized messages when the employee performs certain activities.
Uses own fee schedule—Select this option for an employee with a separate fee schedule.
-
In the Fee schedule field, type the number of fee schedules you use. You can set up as many as three provider fee schedules.
Note: The Name on return address and Make checks payable to fields are generated from the license file.
-
Click OK.
Setting Office-Wide Insurance Estimating