Using the Recare List
![]() Related Training
Related Training
Setting Up Recare Recorded Class
Using a Recare System Recorded Class
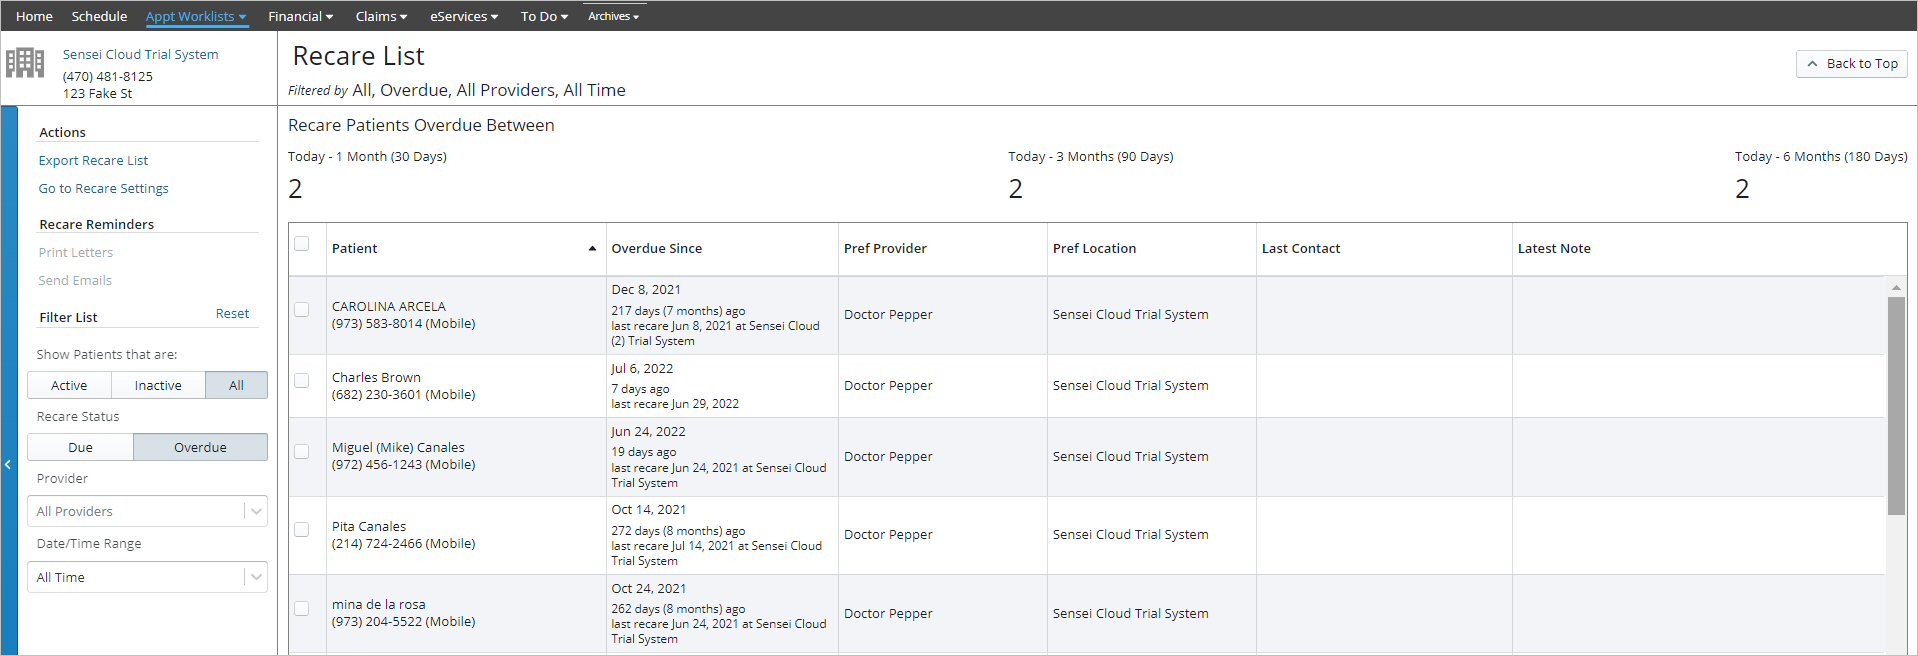
Use the Recare List to identify patients whose next appointments have not been scheduled.
To access the Recare List:
-
From the Location tab, select Appt Worklists > Recare List. The list is displayed.

-
Use the Filter List options to refine the list of patients displayed.
Note: You can click the column heads to sort the list by name, due date, provider, location, etc.
From this list, you can:
-
Select a patient to expand details, contact the patient, schedule an appointment, or add a note.
Note: Patients remain on the list until their next recare appointment is scheduled.
-
Select one or more patients in the list to send Recare Reminders.
-
Click Print Letters or Send Emails to access the corresponding Recare Reminder template for the selected patients.
Note: Patients without an email address are added to the Print Letters category, and those with an email address are in the Send Emails category. The total selected for each category is displayed.
-
Click Export Recare List to generate a .PDF file of the list using the current filters.
-
Click Go To Recare Settings to adjust the practice defaults.
Setting Recare Defaults
Note: You must have Administrator permission to edit these settings.
To set or edit Recare defaults:
-
On the Location tab, select Appt Worklists > Recare List.
-
Under Actions, click Go to Recare Settings.
-
Under Actions, click Edit Recare Settings. The Default Recare Setting fields become active.

-
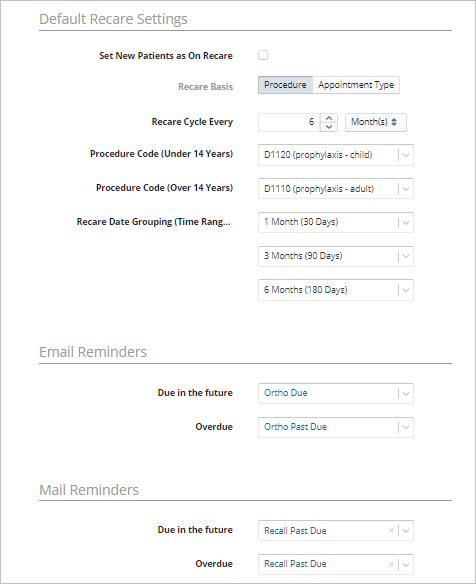
Select Set New Patients as on Recare if you want new patients to automatically be placed on the Recare worklist.
-
In the Recare Basis field, select whether procedures or appointment types are the trigger to determine the appointments designated as recare appointments.
-
Define the default recare cycle in weeks, months, or years.
-
In the Procedure Code or Appointment Type fields, based on the Recare Basis selection, enter information.
-
Select the Date Grouping (Time Range) defaults that determine due-date categories displayed at the top of the Recare List.
-
In the Email Reminders and Mail Reminders sections, select the correspondence templates to use when contacting patients on the Recare List.
-
Click Save.
If Recare processing fails:
-
From the Location tab, select Appt Worklists > Recare List.
-
Apply filters, if necessary, to re-display the Recare List with the appropriate criteria.
-
Do one of the following:
-
To select all patients, click the Patient option.
OR
-
To select a single patient, click the checkbox to the left of the patient’s name.
-
From Recare Reminders, select Print Letters or Send Emails.
Note: If the software stalls, make sure you do not have missing or invalid Recare correspondence in Administration > Recare Settings.
Scheduling to Another Location
Scheduling Treatment Plan Appointments