Working with Charges and Payments
Posting Payments at Checkout
![]() Related Training
Related Training
Posting Charges, Payments, and Adjustments Recorded Class
Posting Payments to Multiple Locations Recorded Class
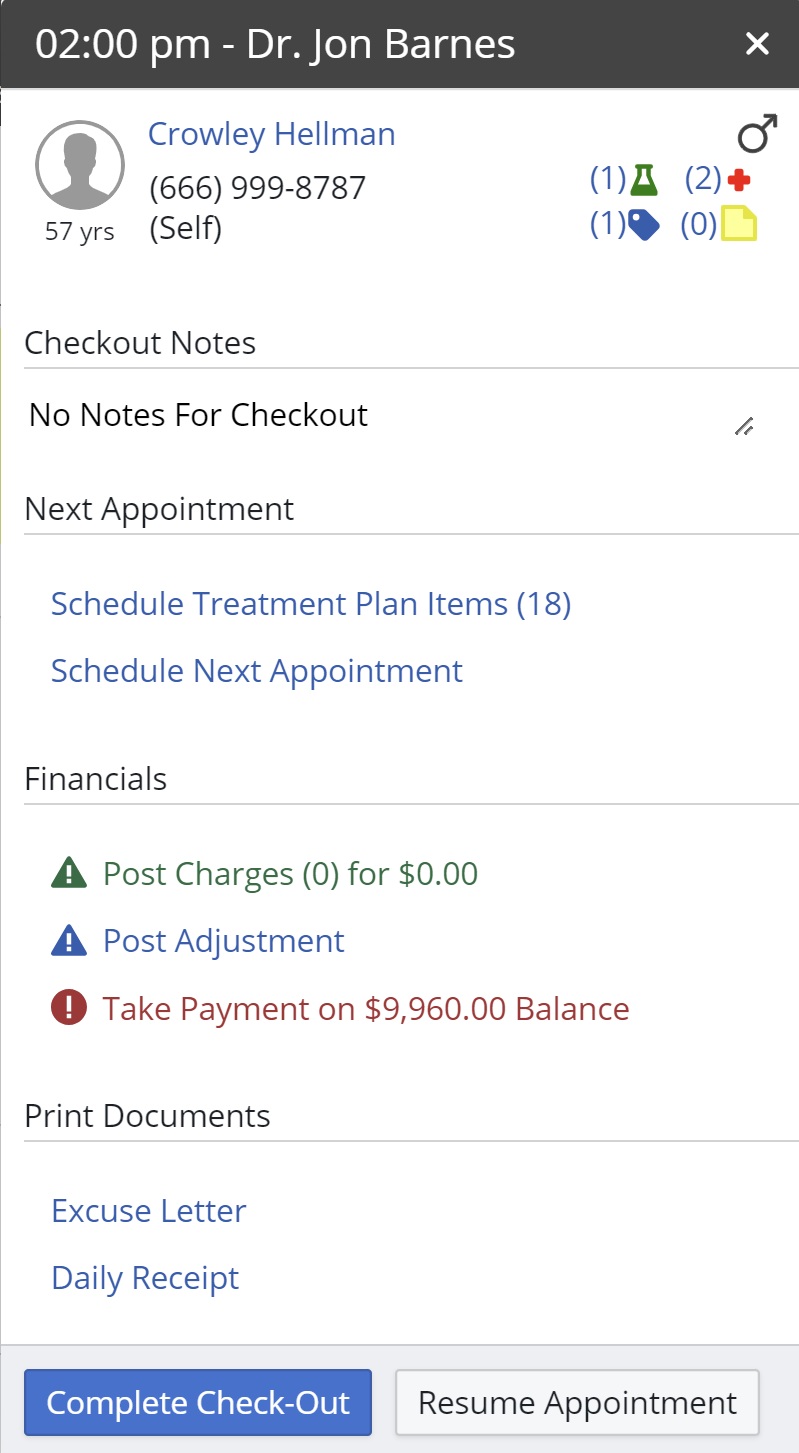
To post a payment at checkout:
-
After changing the Appointment Status to Complete, the patient is placed in the Checkout Queue.
-
If more than one patient is displayed, click the patient you want to check out. The Checkout window is displayed.
-
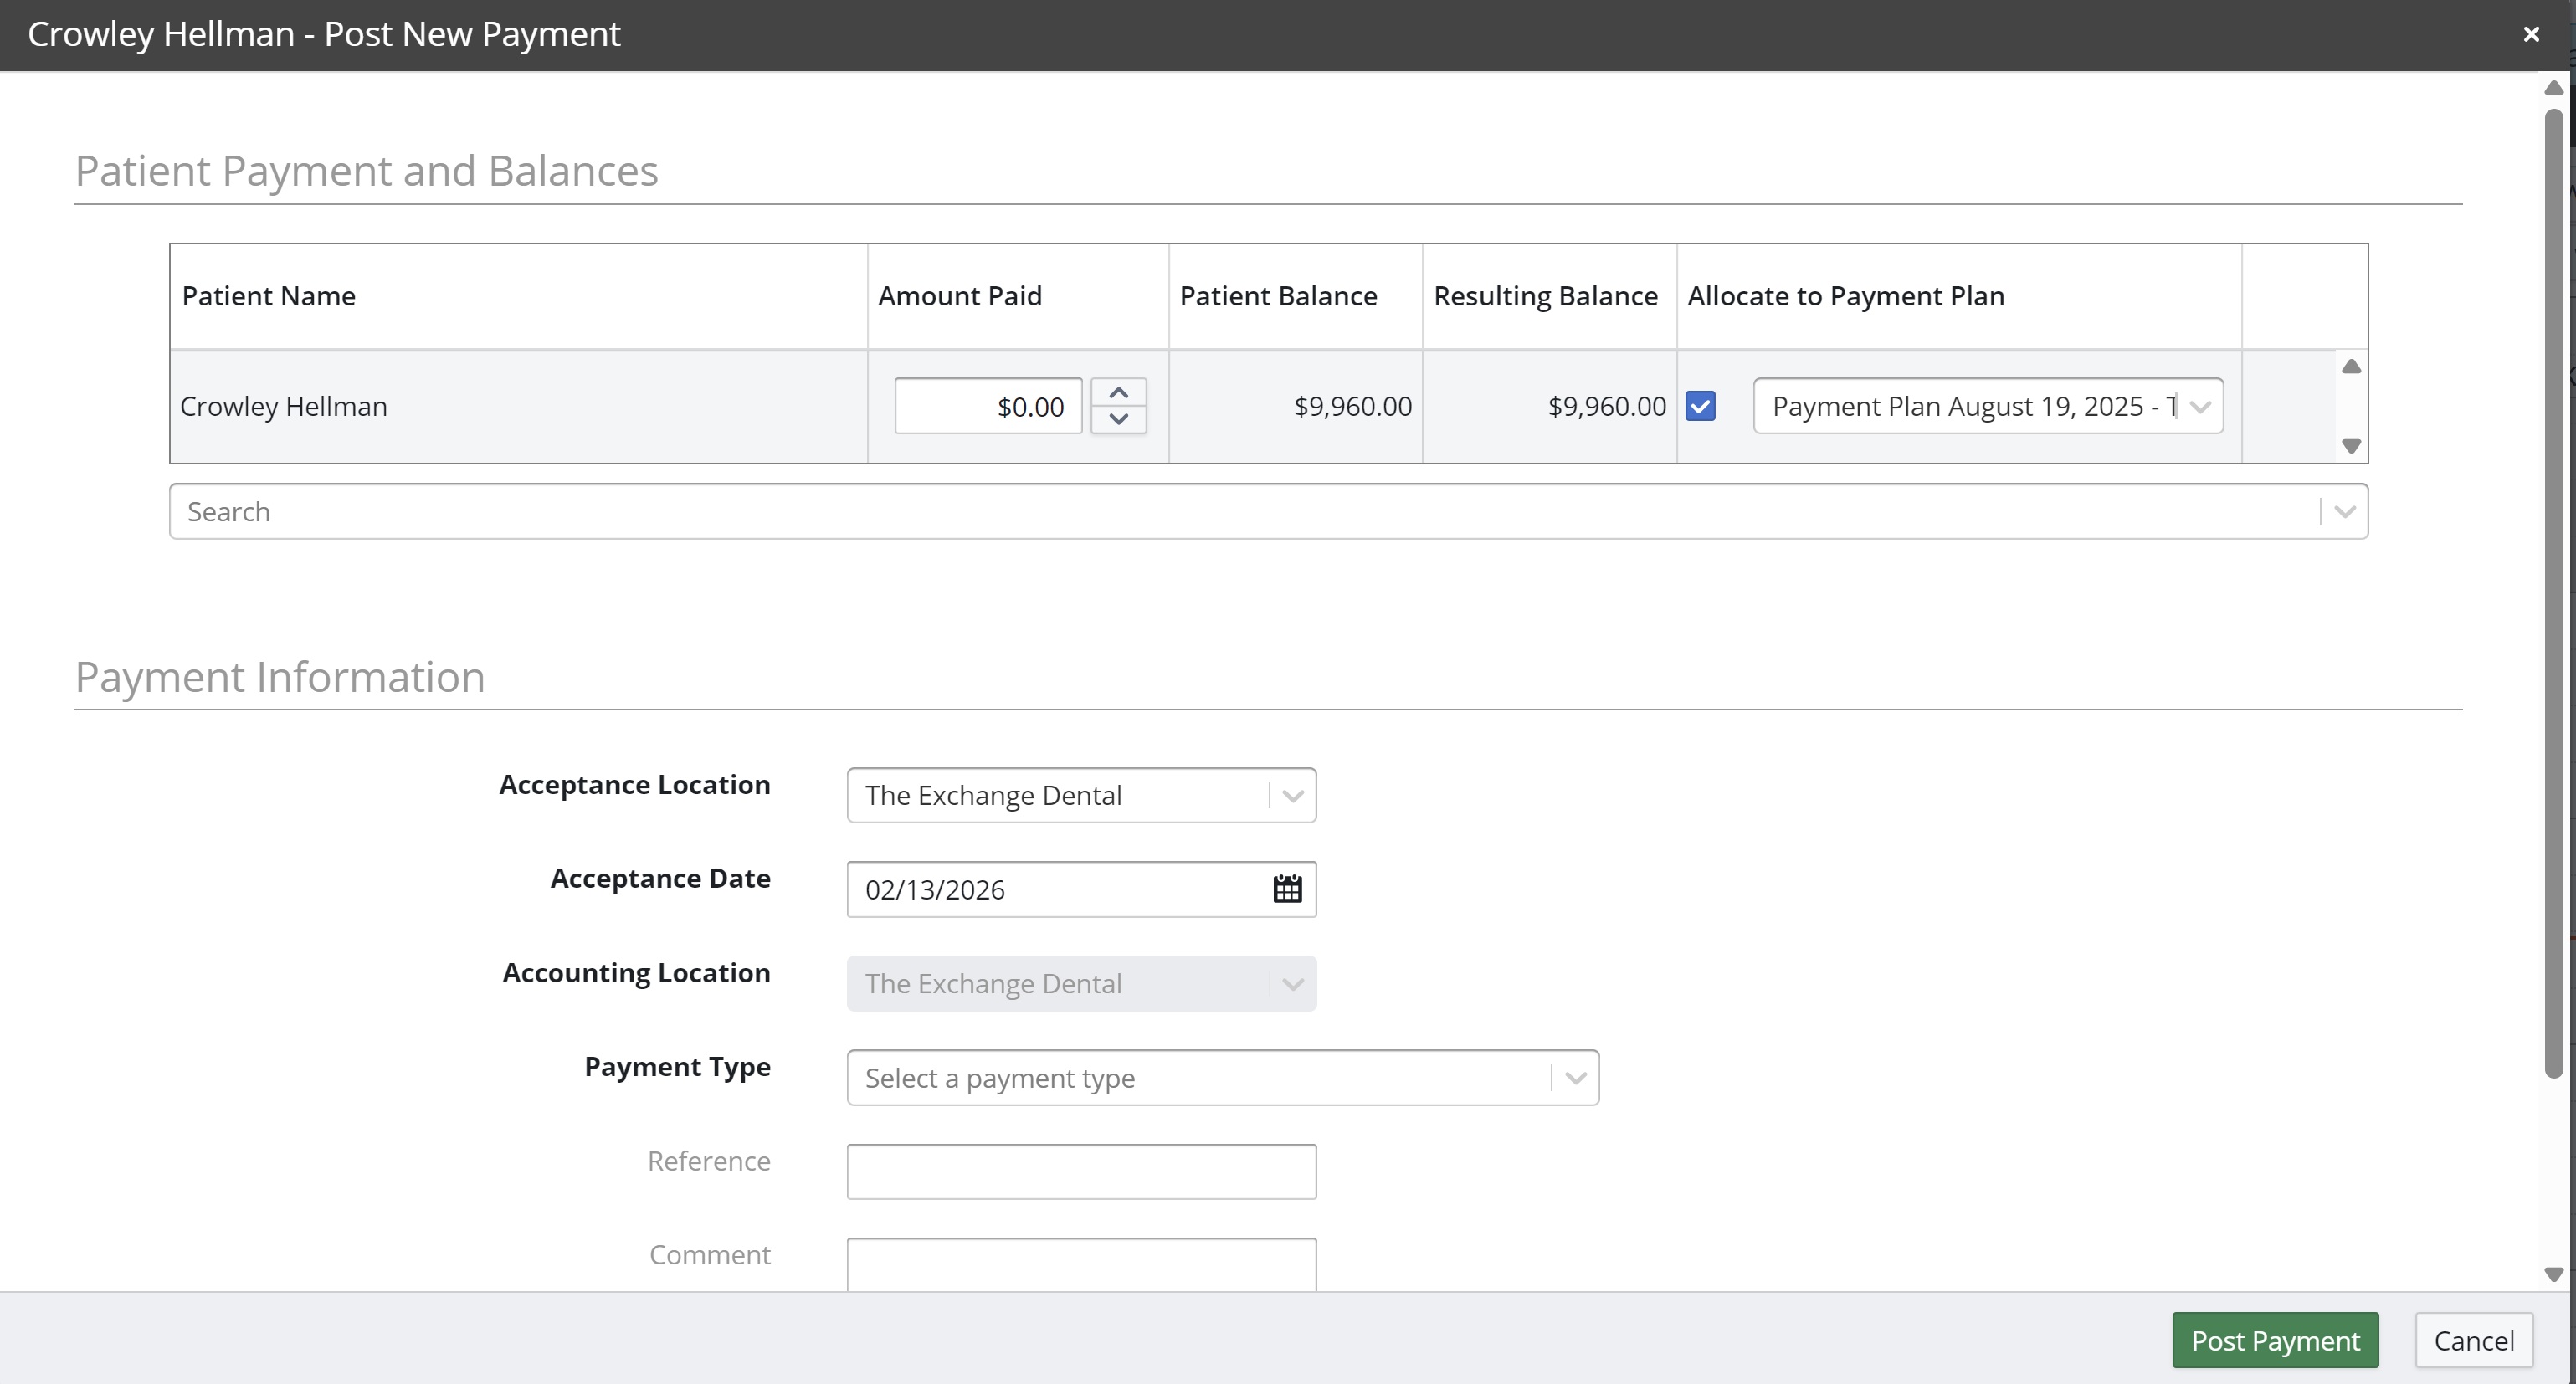
Click Take Payment. The Post New Payment window is displayed.
-
In the Amount Paid field, enter the amount.
-
If you want the payment to be allocated to an existing payment plan, select the checkbox next to Select Payment Plan, and then use the drop-down list to select one of the patient's active payment plans.
Note:
-- The Select Payment Plan option is grayed out if a payment plan is not available.
-- You can also select to make a payment for a guarantee's payment plan. -
Verify or correct the Acceptance Location, Acceptance Date, and Accounting Location fields.
Note:
-- The Acceptance Location for the payment is where the payment is taken and defaults to your logged-in location.
-- The Accounting Location for the payment is where the work was completed and where the payment is applied.
-- If the payment is being allocated to a payment plan, the Accounting Location defaults to the location that the payment plan is for and cannot be changed. -
From the Payment Type drop-down list, select the type of payment.
Note: If the type is either Insurance – Check, Insurance – Credit Card, or Insurance – EFT, the Claim Number field is displayed. Use the drop-down list to select the claim.
-
If applicable, select a Payment Subtype from the list.
Note:
-- The Payment Subtype field is only displayed for certain payment types, including: Credit Card, Check, Insurance - Credit Card, and Mobile or Online.
-- For example, if your payment type is Mobile or Online, you can specify a subtype such as PayPal, Venmo, Zelle, Apply Pay, etc. -
In the Reference field, enter a reference, if necessary; for example, Deductible.
Note: Text you enter in the Reference field is displayed on patient statements and in financial reports.
-
In the Comments field, enter comments, if any.
-
Verify that the Payment Amount is correct.
-
Click Post Payment.
Important: If you are signed up to use Payment Manager for Sensei Cloud, the posting process is different. For more information, see the Sensei Cloud Payment Manager Getting Started Guide.
Entering Bulk Insurance Payments
Adjusting Payments Posted in Error
Allocating Payments to Payment Plans
Creating Patient Ledger Comments