Working with Charges and Payments
Generating Statements
![]() Related Training
Related Training
Generating Statements Recorded Class
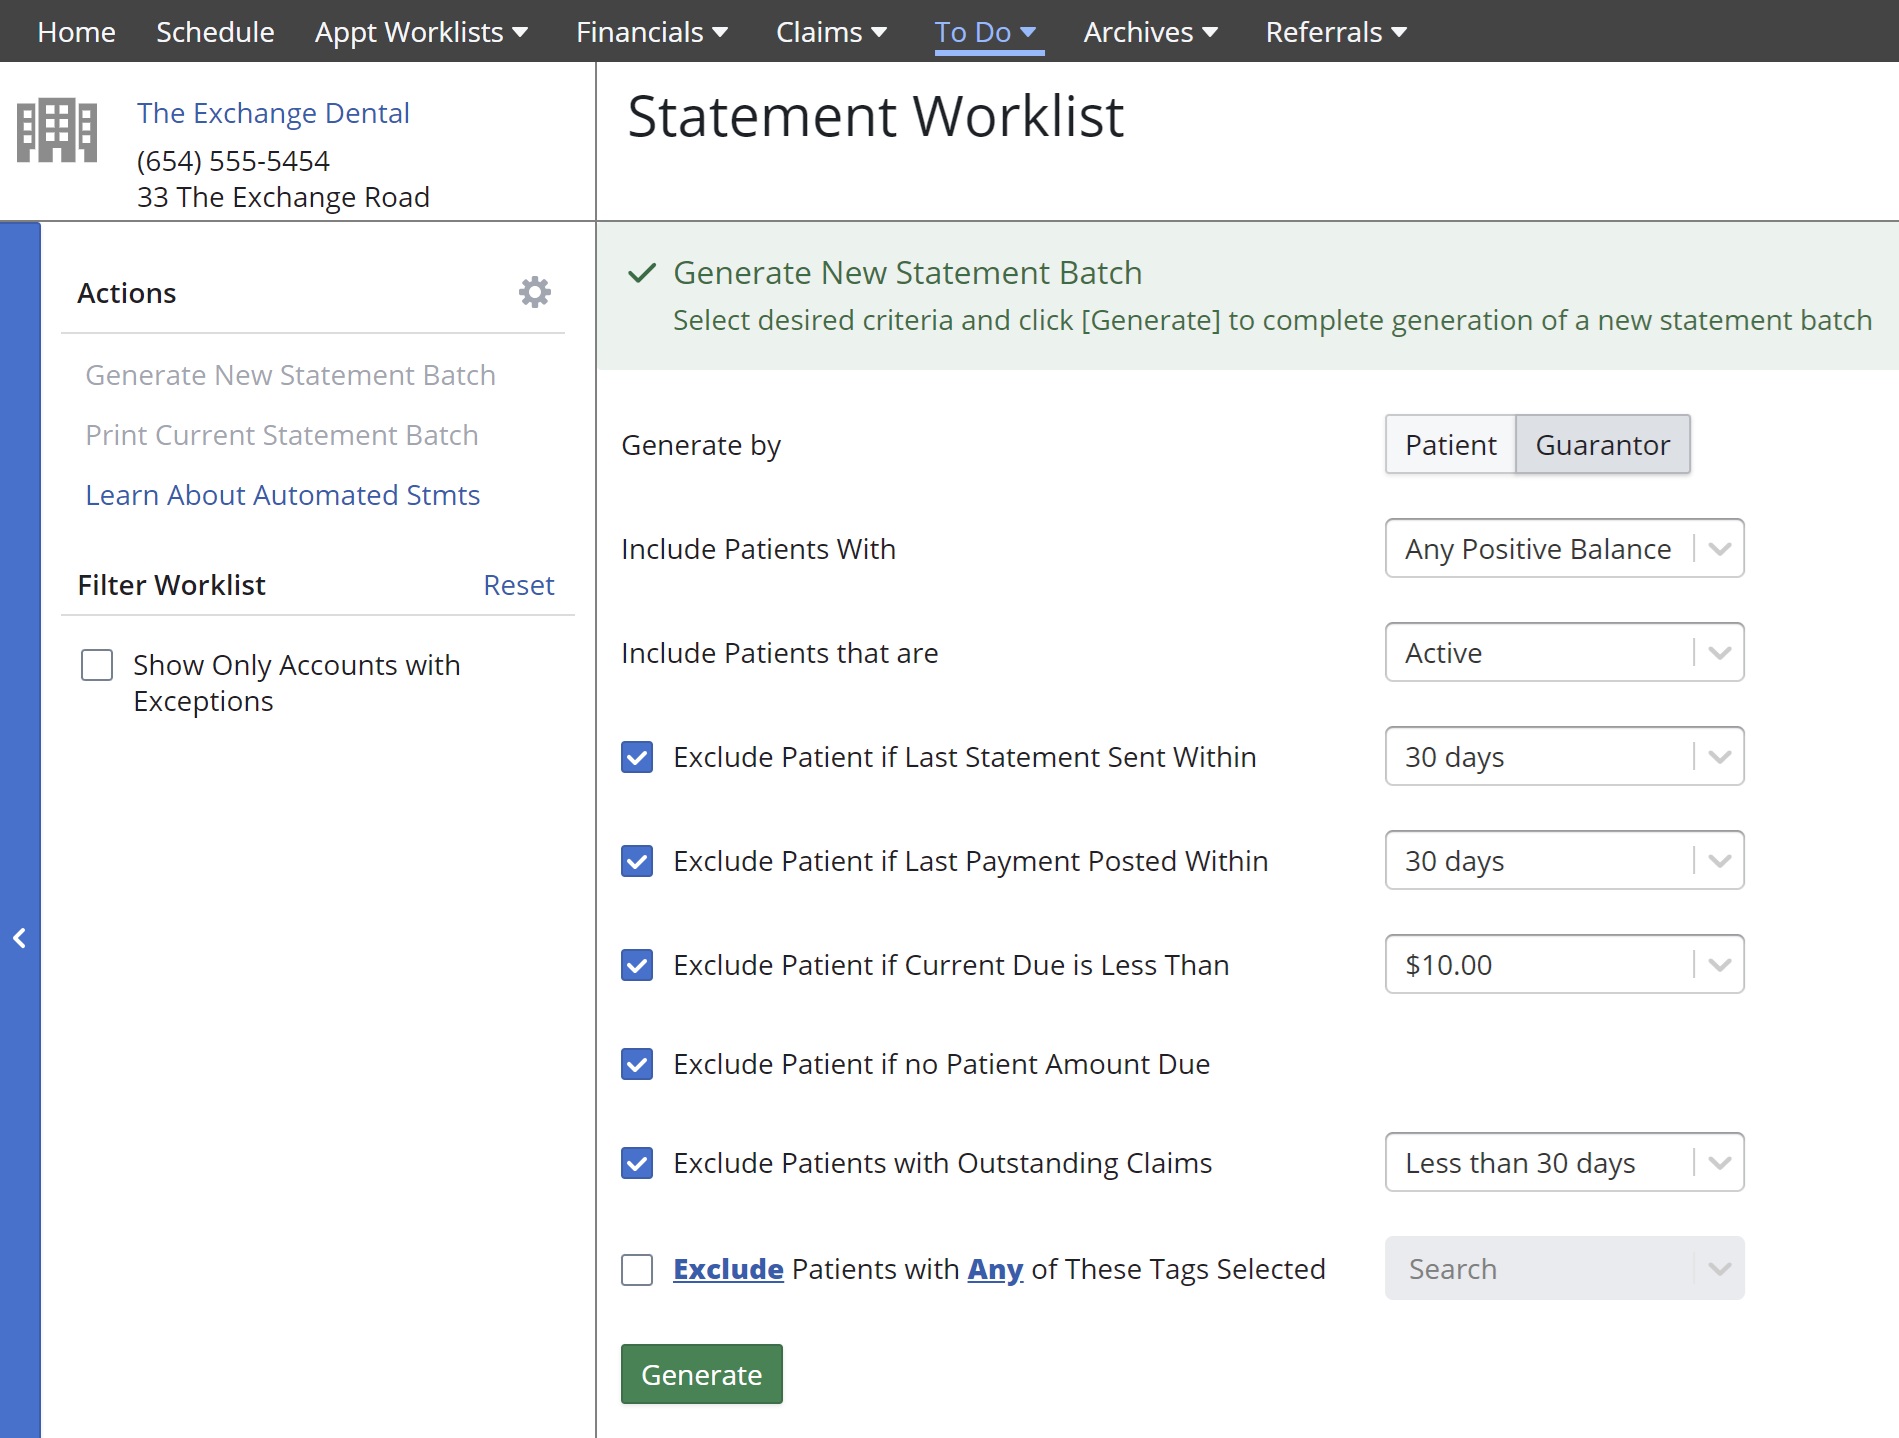
You have the option to run individual patient statements or to run guarantor statements, which are based on the guarantor of a family. The Statements functionality is accessed from the To Do menu of the Location tab.
To generate statements:
-
From the Location tab, select To Do > Statements. The Statement Worklist is displayed.
Note: If you generate by guarantor, the list includes one line item per guarantor, with the total balance for the group. Click on the line item to expand the details and take action, if needed.
Important: If a record has a red circle with an exclamation point, the record has more than one guarantor and must be corrected before the statement can be sent.
From here, you can work with the items in the list:
-
Select Show Only Accounts with Exceptions to display only accounts that need action. You can toggle back to the full list after managing the alerts.
-
Hover your cursor over an Alert icon to see what action is needed on the patient account. If a record has a red circle with an exclamation point, the record has more than one guarantor and must be corrected before the statement can be sent.
-
If you select Inactive or All patients in the Include Patients that are filter, inactive patient accounts are displayed in the statement batch with an alert icon.
-
Select a line item to display details, access the patient record, take a payment, adjust the balance, or view the Ledger.
-
In the Actions column, click the blue T to add a message to the statement, or click the red X to exclude a statement from the batch.
Note:
-- When you exclude a line item, it is displayed as Excluded, with an option to restore it to the batch before printing.
-- If practice administrative fees are enabled for billing statements, there is also a green dollar sign icon in the Actions column. Click this icon to remove the administrative fee from the selected statement. The icon turns red when the statement is set to not be charged a fee. -
Click Reset next to Filter Worklist to refine the list again.
-
Select Generate New Statement Batch again. You are prompted to discard the batch in progress and start again, or continue with the current batch.