Working with Charges and Payments > Posting Payments
Posting Insurance Payments
![]() Related Training
Related Training
Setting Up Automatic Payments Recorded Class
To post an insurance payment:
-
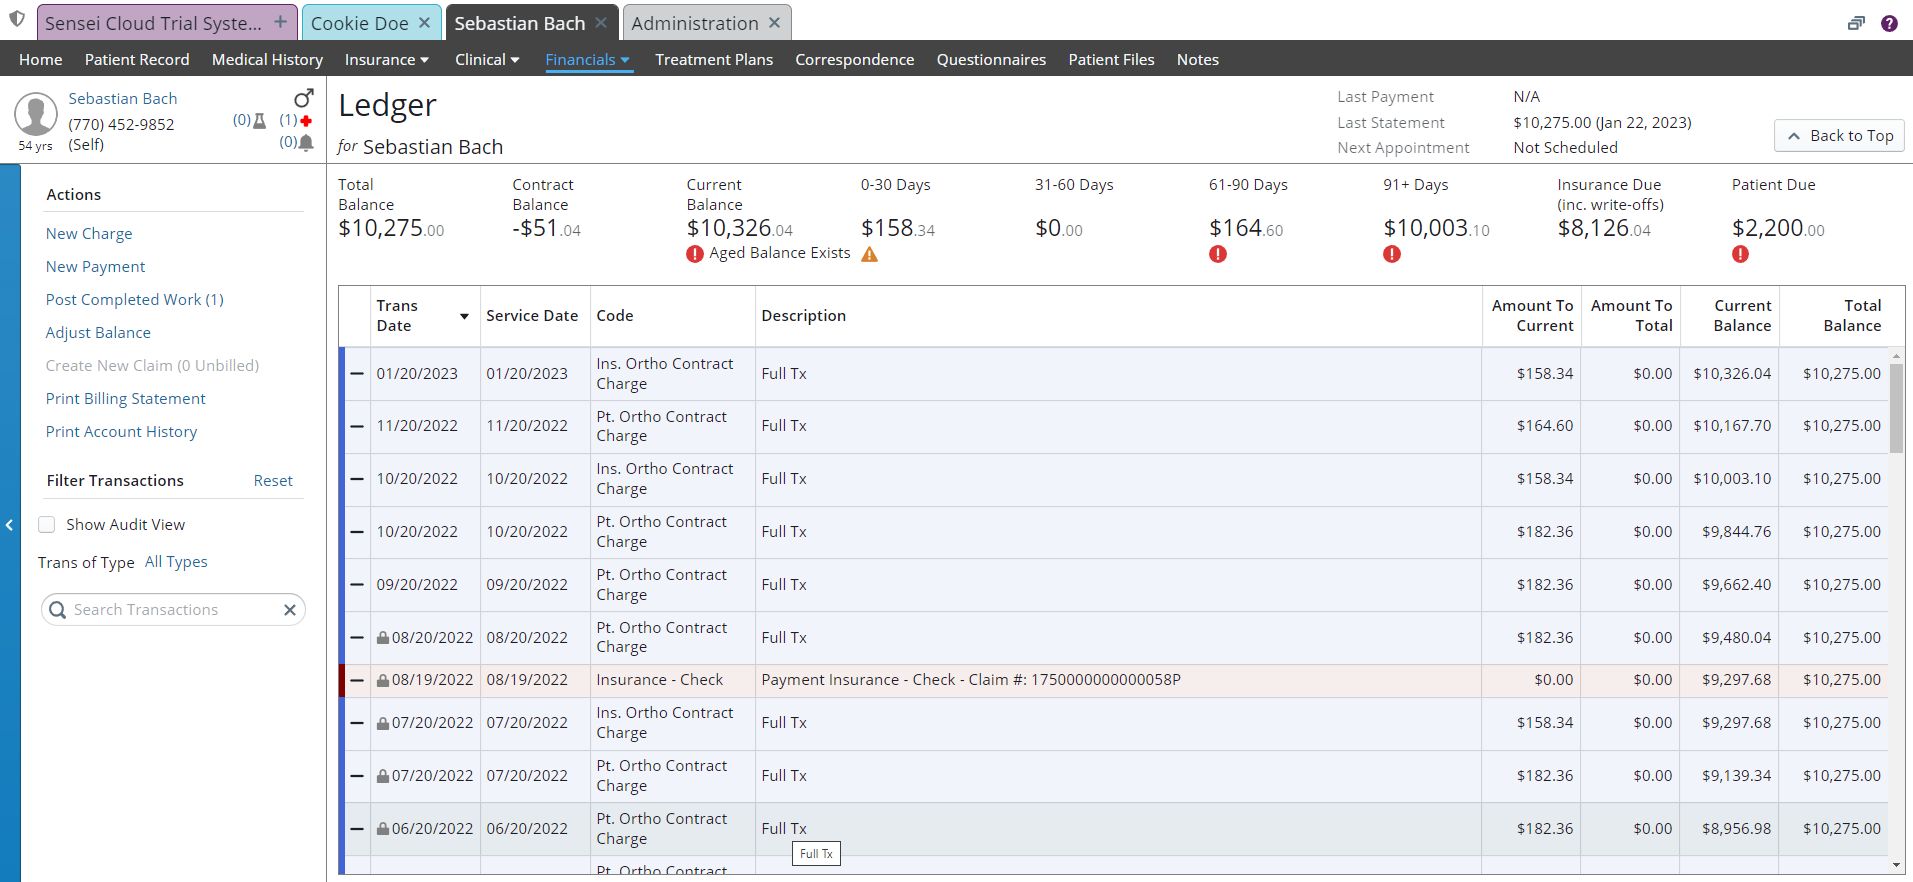
In a patient’s chart, select Financials > Ledger. The Ledger for window is displayed.

-
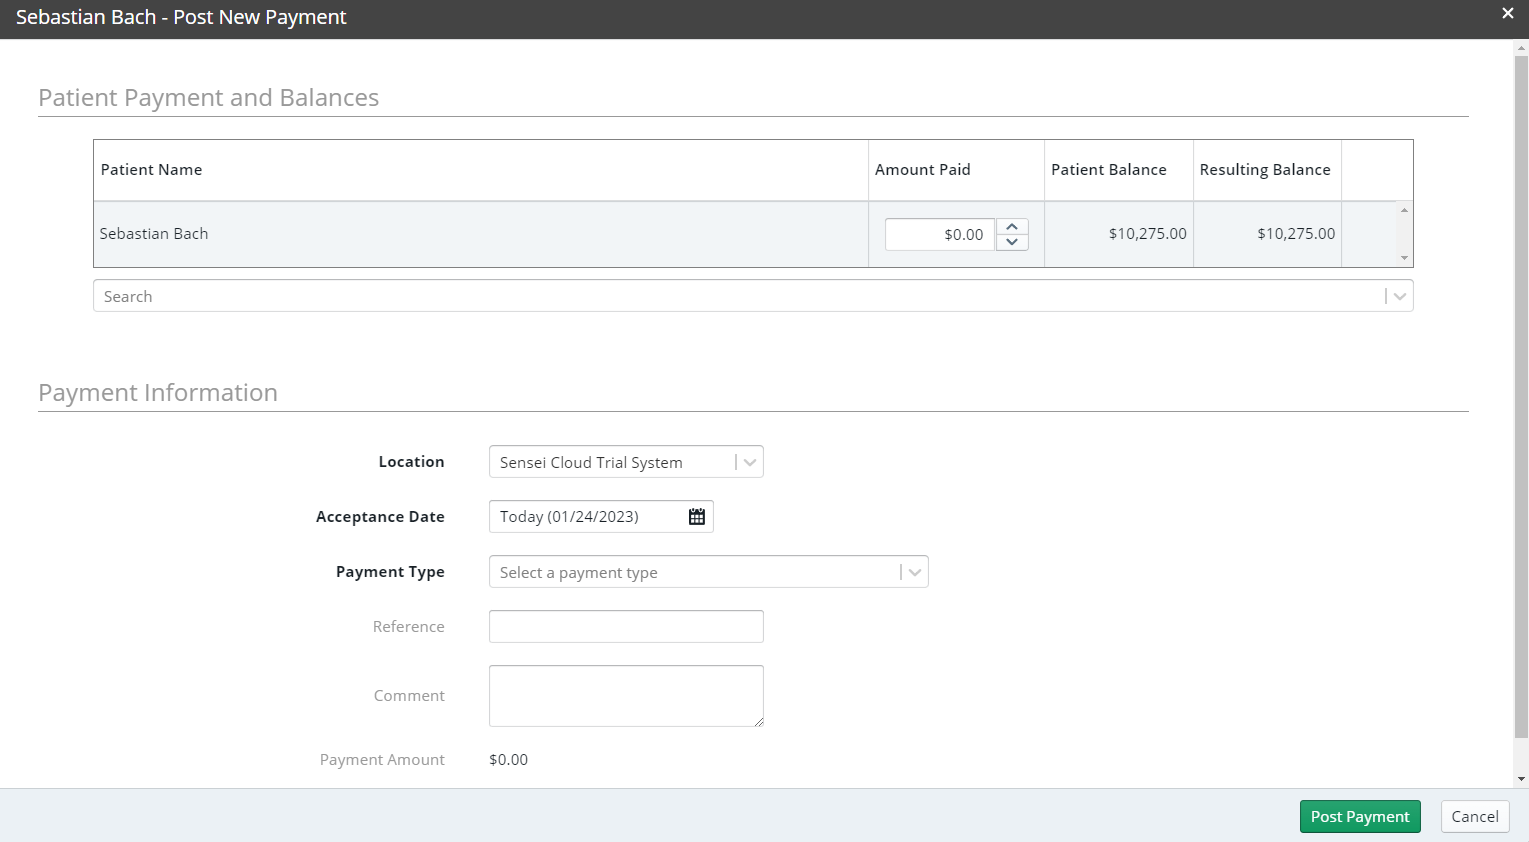
Under Actions, click New Payment. The Post New Payment window is displayed.

-
In the Amount Paid field, enter the payment amount.
Note: If the insurance claim is denied, enter $0 in the field.
-
Verify or correct the Location and Date fields.
-
From the Payment Type drop-down list, select the type of payment. If you select Insurance—Check, Insurance—Credit Card, or Insurance—EFT, you are prompted to select a claim, and the Claim Number is automatically added to the transaction details upon posting.
-
Use the Reference and Comments fields as needed for additional information.
Note: Reference and comment text is included in the transaction description upon posting. Reference text is automatically appended to Claim Number and displayed in the Patient Ledger, Financial Daysheet, and related reports including Statement and Account History.
-
Verify that the Payment Amount is correct.
-
Click Post Payment.
Important: If you are signed up to use Payment Manager for Sensei Cloud, the posting process is different. For more information, see the Sensei Cloud Payment Manager Getting Started Guide.
Entering Bulk Insurance Payments
Adjusting Payments Posted in Error