Completing the Installation
To complete the installation, follow these steps:
- Switch OFF the unit.
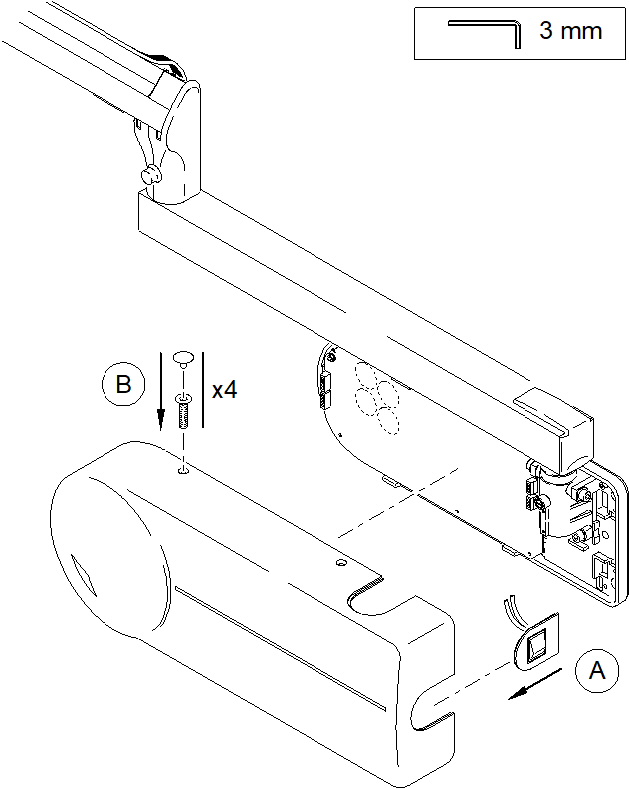
- Put the ON/OFF switch in the cover recess depending on your desired wall framework orientation
 .
. - Stick the warning label near the ON/OFF switch.
- Check that all plugs and cables are securely fixed.
- Fit the wall framework cover using the four screws and insert the screw caps
 .
. - Switch ON the unit. The self-test procedure starts.
- If the self-test is successful, you can use the unit.
- If the self-test fails, an error code is displayed. For more information, see the Error Messages section.
- Show the local staff how to use the User Mode by setting the preset programs. Set the preset programs according to the local practice imaging systems. For more information, see the User Mode section P 4.1 and P 4.2.
- Clean the entire unit using an alcohol-based product.
 |
CAUTION: DO NOT use solvent-based products. When cleaning the product, follow the manufacturer’s recommendations. |
- Fill in all documents related to installation and warranty
 |
IMPORTANT: Make sure that all manuals are left on site for the operators. |
Installing the Main Powerboard