Connecting the Wiring
 |
WARNING: Compliance with all national and local codes as well as with the manufacturer's electrical specifications is mandatory for high and low voltage wiring. |
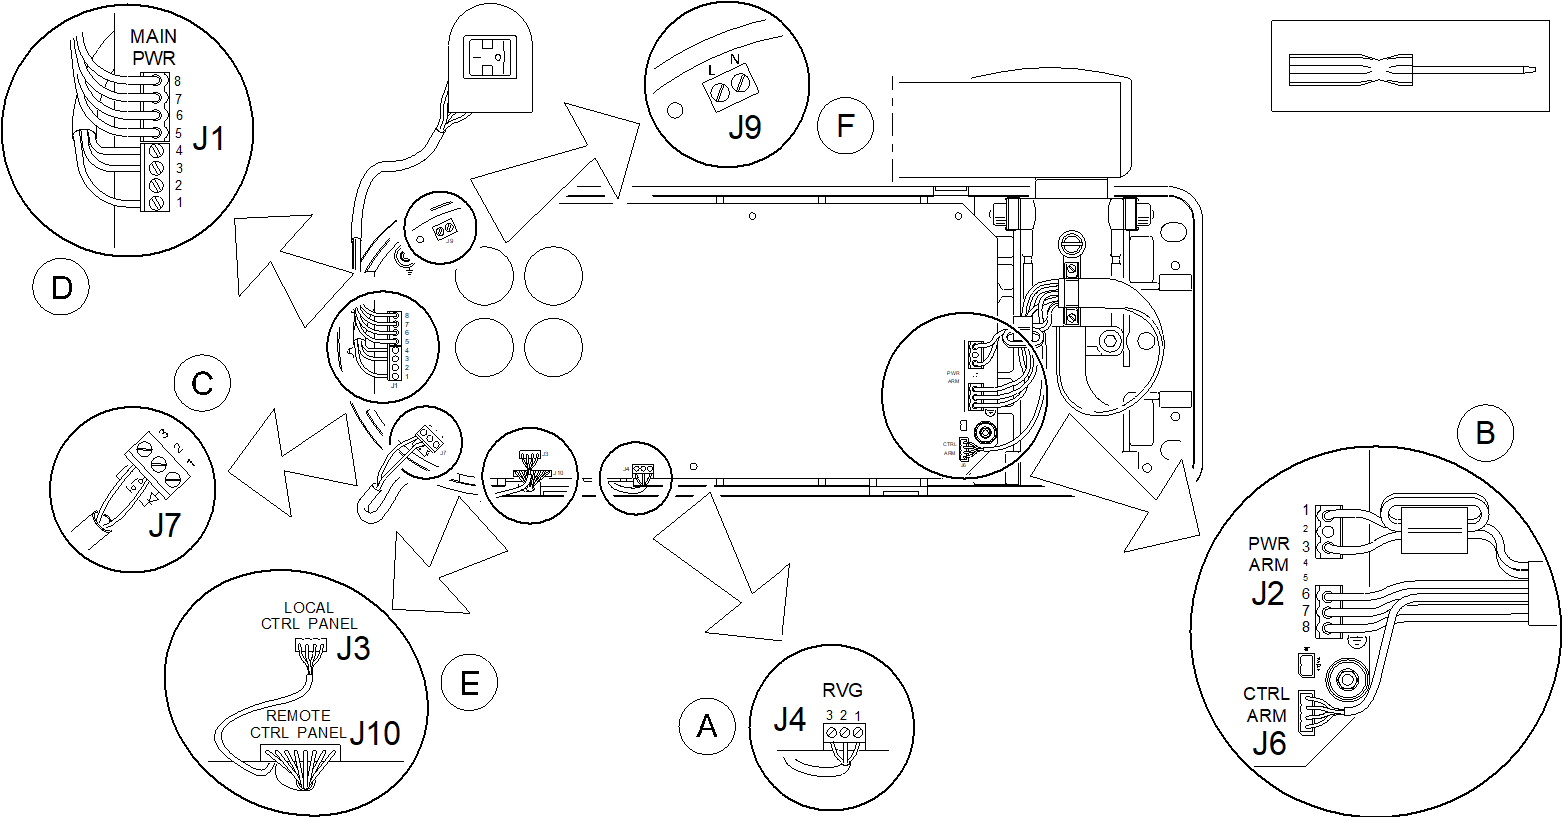
Connect the following wiring in the indicated order and use cable ties to attach the cables. The following figure illustrates the general wiring of the CS 2200 unit:
|
Component |
Connected to... |
|
| RVG synchronization link (optional) | J4 | |
| Generator | J2 and J6 | |
| Remote exposure switch | J7 | |
| Power supply + ON/OFF switch | J1 | |
| Control timer unit | J10 (Standard wall-mounted unit) J3 (Wall-mounted unit for Irix replacement) |
|
| “Ready state” lamp | J9 |
Installing the Main Powerboard