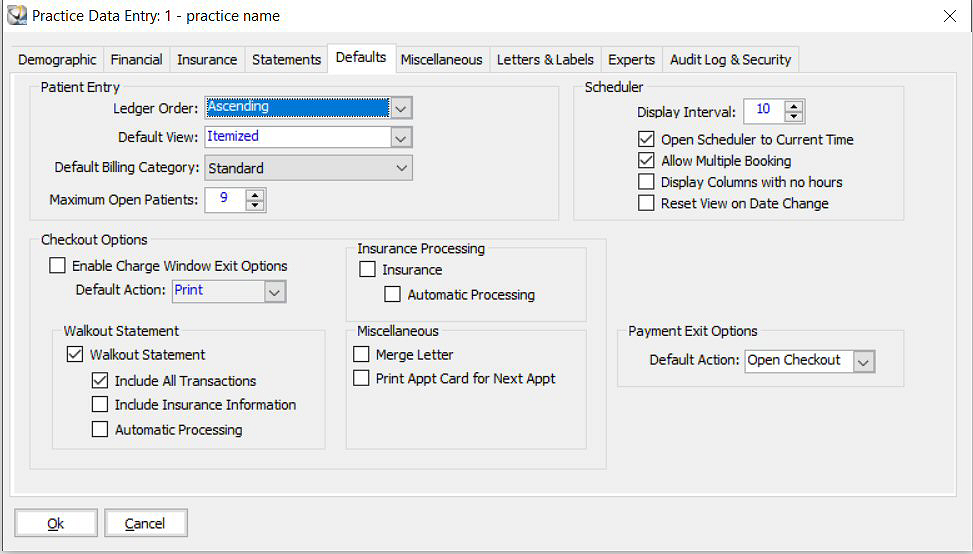
To set or change system defaults:
In the All Tables window, select Practice > Practice Preferences. The Practice Data Entry window is displayed.
Click the Defaults tab. The Defaults window is displayed.

In the Patient Entry section:
Ledger Order—Select Ascending or Descending.
Default View—Select Open Item, Itemized, or Claims.
Default Billing Category—Select the ledger.
In the Checkout Options section:
Enable Change Window Exit Options—Enables the exit option on the Visit tab in the Charge window.
Default Action—Select No Processing, Post Pay/Adj, or Print.
Print Walkout Statement—Prints walkout statements. Select from these options:
Include Insurance Information—Prints procedure codes and diagnosis codes on walkout statements.
Include All Transactions—Includes payments and adjustments in the itemized portion of the walkout statement.
Process Walkout Automatically—Prints the walkout statement automatically at checkout.
Print Insurance Form—Prints insurance forms. You can select the Process Insurance Automatically option.
Merge Letter—Selects the Letter option automatically at time of checkout.
In the Scheduler section:
Display Interval—Selects the length of time for appointment units.
Open Scheduler to Current Time—Opens the appointment book to the current time when you open the Scheduler.
Allow Multiple Booking—Allows booking multiple patients at the same time.
Display Columns with no hours—Displays Scheduler columns that have no open hours.
Reset View on Date Change—Displays your full office hours when you change the date, rather than the current time.
Click OK.
Setting Miscellaneous Preferences
Setting Letter and Label Preferences