Manually Assigning Static IP Address
To manually assign a static IP address to the RVG Connect unit, follow these steps:
- Briefly press the menu button on the side of the RVG Connect unit.
- Press the left touch sensitive button under
 until
until  is displayed on the screen.
 - Briefly press the menu button on the side of the RVG Connect unit.

- Press the left touch sensitive button below
 .
.
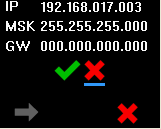
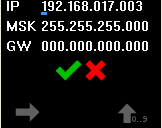
A cursor in the form of a small blue line is displayed under the first digit of the IP address.

You can either press the:
- right touch sensitive button below
 to increase the value of this digit.
 - left touch sensitive button below
 to move the cursor to the next digit.
- Once you have entered the desired information, press the left touch sensitive button below
 to move the cursor under
  .
.
You can position the cursor under and briefly press the menu button on the side of the RVG Connect unit to cancel the configuration.
- Press the right touch sensitive button below
 .
.
The RVG Connect unit automatically restarts.
- Briefly press the menu button on the side of the RVG Connect unit.
The manually entered IP address is displayed at the top of the screen.
Checking Dynamic Attribution of IP Address
Assigning Default Static IP Address with Automatic Device Detection