Setting Up Payment Manager
Before you can use Payment Manager in Sensei Cloud, you must be enrolled. Contact a Carestream Dental representative for more information.
Note: Existing ePayments Secure customers are converted to Payment Manager by GPI. When the conversion is complete, the new merchant accounts and card devices are set up, and the Activate button is clicked, the Payment Manager service is active.
To edit the general settings for your practice:
-
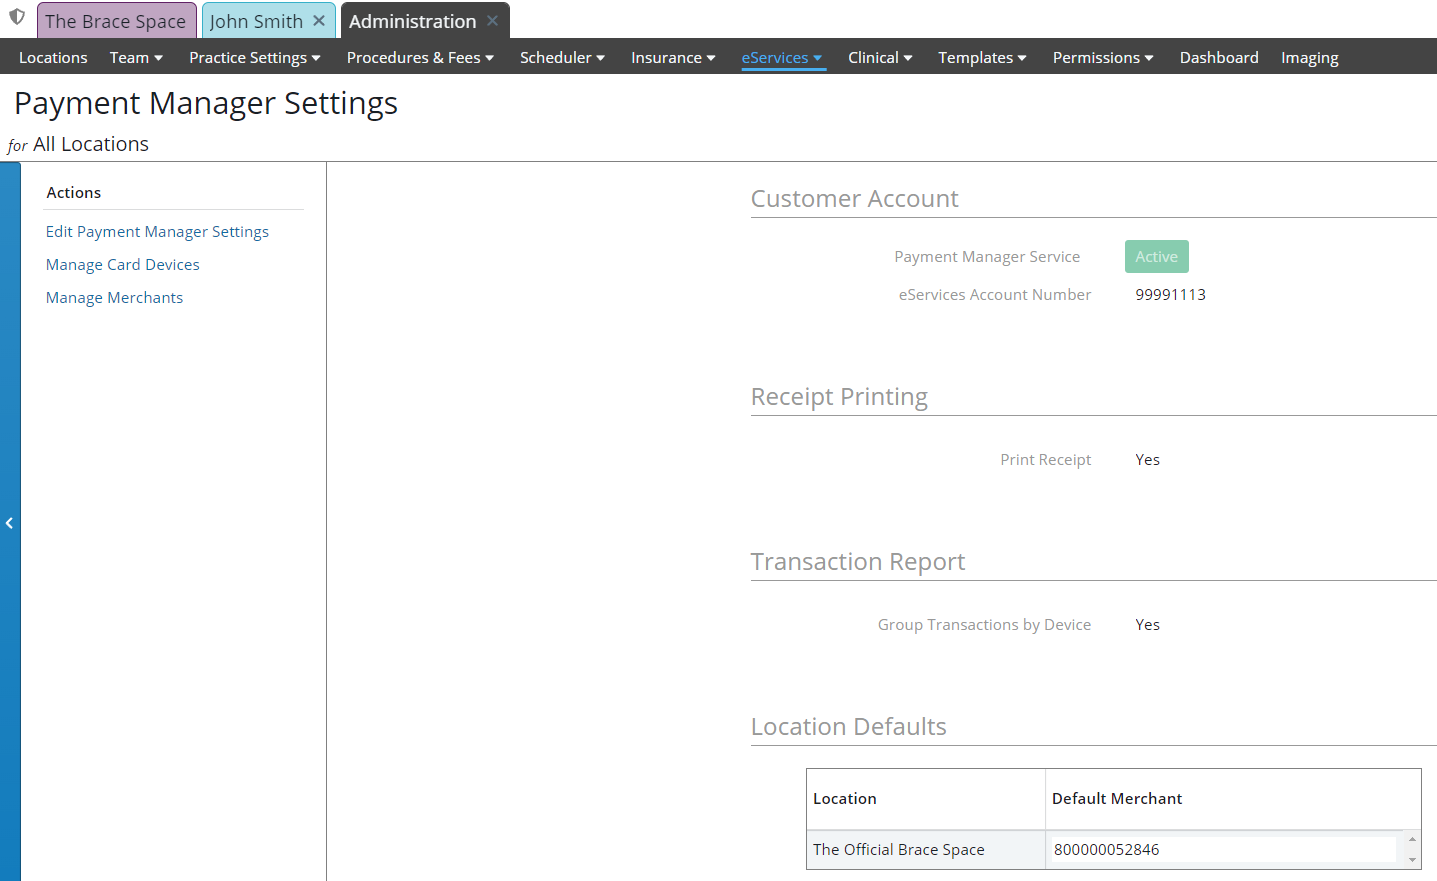
On the Administration tab, select eServices > Payment Manager. The Payment Manager Settings are displayed.
-
Under Actions, click Edit Payment Manager Settings. The entry fields become editable.
Note: The eServices Account Number is already entered.
-
In the Receipt Printing section, select the option if you want to automatically generate a .PDF receipt upon posting the electronic payment. Receipts can also be generated from the transaction posted in the patient's Ledger.
-
In the Transaction Report section, select Group Transactions by Device if you have multiple card readers and want to group transactions by the device used. If the option is not selected, the report lists transactions in chronological order.
Note: Reports can be generated from the Financial Daysheet.
-
Use the Location Defaults section to select a default Merchant for each location.
-
Click Save.