Setting Up Orthodontic Contracts
Setting Up Automatic Payments in an Ortho Contract
![]() Related Training
Related Training
Setting Up Automatic Payments Recorded Class
Orthodontic practices using the Sensei Cloud ePayments Secure service can set up automatic, recurring payments as part of an Ortho Contract. You can add automatic payments to new and existing contracts:
-
The stored payment method is automatically billed when the contract’s next scheduled charge posts to the patient ledger. This method can be updated as needed.
-
Automatic Payments are displayed in the patient ledger as Auto Pmt.
-
Failed payments generate an alert and can be addressed in the Failed Payments work list. To access the list, select Location > To Do > Failed Payment Transactions.
-
Use the Scheduled Automatic Payments report to review contract-based revenue for the current month or a specified range. To access the report, select Location > Financial > Auto Payments.
Note: This report only includes contracts for which recurring payments have been configured. The Contracts report provides an overview of all contracts.
To add automatic payments to a contract:
-
From the Patient tab, select Financials > Contracts. The Contracts window is displayed.
-
Select New Contract or select an existing contract and click Edit Selected Contract. The contract details become active for editing.
-
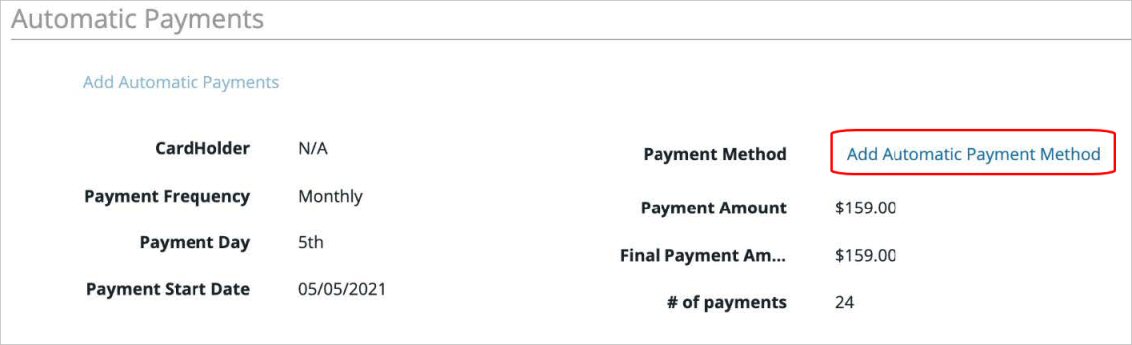
Scroll down to the Automatic Payments section and click Add Automatic Payments. The details are expanded showing the payment schedule information.
-
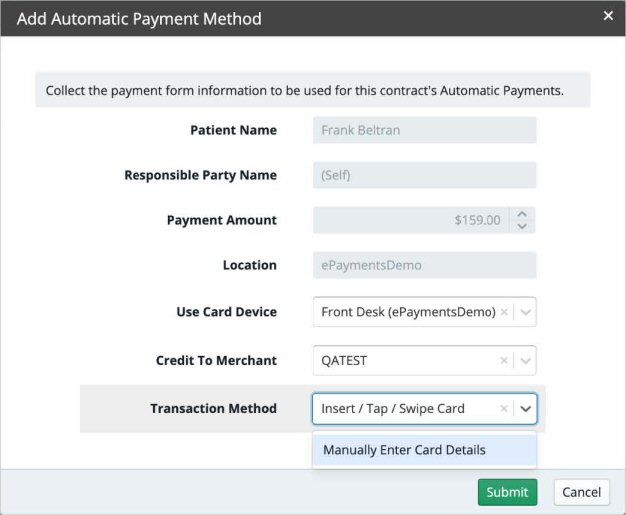
Click Add Automatic Payment Method. The Add Automatic Payment Method window is displayed.
-
In the Use Card Device field, select a device (swiper) to use for collecting the card's payment information.
-
In the Credit to Merchant field, select the merchant account to credit with the payments.
-
For the Transaction Method, select Insert/Tap/Swipe Card and then click Submit.
-
Follow the instructions on the card device.
-
If the card is not present or you are handling the setup remotely, select Manually Enter Card Details and follow the on-screen instructions.
-
Click Save Contract. The contract details are updated while securely masking the credit card information.
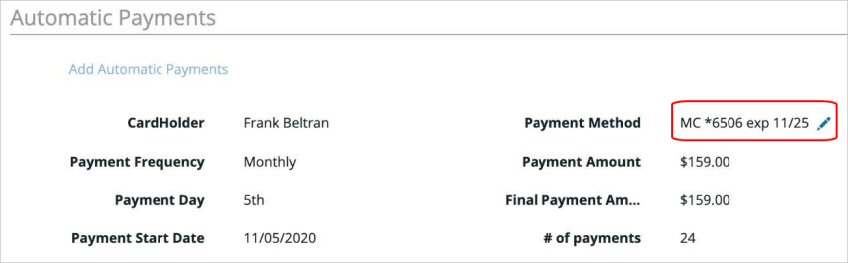
Note: To edit the payment method details, click the Pencil icon.
Setting Plan-Based Defaults for Ortho Coverage
Removing Automatic Payments from an Ortho Contract
Entering Advance Payments in an Ortho Contract