 button and then select Patient
Flow Options.
 To set up Patient Flow options,
click the Maintenance/Set-up  button and then select Patient
Flow Options.
To set up the display options:
Open the Patient Flow Options window. The Display Opts tab is displayed.
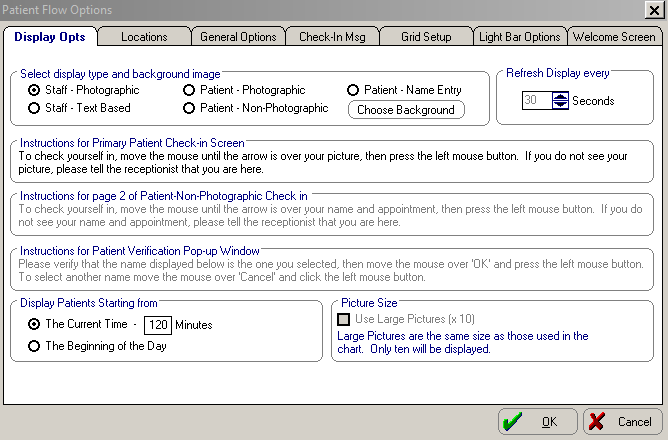
In the Select display type and background image section, select from the following options:
Click Choose Background and navigate to the folder containing the background you want to be displayed on the lobby computer. You can change the dimensions and color of the background.
In the Refresh Display every field, select the number of seconds to refresh the display. The default setting is 30.
It is recommended that you set this field to 10.
In the Instructions sections, leave the default instructions or type new instructions to be displayed in the Check-In windows of the lobby computer.
In the Display Patients Starting from section, set when you want patients to be displayed in the Patient - Non-Photographic Check In window if they have not checked in.
In the Picture Size section, select Use Large Pictures (x10) if you want large pictures to be displayed in Patient and Staff Check In windows.
Click OK.
To set up location options:
In the Patient Flow Options window, click the Locations tab.
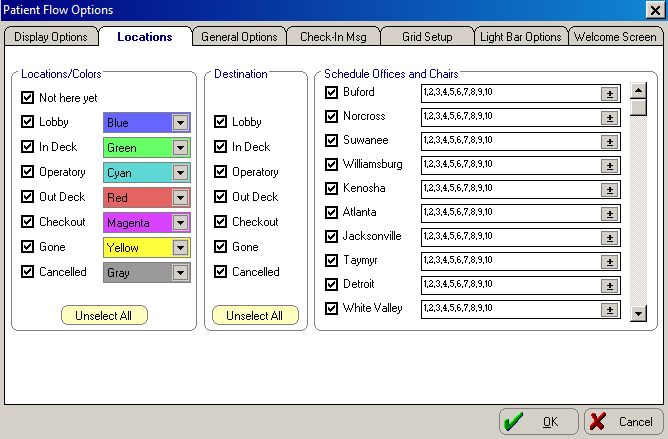
In the Locations/Colors section, select the specific locations that you want to include in the grid.
Use the drop-down arrows to select identifying colors for each location.
Select the destinations you want to include in the grid.
In the Schedule Offices and Chairs section, select the offices you want to see in Patient Flow. Click the drop-down arrows to select the number of chairs in each office.
Click OK.
To set general options:
In the Patient Flow Options window, click the General Opts tab.
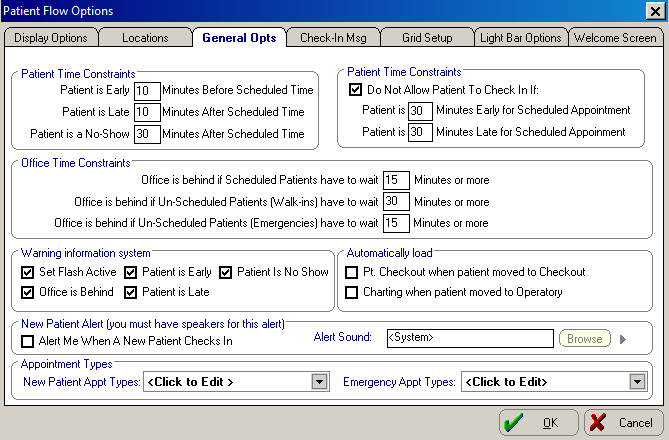
Set the patient time constraints.
Set the office time constraints.
In the Warning information system section, set the method and parameters of warnings.
Set the remaining options.
Click OK.
Use the Check-In Msg tab to set up the following types of messages:
Financial
Promise Due
Scheduled Procedure
To set up the grid:
In the Patient Flow Options window, click the Grid Setup tab.
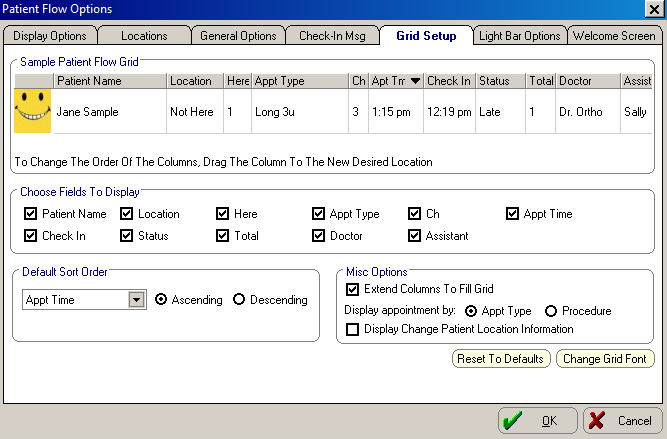
In the Sample Patient Flow Grid, you can click a column header and change the size and order of the column.
In the Choose Fields to Display section, select the fields you want to display in the Patient Flow window.
In the Default Sort Order, use the drop-down list to select how you want to sort the grid.
In the Misc Options section, select the options you want.
To restore the default settings, click Restore to Defaults.
To change the font, style, and size, click Change Grid Font.
Click OK.
The Light Bar Opts tab is not available if you do not use the Charting module.
To set Light Bar options:
In the Patient Flow Options window, click the Light Bar Opts tab.
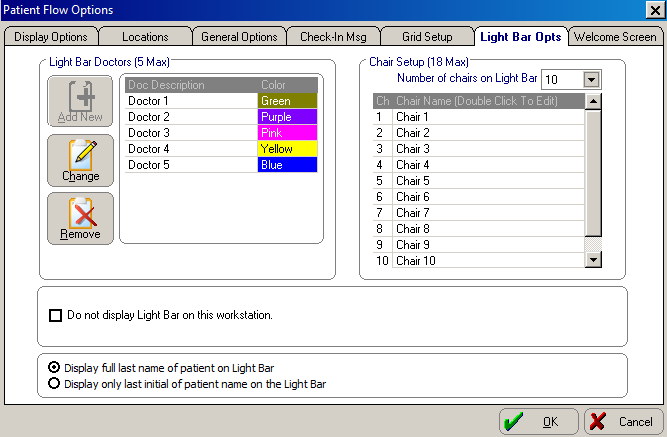
In the Light Bar Doctors section, add, change, and remove doctors. Double-click a doctor’s name to change it; double-click an assigned color to change it.
In the Chair Setup section, enter the amount of chairs to display on the Light Bar. Double-click a chair to change it.
If you do not want to display the Light Bar, select the Do not display Light Bar on this workstation option.
Select an option to display patient names on the Light Bar.
Click OK.
Use the Welcome Screen tab to type the greeting to patients to be displayed on the Welcome Screen.
Setting Up the Financial Estimator