Close all open programs.
On the desktop, double-click the
Service Tools icon  . The Service
Tools Selection window is displayed.
. The Service
Tools Selection window is displayed.
Using the CS 8100 and CS 8100 3D Units or CS 8200 and CS 8200 3D Units
Note: Most states require monthly quality assurance testing, except for New Jersey, which requires daily testing.
To perform QAT:
Close all open programs.
On the desktop, double-click the
Service Tools icon . The Service
Tools Selection window is displayed.

Select CS 8100 3D or CS 8200 3D and click OK. The Service Tools window for the applicable device is displayed.

In the Diagnostic section, click Quality Assurance Tool. The Imaging Quality Control Software window is displayed.
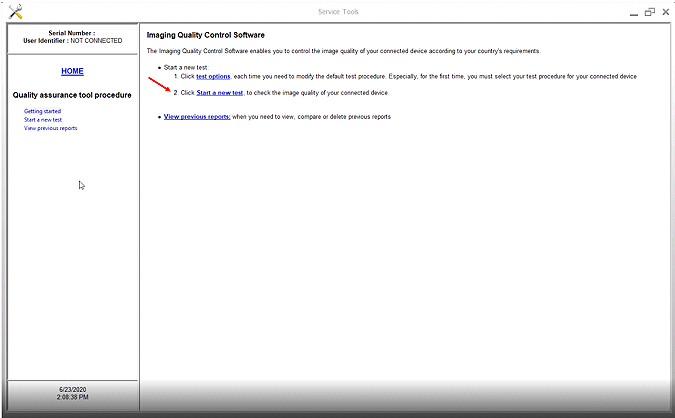
Click Start a new test.
Note: To retrieve and view reports, select View previous reports.
The Select your test procedure window is displayed.
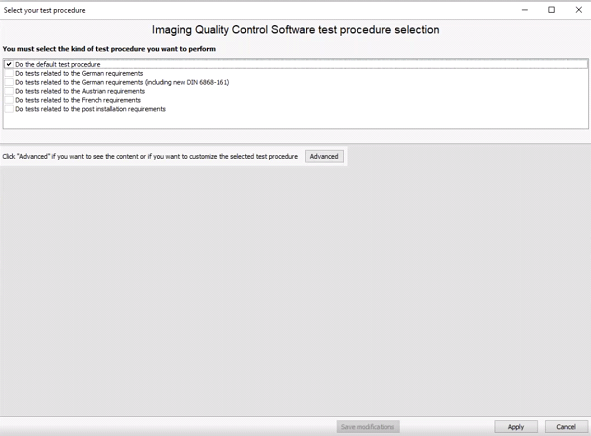
To perform the default test procedure, click Apply. The Start a new test window is displayed again.

Select an acquisition device and click Next. The Select one device section is displayed.

Select CS 8100 3D-3D or CS 8200 3D-3D and click Next. The Select a test window is displayed.
Note: If the CS 8100 3D-3D device is not in the list, click Search devices.
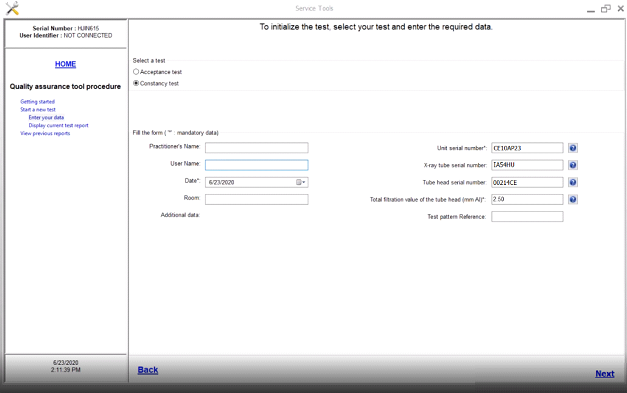
To initialize the test, select Constancy test and enter data in the fields:
Practitioner’s Name—Enter the name of the practice.
User Name—Enter your name.
Room—Enter the name of the room in which the unit is located.
The fields on the right side of the window are populated during installation. If a field is blank, click the ? to see where the information is located.
Note: If a previous test has been performed, the fields, except for User Name, are already populated. Enter your name in the field.
Click Next. The Performing the Quality Assurance Tool phantom acquisition window is displayed.
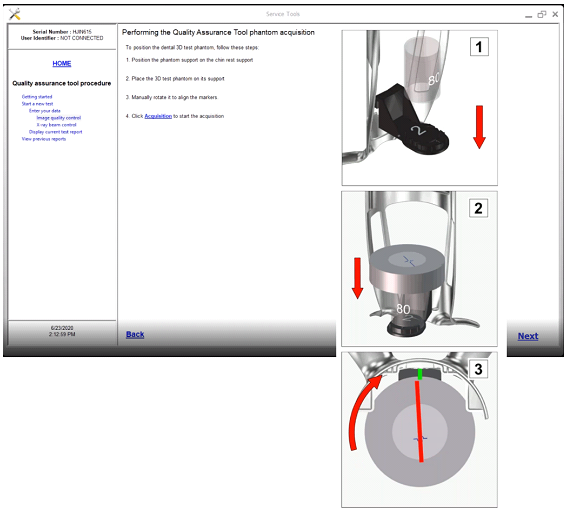
Follow steps 1 through 4 on the screen. Do NOT click Next.

When the Ready circle turns green, acquire the image.
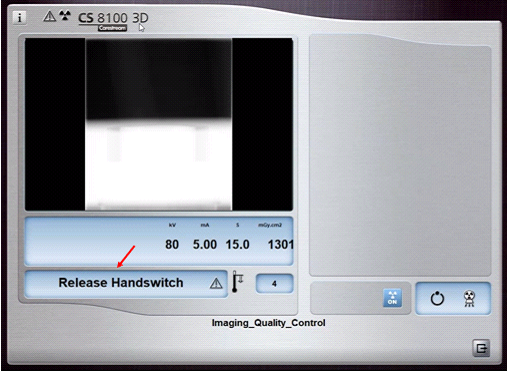
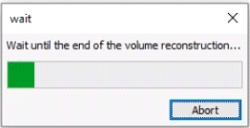
When the Release Handswitch message is displayed, release the handswitch. A Wait until the end of the volume reconstruction message is displayed.
The Identifying the slices of the volume to be used for the test procedure window is displayed.
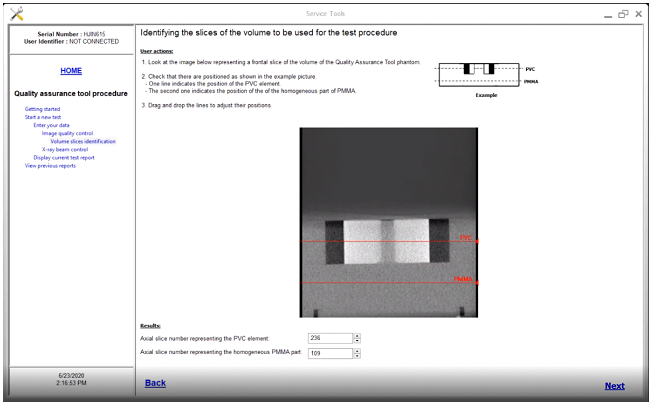
Follow the steps on the screen and click Next. The Computing the values of the signal noise ratio and homogeneity window is displayed.
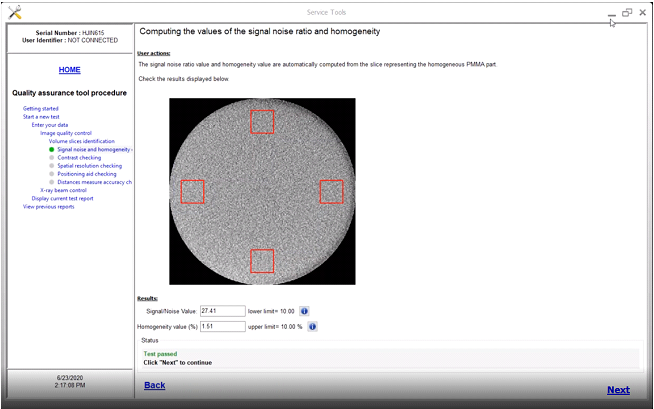
When Test passed is displayed at the bottom of the window, click Next. The Checking the contrast value window is displayed.
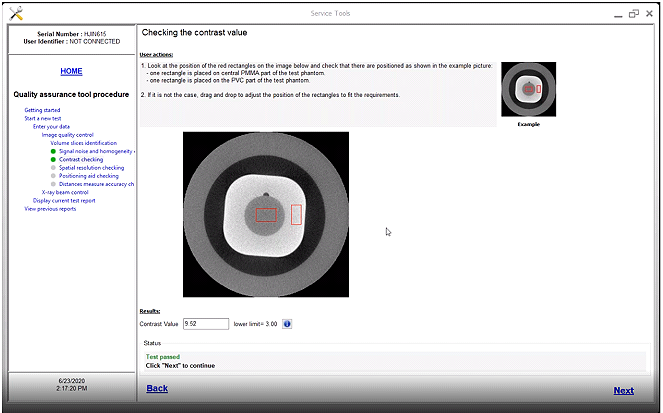
Adjust the red rectangles, if necessary.
When Test passed is displayed, click Next. The Checking the spatial resolution values window is displayed.
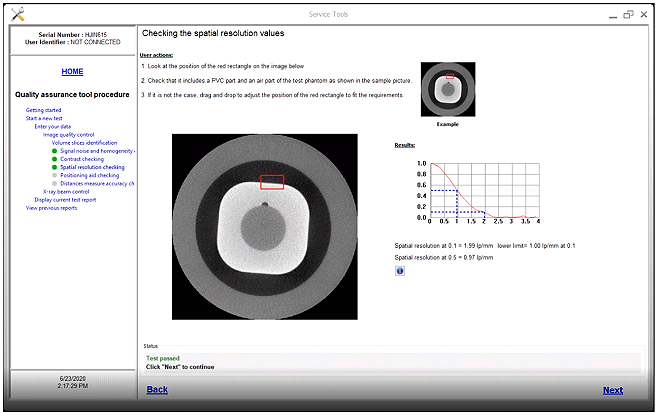
Adjust the red rectangle, if necessary.
When Test passed is displayed, click Next. The Checking the central positioning aid tool window is displayed.
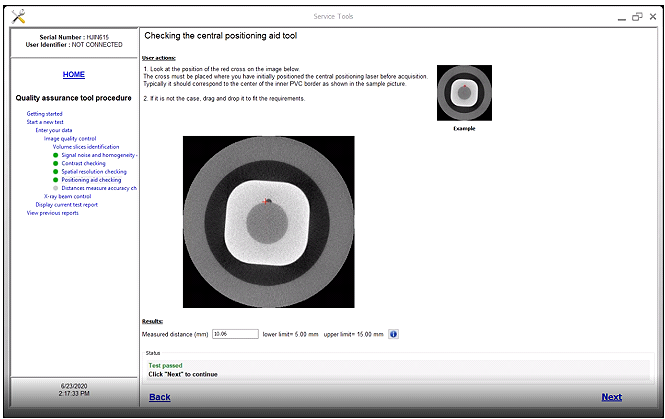
Adjust the red cross to match the example, if necessary.
When Test passed is displayed, click Next. The Checking the distances measure accuracy, typically the voxel size accuracy window is displayed.
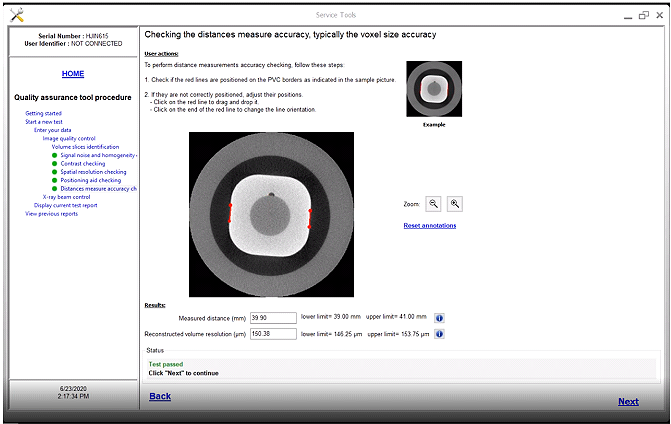
Adjust the red lines to match the example, if necessary.
When Test passed is displayed, click Next. The Performing the X-ray beam control acquisition window is displayed.
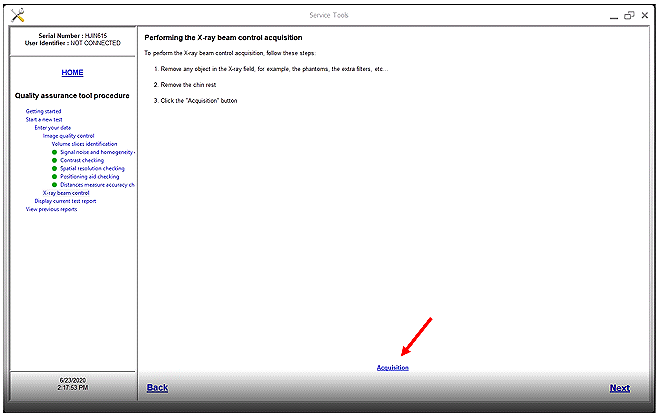
Follow steps 1 through 3 on the screen. Do NOT click Next. The Imaging Quality Control window is displayed.
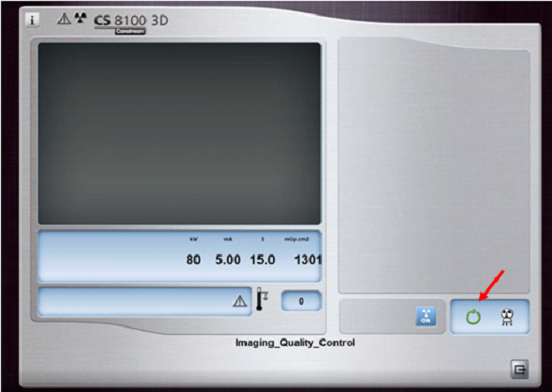
When the Ready circle turns green, acquire the image.
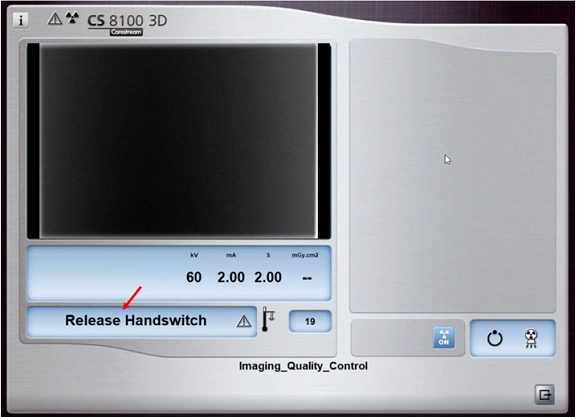
When the Release Handswitch message is displayed, release the handswitch. The Checking the X-ray beam window is displayed.
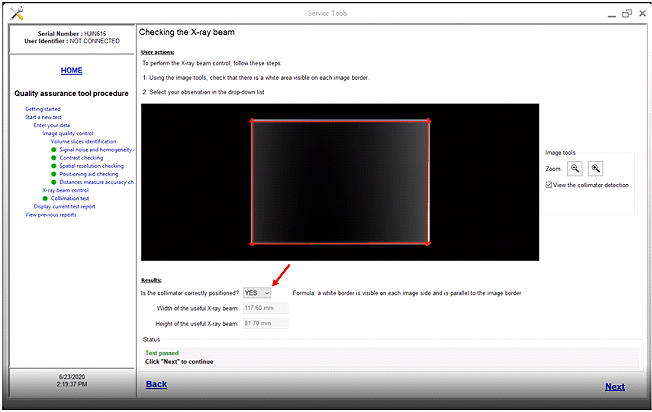
Check that a white area is visible on each border, and in the Is the collimator correctly positioned? drop-down field, select YES. The Test Report window is displayed.
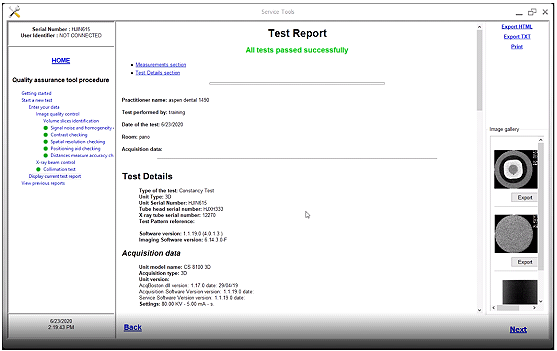
Note: All reports are saved in Service Tools. You can print the report now or at a later date.
If All tests passed successfully is displayed, click Next twice and close Service Tools.