Before using the Scheduler:
Set up offices, if you have multiple offices.
Add schedules for providers.
Add appointment categories.
Add appointment types.
You can set up each provider’s schedule to match his or her work schedule.
To add a provider schedule:
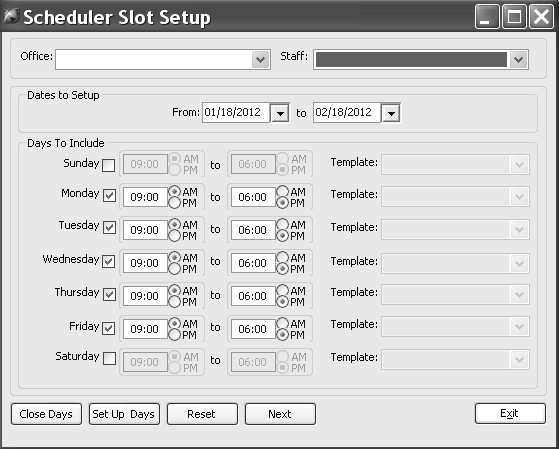
Select Scheduler > Setup Scheduler > Slot Setup. The Scheduler Slot Setup window is displayed.
In the Staff field, select the provider.
In the Office field, select the office location.
In the Dates to Setup field, enter the range of dates for which you are setting up the schedule.
In the Days to Include field, select the days of the week, along with the time for which the schedule is open each day.
Click Set Up Days.
To set up additional providers, click Next. Otherwise, click Exit.
To add an appointment category:
Select Tables > Appointments > Categories. The Appointment Category Search window is displayed.

Click New. The Appointment Category Data Entry window is displayed.

In the Code and Description fields, type an appointment category code and description.
Click Cell Color to select the color of the cell to display on the Appointment Scheduler. Select a color and click Ok.
Click Ok.
To add an appointment type:
Select Tables > Appointment > Type. The Appointment Type Search window is displayed.

Click New. The Appointment Type Data Entry window is displayed.

In the Code field, type a unique code and a description.
To indicate an appointment type as a lockout, select Lockout.
From the Category drop-down list, select an appointment category.
In the Defaults section, use the arrows in the Length (mins) field to select an appointment length.
To enable scheduling of more than one appointment at a time, select Allow Multiple Booking. If this is not selected, the word Reserved is displayed in the other provider columns.
To use the first column of a provider when scheduling, select Default to Primary Col.
Click Ok.
Note: The appointment color, displayed on the side of an appointment, is based on the appointment type.