Posting Charges and
Payments
Posting Payments
The Payment/Adjustment Entry
window, also known as the Payment Wizard, walks you through the steps
for entering and distributing payments and adjustments, which include
the following:
Entering basic payment information
Applying the payment to the
appropriate charges
Entering adjustments or changing
fees
Determining the next action
to take for each charge
To post a patient payment:
On the WinOMS toolbar, click  . The Patient Search
window is displayed.
. The Patient Search
window is displayed.
Enter search criteria and click
Find. The records matching
your search criteria are displayed.
Double-click a patient record. The
Patient window is displayed.
Click  . The
first window of the Payment Wizard is displayed.
. The
first window of the Payment Wizard is displayed.

In the Pay/Adj
Code field, click  or type
the code and press Tab.
or type
the code and press Tab.
In the Amount
field, type a payment amount.
In the Transaction
Date field, type the date of the transaction.
In the Method
field, select one of the following methods:
Cash
Credit Card If Credit
Card
is selected, select a card type from the drop-down list in the Credit Card field. If you are using the electronic credit card
processing service, Using
ECCPS
is displayed in the Credit
Card
field, and no selection is necessary.
Check If Check is selected, type a bank identification
number in the Bank ID field and a check number in
the Check
Number field.
Electronic Deposit
Money Order If Money
Order
is selected, type an identification number in the Bank ID
field and the money order number in the Check
Number
field.
In the Comment
field, type comments concerning the payment.
Note: Text typed in the Comment field is displayed in the
transaction line in the Ledger Distribution
Information window.
Click Next.
The next window of the Payment Wizard is displayed.
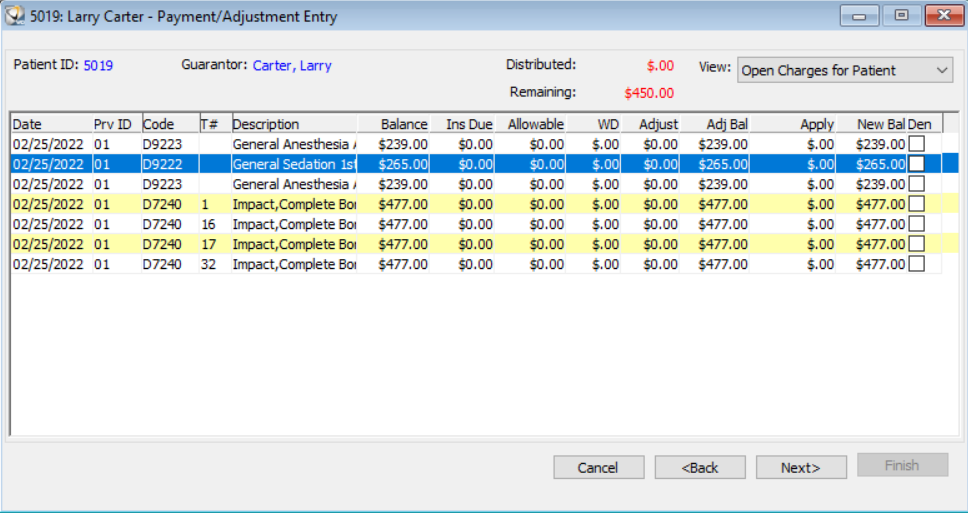
In the Apply
column, type the appropriate amount to distribute the payment to specific
charges.
To enter an adjustment while entering
a payment, right-click on a charge and select Adjustment
from the list. The Adjustment
window is displayed.
In the Code
field, type the adjustment code and press Tab, or click and click Display
All to select an adjustment code.
In the Amount
field, type an adjustment amount.
Click Ok.
The adjustment amount is displayed in the Adjust
column.
Note: The adjustment affects
only the selected charge and cannot exceed the amount of the charge.
Click Next.
The final window of the Payment Wizard is displayed.
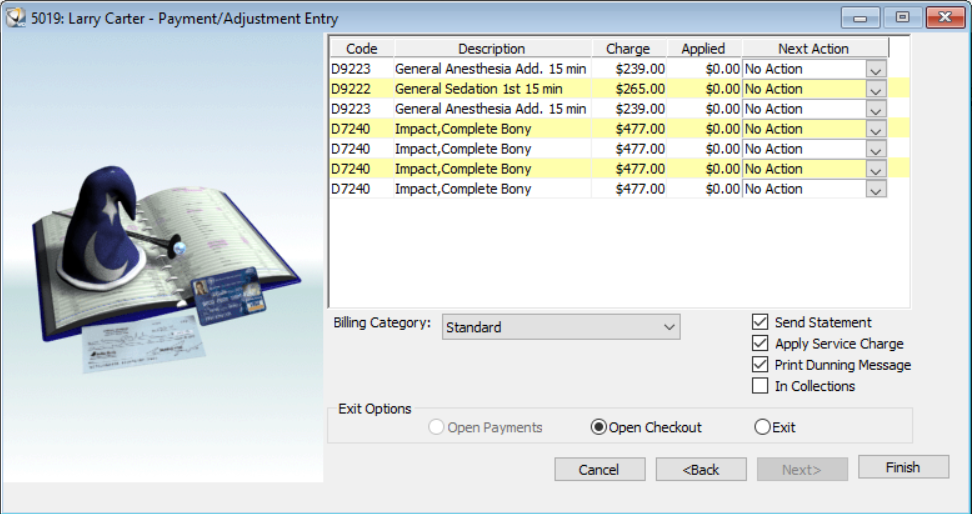
From the Next
Action list, select the next action:
If the charge balance is the
patient's responsibility, select No
action.
If the charge balance is zero,
select No action.
If the payment is from the
patient, select No action.
If the payment is from insurance
and additional coverage exists, select Bill
Next Policy.
If the payment is from insurance
and no additional coverage exists, select Transfer
Balance to Patient.
From the Billing
Category drop-down list, select the appropriate billing category.
Select the appropriate option to
change the billing indicator, if applicable.
Click Finish.
The payment information is saved, and the Exit
Options window is displayed.
Select one of the following options:
Open
Payments—Closes the Payment Wizard and returns to the Open Payments window.
Check
Out Window—Closes the Payment Wizard to check out the patient.
Exit—Closes
the Payment Wizard.
Related Topics
Entering Patient
and Insurance Payments
Entering Adjustments
Entering Insurance Denials
Posting Charges
Skill Sharpeners