Generating Paper Statements

Whether generating paper or electronic statements, the process consists of two phases:

To preview paper statements:

  1. Select Reports > Accounting > Statements > Paper > Statement Preview. The Paper Statements window is displayed.
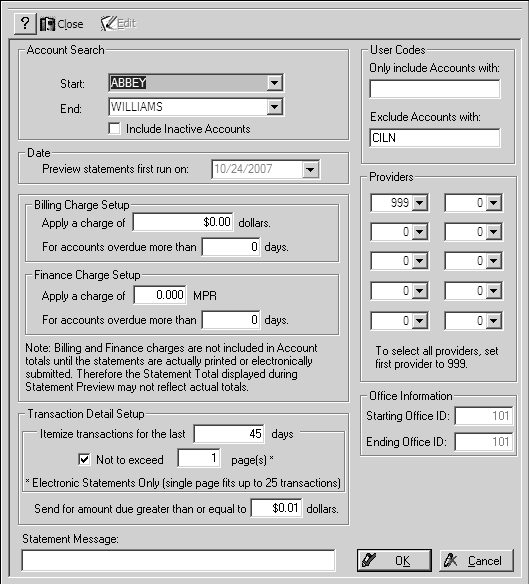
  1. To identify the statements to be run:

  2. In the Account Search sectionIn the Account Search section...select the starting and ending names to include in the report from the drop-down lists in the Start and End fields.

  3. In the User Code sectionIn the User Code section...type codes to include in the Only include Accounts with field. Type codes to exclude in the Exclude accounts with field.

  4. In the Transaction Detail Setup sectionIn the Transaction Detail Setup section...type the number of days for which you want transactions itemized on the statement.

  5. In the Send for amount due greater than or equal to _ dollars fieldIn the Send for amount due greater than or equal to _ dollars field...type the minimum amount for which a statement will be generated.

  6. In the Statement Message fieldIn the Statement Message field...type a message you want to display on all statements.

  1. When you have made your choices, click OK. The Paper Statements List window is displayed.
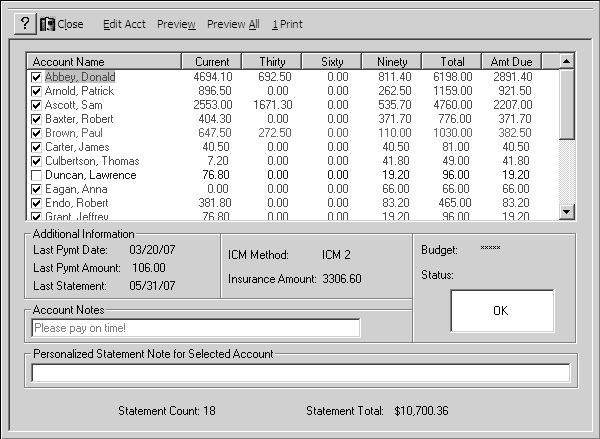
Tip: Blue text indicates accounts with invalid addresses; pink text indicates accounts with no balances. No statements are printed for these accounts.

  1. Select from these options:

  2. To sort the list by account name, account balance, or amount due,To sort the list by account name, account balance, or amount due,...click the Column

  3. To exclude a statementTo exclude a statement...deselect it in the Account Name column.

  4. To display additional informationTo display additional information...select the account. The information is displayed in the Additional Information section.

  5. To include a statement noteTo include a statement note...select the account and type the note in the Personalized Statement Note for Selected Account field.

  1. To view or edit account information, select the account and click Edit Acct. The Account window is displayed. Edit the record and click OK.

  2. Select from these options:

  3. To preview statements for specific accountsTo preview statements for specific accounts...select the accounts and click Preview.

  4. To preview statements for all accountsTo preview statements for all accounts...click Preview All.

  5. To print statementsTo print statements...click Print.


Related Topics

Setting Preferences

Generating Electronic Statements

Transmitting Electronic Statements

Skill Sharpener