Screening Patients
![]() Related Training
Related Training
Screening Patients for COVID-19 Recorded Class
Sensei Cloud provides a way to screen patients for illness, symptoms, and risk factors prior to booking and checking in. Pre-appointment screening has become common to help protect staff and patients from COVID-19 and other transmissible infections. The Patient Screening form is based on the ADA Return to Work Interim Guidance Toolkit.
To enable the Patient Screening form:
-
Click your user name and select Administration.

-
On the Administration tab, select Scheduler > Schedule Settings. The Schedule Settings window is displayed.

-
Under Actions, click Edit Schedule Settings. The fields for changing the Schedule settings are displayed.

-
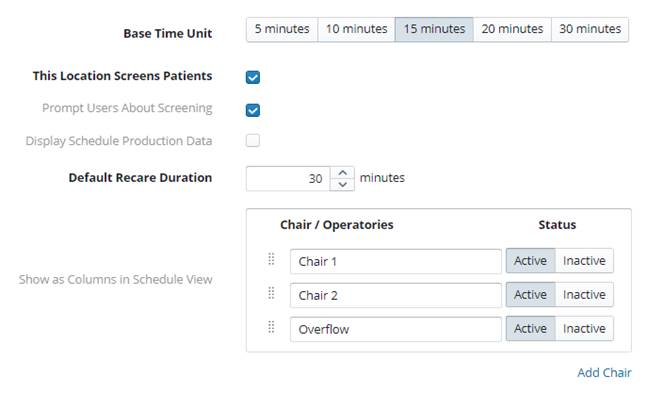
Select the This Location Screens Patients option. Patient screening controls are added to appointment interfaces and can be accessed at any time.
-
Select the Prompt Users About Screening option to prompt users to screen the patient. Prompts are also displayed when screening results indicate risk factors.
-
Click Save.
-
When scheduling or checking a patient in and you see the following message, click Screen Now.

Using the Patient Screening Form
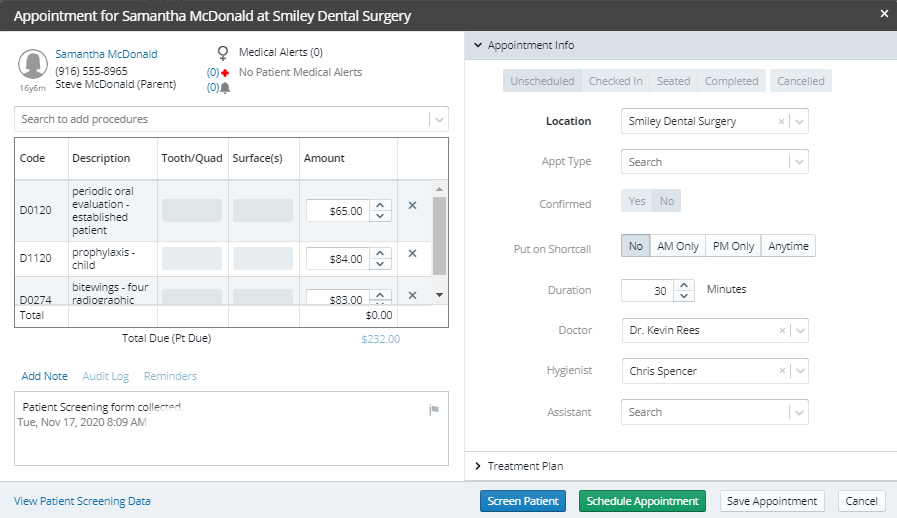
When Patient Screening is enabled, the Screen Patient and View Patient Screening Data options are added to appointment controls.
A note is created and stored with the patient's appointment and clinical records each time the form is used. When you select View Patient Screening Data, the most recent screening is displayed. You can use the drop-down list to access previous forms.
To screen a patient:
-
Select Screen Now from the prompt or open a patient’s Appointment Card.

-
Click Screen Patient. The Patient Screening Form is displayed.

-
Collect the patient's data and click Save Changes.
-
If the patient answers Yes to any question, the following alert is displayed:

-
Click Yes or No.
Note: If risks are present, the patient is flagged with a medical alert for a period of three weeks; the Screening Alert message is displayed whenever an attempt is made to schedule the patient during that time period.