Checking Patients Out
![]() Related Training
Related Training
Checking Patients In and Out Recorded Class
When a patient finishes treatment, change the status to Complete. The appointment color changes to light gray, and the patient is moved to the Checkout Queue.
To check a patient out:
-
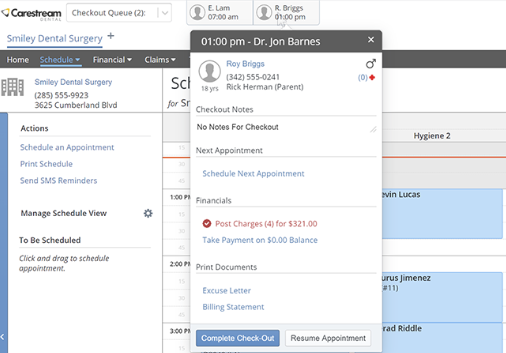
Select Checkout Queue from the Queue drop-down list. The patient’s name is displayed to the right of the queue.

-
Click the Patient's name to see the Check-out options and to review any checkout notes.
-
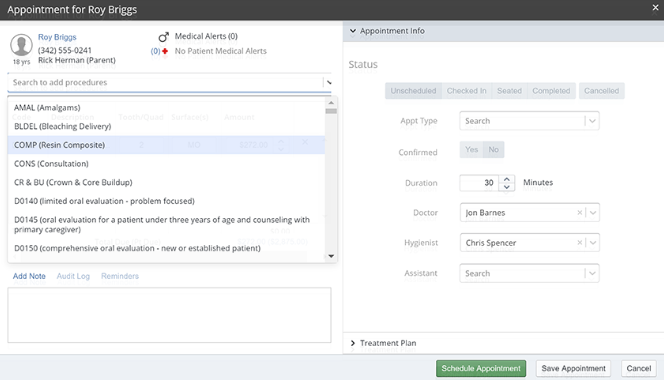
To schedule the patient’s next appointment, click Schedule Next Appointment. The Appointment for window is displayed.

-
Enter the appointment information.
-
Click Schedule Appointment. The Schedule is displayed.
-
Find the date for the appointment and click-and-drag the patient’s name from the To Be Scheduled section to the time slot.
-
Select the patient tile in the Checkout Queue again. To complete today's charges, click Post Charges. The Post New Charges window is displayed.

-
Add, edit, or delete charges, if necessary.
-
Click Post Charges.
-
To post a payment, from the Checkout Queue, click Take Payment.
-
Enter the payment information.
-
Click Post Payment.
-
To print a receipt or an excuse letter, under Print Documents, click Excuse Letter or Daily Receipt.
-
Click Complete Check-out. The appointment turns dark gray.