Working with the Charting Module
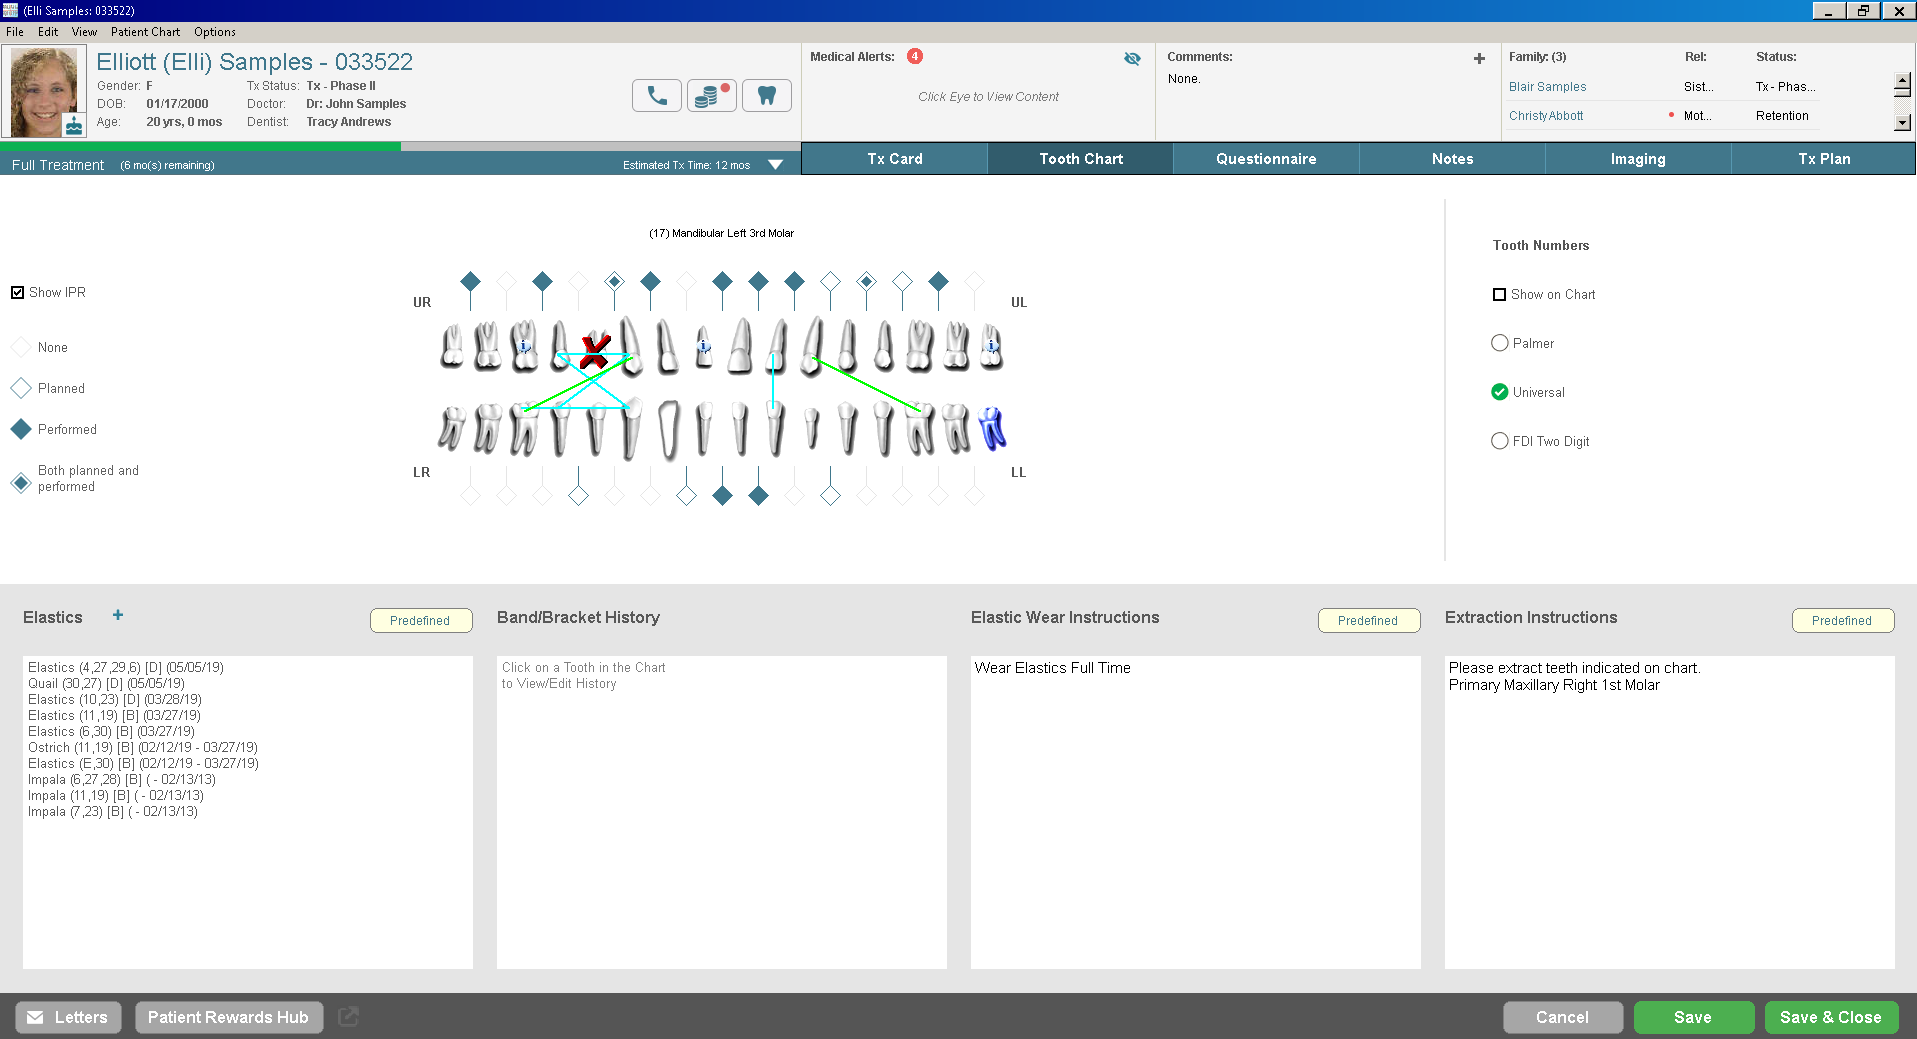
Use the ToothChart tab to enter a list of elastics currently used for a patient, as well as a graphic representation of the elastic placement. You can designate teeth as primary, permanent, or extracted; enter band and bracket history; and track arch wires, appliances, and so on.
To display the tooth chart, click the ToothChart
tab.

You can select the Palmer, Universal, or FDI Two-Digit numbering system when using the tooth chart. This setting is per workstation and must be set on each computer.
In the Tooth Numbers section, select the appropriate option. When you hover over a tooth with the cursor, the tooth is shaded, and the tooth number is displayed at the center of the tooth chart. If you select Show On Chart, the description of the tooth is displayed with the tooth number.
When you open the tooth chart for the first time, all teeth are displayed as permanent. You can right-click on a tooth to view a list of tooth display options. Using the options on the menu, you can change a permanent tooth to a primary tooth or indicate that a tooth was extracted or missing. You can also indicate whether a tooth has a crown or is an implant.
To change a tooth:
Move the cursor over the tooth you want to change and right-click on it. A menu is displayed.
Select the appropriate option.
You can enter information about elastic type, location, and the times elastics should be worn.
To add elastics for a patient:
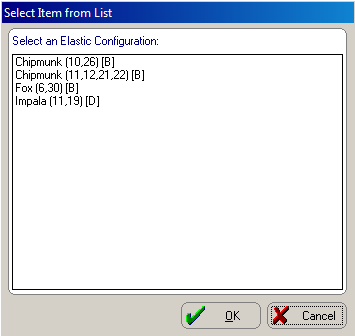
In the Elastics section, click Predefined. The Select Item from List window is displayed.

Select an elastic option from the list and click OK. The patient chart is displayed. The software displays a message if you attempt to apply a predefined configuration to a patient that is missing a required tooth.
In the Elastics section, use the drop-down list in the Type field to select the elastic type.
Select an option button for the times the elastics are to be worn.
Select the starting tooth and click the left mouse button.
Move the cursor to the tooth to which the elastic connects and click the left mouse button.
Click OK.
Click Apply on the ToothChart tab.
You can enter information about the types and sizes of brackets and bands you installed in the Band/Bracket History section.
To add brackets or bands to the tooth chart:
Select the tooth to which you want to attach a band or bracket.
In the Band/Bracket History section, click +. The Band/Bracket History window is displayed.
Select the band/bracket size and click OK.
Click Apply.
You can include information about elastic wear and extractions in the sections at the bottom of the tooth chart.
Elastic wear instructions that you type in the Elastic Wear Instructions section are printed on the tooth chart. These instructions are also displayed in letters when you use the <<ElasticWearInstructions>> merge field.
Instructions that you type in the Extraction Instructions section are printed on the tooth chart. These instructions are also displayed in letters when you use the <<ExtractionInstructions>> merge field.
To enter elastic wear or extraction instructions:
Click in the Elastic Wear Instructions or Extraction Instructions section and type the instructions, or click the Predefined button to select from a list of predefined comments.
To mark a tooth for extraction, right-click on the tooth and select Extract. The Extraction Instructions are displayed automatically when a tooth is marked for extraction
Click OK.