Open a visit that contains more than one image. Display it as a Records or Records + gallery.
In the Image
Chart window, click the Gallery
Edit View  button. The Gallery Edit View window is displayed.
Using the Software > Using Gallery Edit View
To display and hide gridlines:
Open a visit that contains more than one image. Display it as a Records or Records + gallery.
In the Image
Chart window, click the Gallery
Edit View button. The Gallery Edit View window is displayed.
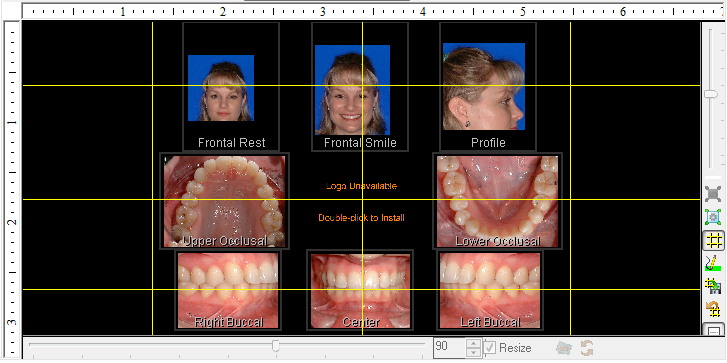
Gridlines are displayed in the Gallery Edit View window if you
selected Show Gridlines in
your preferences. To the right of the Gallery
Edit View window is a toolbar. Click the Hide/Show
Lines  button to hide the gridlines.
Click the Hide/Show Lines button again to display the gridlines.
Click the Gallery Edit View button to return to the Image Chart window.
By default, each column of images has one gridline and each row of images has one gridline.
To add gridlines:
In the Image
Chart window, click the Gallery
Edit View
button. The Gallery Edit View
window is displayed with gridlines.
To add a horizontal gridline, click on the left ruler where you want the gridline to be.
To add a vertical gridline, click on the top ruler where you want the line to be.
To remove the extra gridlines, click
the Restore Defaults  button
on the Gallery Edit View toolbar.
button
on the Gallery Edit View toolbar.
To move a gridline:
With the gridlines showing in the Gallery Edit View window, point at a gridline. The cursor changes to a double-headed arrow.
Click-and-drag the line to a new position.
To change the gridline to its original
position, click the Restore Defaults
button on the Gallery Edit
View toolbar.