Software Overview > Acquisition Interface
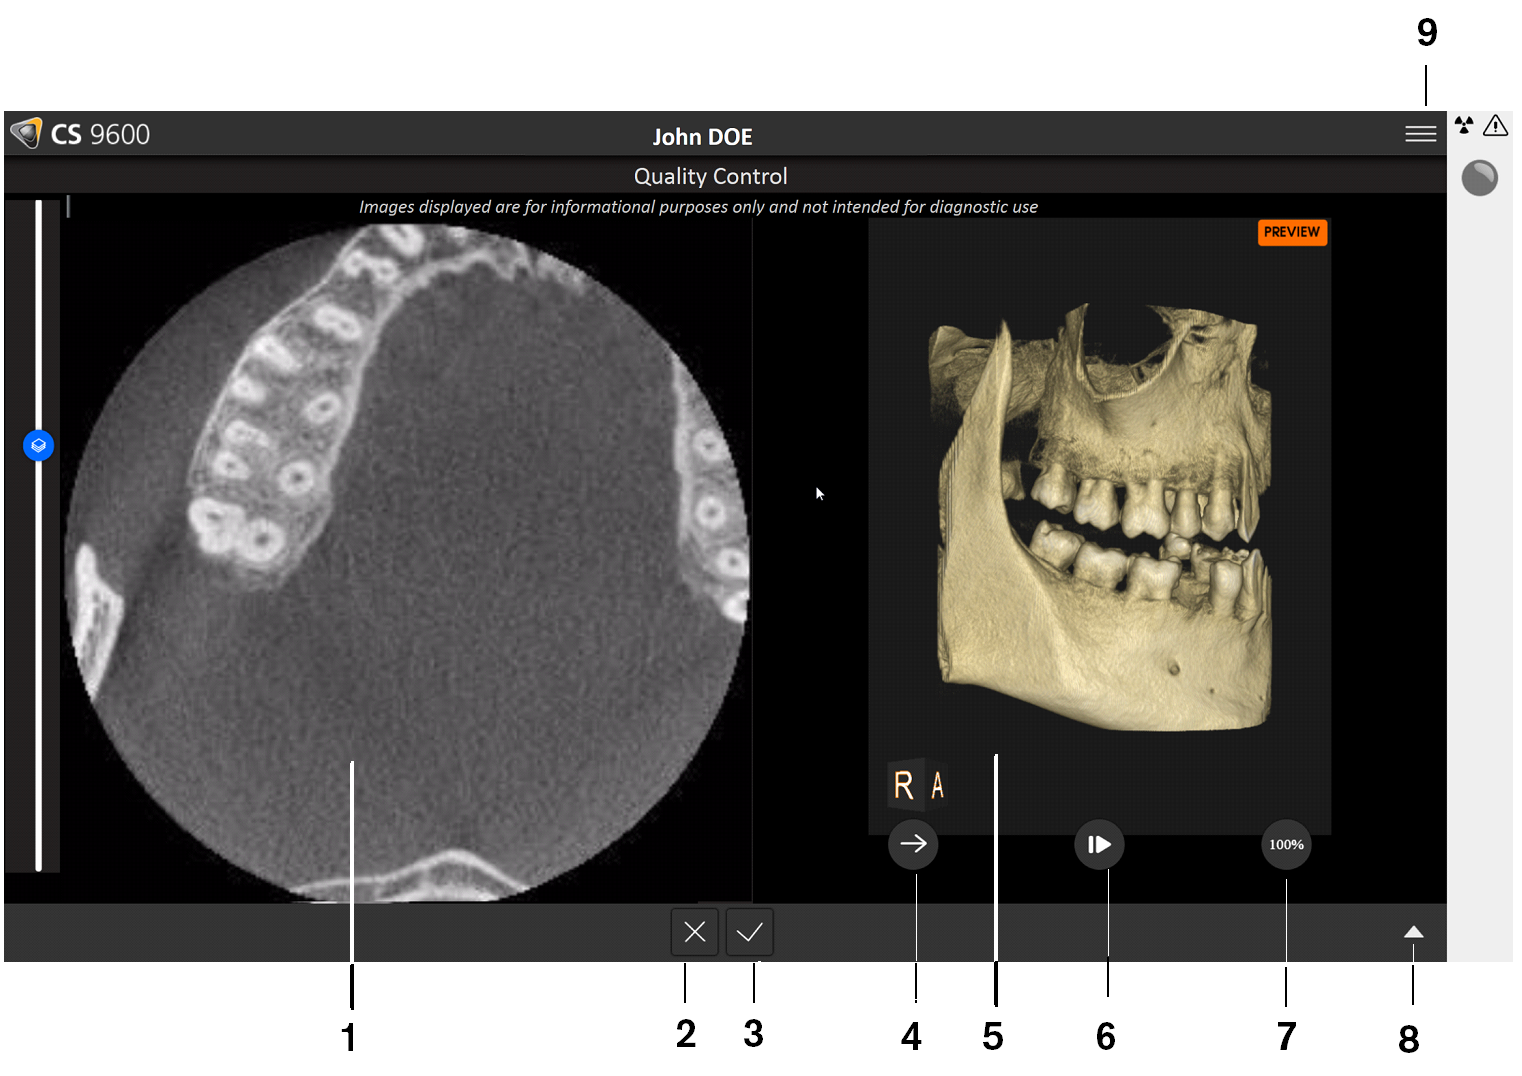
3D Quality Control Interface Overview for the DICOM Environment
The DICOM 3D Quality Control interface allows you to check the quality of an acquired image (for example, position of the patient, image centering) to enable you to accept or reject the image.
 |
IMPORTANT: The displayed image is for information purposes only. DO NOT use it for diagnostic purposes. |
Figure 13 - DICOM 3D Quality Control Interface
|
1 |
3D MultiPlanar Reconstruction (MPR) window - Enables you to pre-visualize an acquired image. |
|
2 |
If you are not satisfied with an acquired image, click
Select one of the displayed reasons, or enter other reasons in the text field.
|
|
3 |
If you are satisfied with an acquired image, click |
|
4 |
3D Volume Rendering Treatment (VRT) management button - Enables you to project and rotate an acquired image. |
|
5 |
3D VRT management window - Provides the space and tools for VRT management. |
|
6 |
Play/Pause button - Plays or pauses the motions in the 3D VRT management window. |
|
7 |
Transparency tool - Enables you to change the transparency of an acquired image. |
|
8 |
Expandable panel button - Opens and closes the panel to access several tools: Brightness, Contrast, Zoom, Reset, and Information. |
| 9 | Menu - Provides access to the Quality Check History sub-menu which gives access to the history of rejected images. |
 . The following window displays:
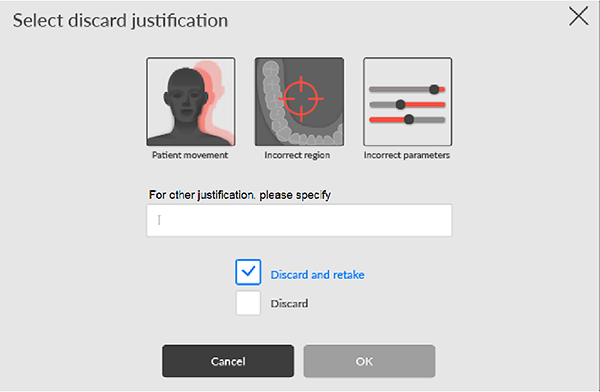
 . The image transfers automatically to the
Panoramic Acquisition Interface Overview
2D Quality Control Interface Overview for the Dental Environment
3D Acquisition Interface Overview
3D Quality Control Interface Overview for the Dental Environment
DICOM Worklist Interface Overview
2D Quality Control Interface Overview for the DICOM Environment