
The EMR window displays a patient’s
clinical information. Use the EMR features to access and enter medical
and surgical histories, procedures, allergies, prescriptions, and progress
notes; and to manage treatment plans, clinical images, and documents.
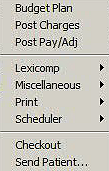
Move the cursor into the demographics area and right-click, and the following
menu is displayed.
The Chart Status displays a list of elements to complete and track for the patient's current appointment:
EMR Consents
EMR Notes
Anesthesia
Encounter Slip
Referral Letters
 —Indicates
the element needs action.
—Indicates
the element needs action.
 —Indicates
the element is complete.
—Indicates
the element is complete.
Tip: Click  to configure
the Chart Status settings for
appointment types.
to configure
the Chart Status settings for
appointment types.
Use the side panel to access specific EMR functions. Click a link on the left to display the associated information and options in the window.
Information is displayed in line-item format. Use the buttons on the right to:
 Add a new line item.
 Edit a line item.
 Delete
a line item.
Delete
a line item.
 Save
a new or edited item.
Save
a new or edited item.
 Expand the list.
 Collapse
the list.
Collapse
the list.
Use these buttons and functions on the EMR tab:
EMR Summary—Click to view and edit details of the patient's medical history, surgical history, allergies, medications, procedures, letters, and notes. You can add items to the summary lists or edit existing items.
To minimize or maximize a section in the EMR Summary window, click the up or down arrow on the right side of the EMR section.
Procedure Hx—Click to view a list of procedures that have been performed on a patient, beginning with the most recent. Use the buttons on the right to add or edit items.
Patient Reg—Click to view patient registration documents.
Encounter Slip—Click to open an Encounter Slip. You can enter information about patient visits, including diagnoses, shortcuts, pre-treatments, procedures, prescriptions, recalls, letters, and notes. You can also create actual, as well as PTE, charges for a specific ticket in this window. See Using Encounter Slips for more information
Rx—Click to view and manage prescriptions for the patient. See Working with Prescriptions for more information.
Follow-ups—Click to add recall information. Click to create a new line item. With the cursor in the Code column, select from the list of recall codes. The Description field populates automatically.
Implants—Click to view and manage implants. Click to add an implant procedure.
EMR Consents—Click to view and manage EMR consent forms. If a consent form is required for the current appointment type, EMR Consents is displayed in the Chart Status section of the window.
A  means action is needed; a
  means the form is complete.
Click
means the form is complete.
Click  to complete a consent
form. See Using EMR Consent Forms
for more information.
to complete a consent
form. See Using EMR Consent Forms
for more information.
Anesthesia—Click
to view and manage the patient's anesthesia records. Click  to create an anesthesia record.
Notes—Click to access EMR notes, digital forms, and narratives.
EMR
Notes—Click to
create an EMR note.
Digital Forms—Select Completed to view completed forms, Appointment to view forms for the current appointment, or All Forms for a list of forms to edit and attach to the patient.
Narratives—Click
to add a narrative.
Images—Click to view a patient's images. Select Clinical, Non-Clinical, or both. Select a line item to view the image in the Preview panel.
Attachments—Click to view documents and files attached to a patient's record. Select Clinical, Non-Clinical, or both. To attach a document or image:
Click  to scan a document or image.
Click  to attach a document or image.
In the Attachments
panel, click to attach
a file. Use the tabs to view specific types of attachments: Referral, Documents,
Images, or iConsult.
Select a line item to view the attachment in the Preview
panel.
Treatment
Plans—Click to access and manage the patient's treatment plans.
Click to create a new
treatment plan.