Managing Referral Sources
![]() Related Training
Related Training
Managing Referrals Recorded Class
Referral Sources are usually entered into Sensei Cloud when adding or updating a patient record. When entered, they are saved to the Referral Source list, where you can update personal and professional details about these providers using the Referral Entry tabs. You can:
-
Add referral sources directly to the list.
-
Edit and update a variety of details about referring providers.
-
Print recorded data for selected sources.
-
Update settings for rating and ranking referral sources.
-
Filter and sort the list as needed.
To manage referral source information:
-
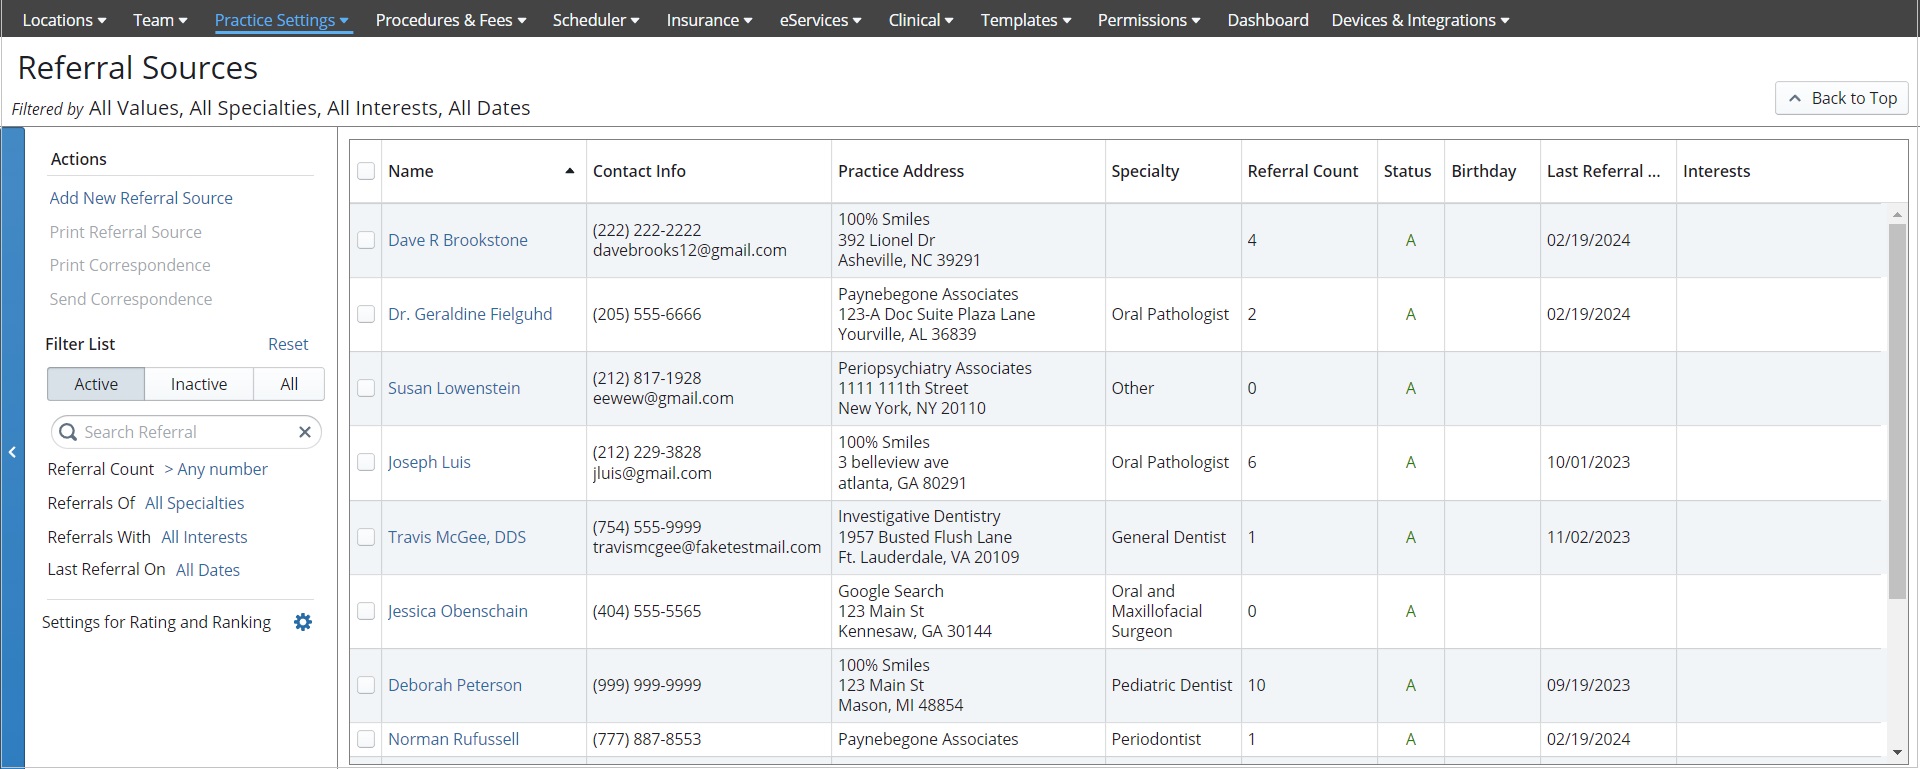
From the Administration tab, select Practice Settings > Referral Sources. The Referral Sources list is displayed.
-
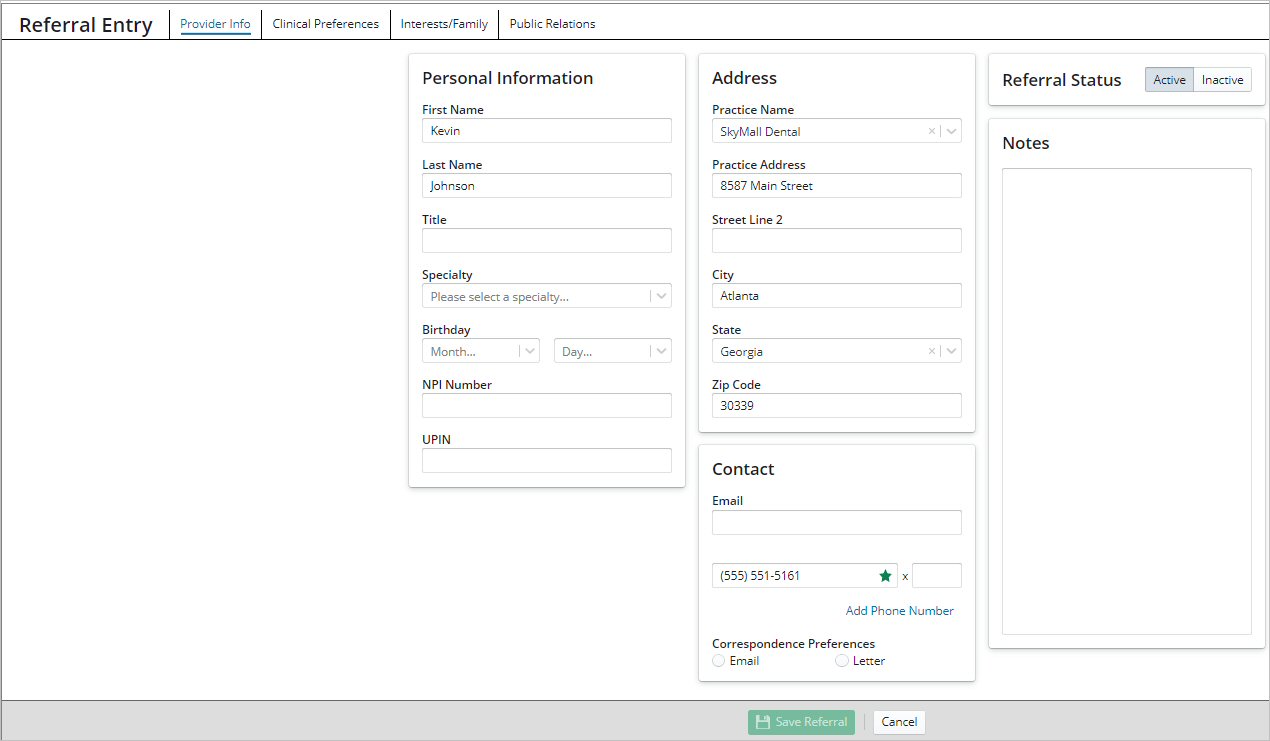
Select a Referral Name from the list, or click Add New Referral Source. The Referral Entry tabs are displayed.
-
From here you can:
-
Use the Provider Info tab to update personal and contact information, correspondence preferences, and status. You can also add notes.
-
Use the Clinical Preferences tab to enter the provider’s preferred implants, lab locations, and additional notes.
-
Use the Interests/Family tab to make notes about interests, hobbies, family information, and so on, that you want to remember when meeting or communicating with the provider through work or in your community.
-
Use the Public Relations tab to record gifts or events used for marketing purposes with the provider.
-
Use the Referred Patients tab to view the total number of referred patients, the last referral date, and a list of patients referred by the provider, along with the referral date, active status of the referral (Yes or No), and the Patient Balance.
Note: The Patient Balance is the total balance, so for patients with orthodontic contracts, this balance includes the current due plus any outstanding contract balance.
Tip: Click on a Patient Name to open the Patient Snapshot.
-
Click Save Referral.
Note: The Patient Home page displays the patient's Active Referral source. Click the name of the source to display details. Click the name again to access the Referral Entry tabs for that source.
Managing Specialties
You can manage the available specialties from the Provider Info tab of the referral entry.
To edit the list of specialties:
-
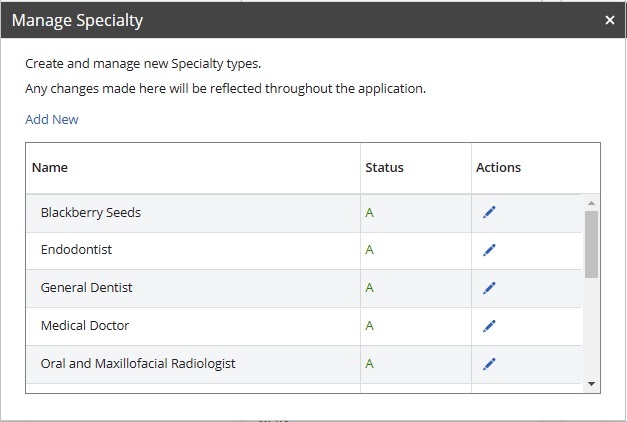
Next to Specialty, click Edit. The Manage Specialty window is displayed.
-
Click Add New to add a new specialty or click the Pencil icon to edit the name or status of an existing specialty.
-
Click the Checkmark icon to accept the changes, or click the X icon to cancel.
Note: If you are changing an existing Specialty label, a message is displayed noting that the change affects all instances that are added to patient records. Click Save & Apply Changes to proceed.
Printing and Exporting Referral Sources
To print or export a list of referral sources:
-
Select Administration > Practice Settings > Referral Sources.
-
Select the filters for the list.
-
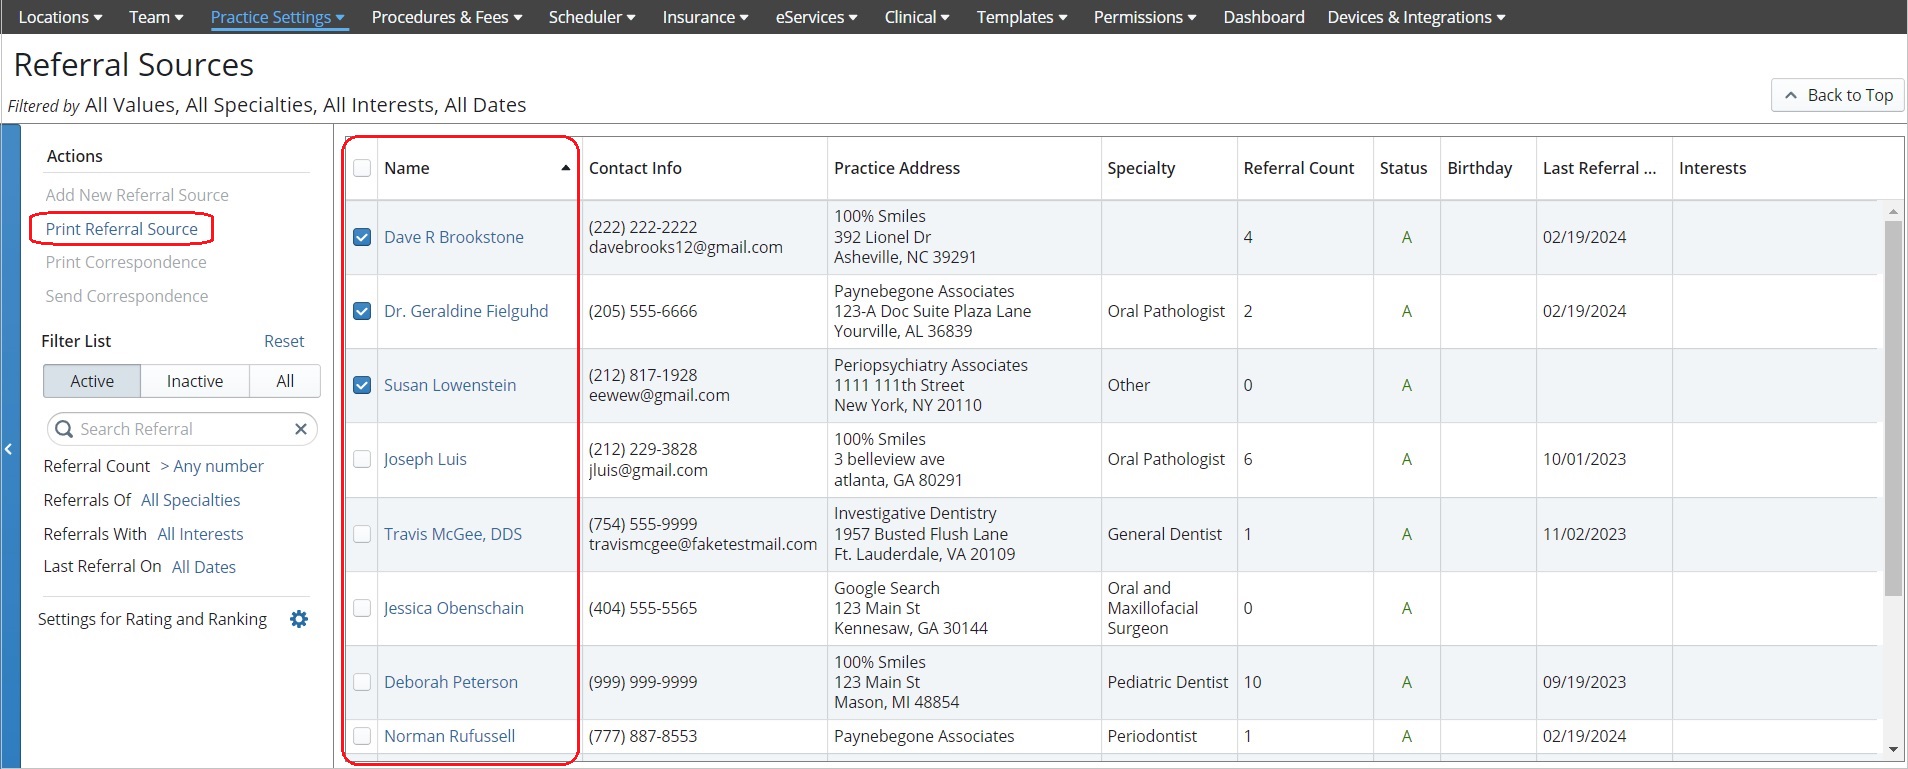
Select the sources to include. You can select specific sources or select the checkbox at the top of the column to select all.
-
Under Actions, click Print Referral Source, and then select your print settings. A .PDF file is generated, with one page per provider, and includes Notes, Referral Count, and Last Referral Date.
Settings for Rating and Ranking Referral Sources
You can also control the settings for rating and ranking of referral sources by clicking the Gear icon next to Settings for Rating and Ranking in the left panel.
Adjust the percentages for Patients Referred, Appointments, and Amount Posted, ensuring that the total percentage equals 100%, to determine how much weight these criteria hold when calculating the rating and ranking of referral sources.
For example, if your practice wants to make the Amount Posted the most important factor for rating and ranking, you can increase this percentage.
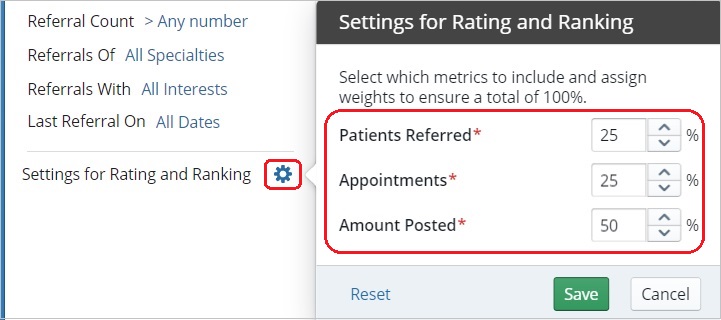
When you have adjusted the percentages as needed, click Save.
Setting Up Rating and Ranking of Referral Sources
Creating Referral Correspondence Templates