Using the Clinical Charts > Using the Hard Tissue Chart
Charting Bridges
When documenting an existing bridge in a patient's Hard Tissue Chart, use Current Mode. When planning a bridge for a patient, use Planning Mode.
Charting an Existing Bridge
To document an existing bridge:
-
Select Patient > Clinical > Hard Tissue Chart.
-
For Mode, select Current.
-
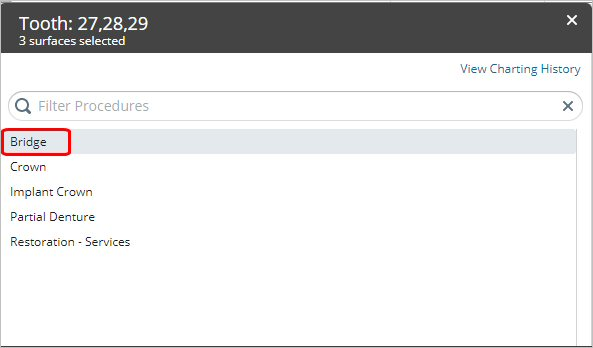
Select the teeth which make up the bridge by a single click on each tooth number on the chart, and then click Bridge.
-
Click Confirm. You are prompted to select Pontic or Abutment and then a material for each tooth.
-
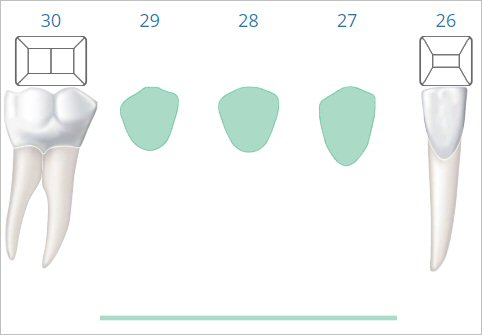
Select the appropriate indicators for each tooth. The chart saves the selections and adds a clinical note. The bridge is displayed as:
Charting a Planned Bridge
To plan a bridge for a patient:
-
Select Patient > Clinical > Hard Tissue Chart.
-
For Mode, select Planning.
-
Select the teeth for the bridge by a single click on each tooth number on the chart, and then click Bridge. You are prompted to confirm.
-
Click Confirm. For the first tooth in the list, you are prompted to select Pontic or Abutment.
-
Make your selection. A list of related procedure codes is displayed.
Note: You can use the Search field to narrow the list of codes displayed.
-
Select the code for that tooth. You are prompted to do the same for the next tooth in the list.
-
Repeat for each selected tooth. A clinical note and visual representation are added for the planned treatment.