Accessing the Location Treatment Plan List
You can view a list of treatment plans for your location to identify patient treatment plans with unscheduled work, so you can schedule the work or update the plans. This list is based on patients who have this location selected as their Preferred Location in the Patient Record.
To view Treatment Plans for a location:
-
On the Location tab, select Appt Worklists > Treatment Plan List.
-
Use the items under Filter List to refine the list:
-- Type in the search field to refine the list by patient name (Search Plans).
-- Use the Plans including option to filter the list by associated procedures.
-- Use the Plans for option to filter to specific providers.
-- Use the Plans created option to filter to a specific date range of plans (e.g., Last 90 Days).
-- Use the Plans that are option to filter to specific treatment plan statuses.
-- Select Hide Pts with Appts to refine the list to plans with procedures to be scheduled.
-- Select Only plans needing completion to display plans for which all procedures have been completed, so you can mark the plans Completed.
-- Use the Manage List View cog icon to display the Select Columns to Show window and select which columns to include in the list.
Note: You can also reorder the columns in the list using the icon. Be sure to click Save to apply the changes to the list.
-
Click a line item to display more information or add a note.
Note:
-- When you submit a pre-authorization claim through Sensei Cloud, the Treatment Plan List automatically updates the new Pre-Auth Sent column to Yes. There are additional Pre-Auth details when the treatment plan line item is expanded.
-- The Pre-Auth Sent option is automatically selected when Sensei Cloud is used to send a pre-auth claim, and the Claim Number and Sent On Date are recorded. However, you can deselect the option (e.g., if you need to re-send the claim, etc.).
-- If you obtain pre-authorization through a method other than Sensei Cloud (i.e., telephone or fax), you can manually select the Pre-Auth Sent checkbox to change the status to Yes. You can also manually deselect this option to change the status to No if needed. Note: Additional details are not included when the Pre-Auth Sent option is selected manually.
-- When there are multiple pre-auth claims sent for a treatment plan, (e.g., a phased or staged plan with distinct pieces of treatment), there is still only a single Pre-Auth Sent indicator for the treatment plan. The associated details for the most recent pre-auth claim are displayed. -
Click Schedule Appointment to create an appointment for the procedures in the plan.
-
Click Manage Treatment Plan to view and edit details.
-
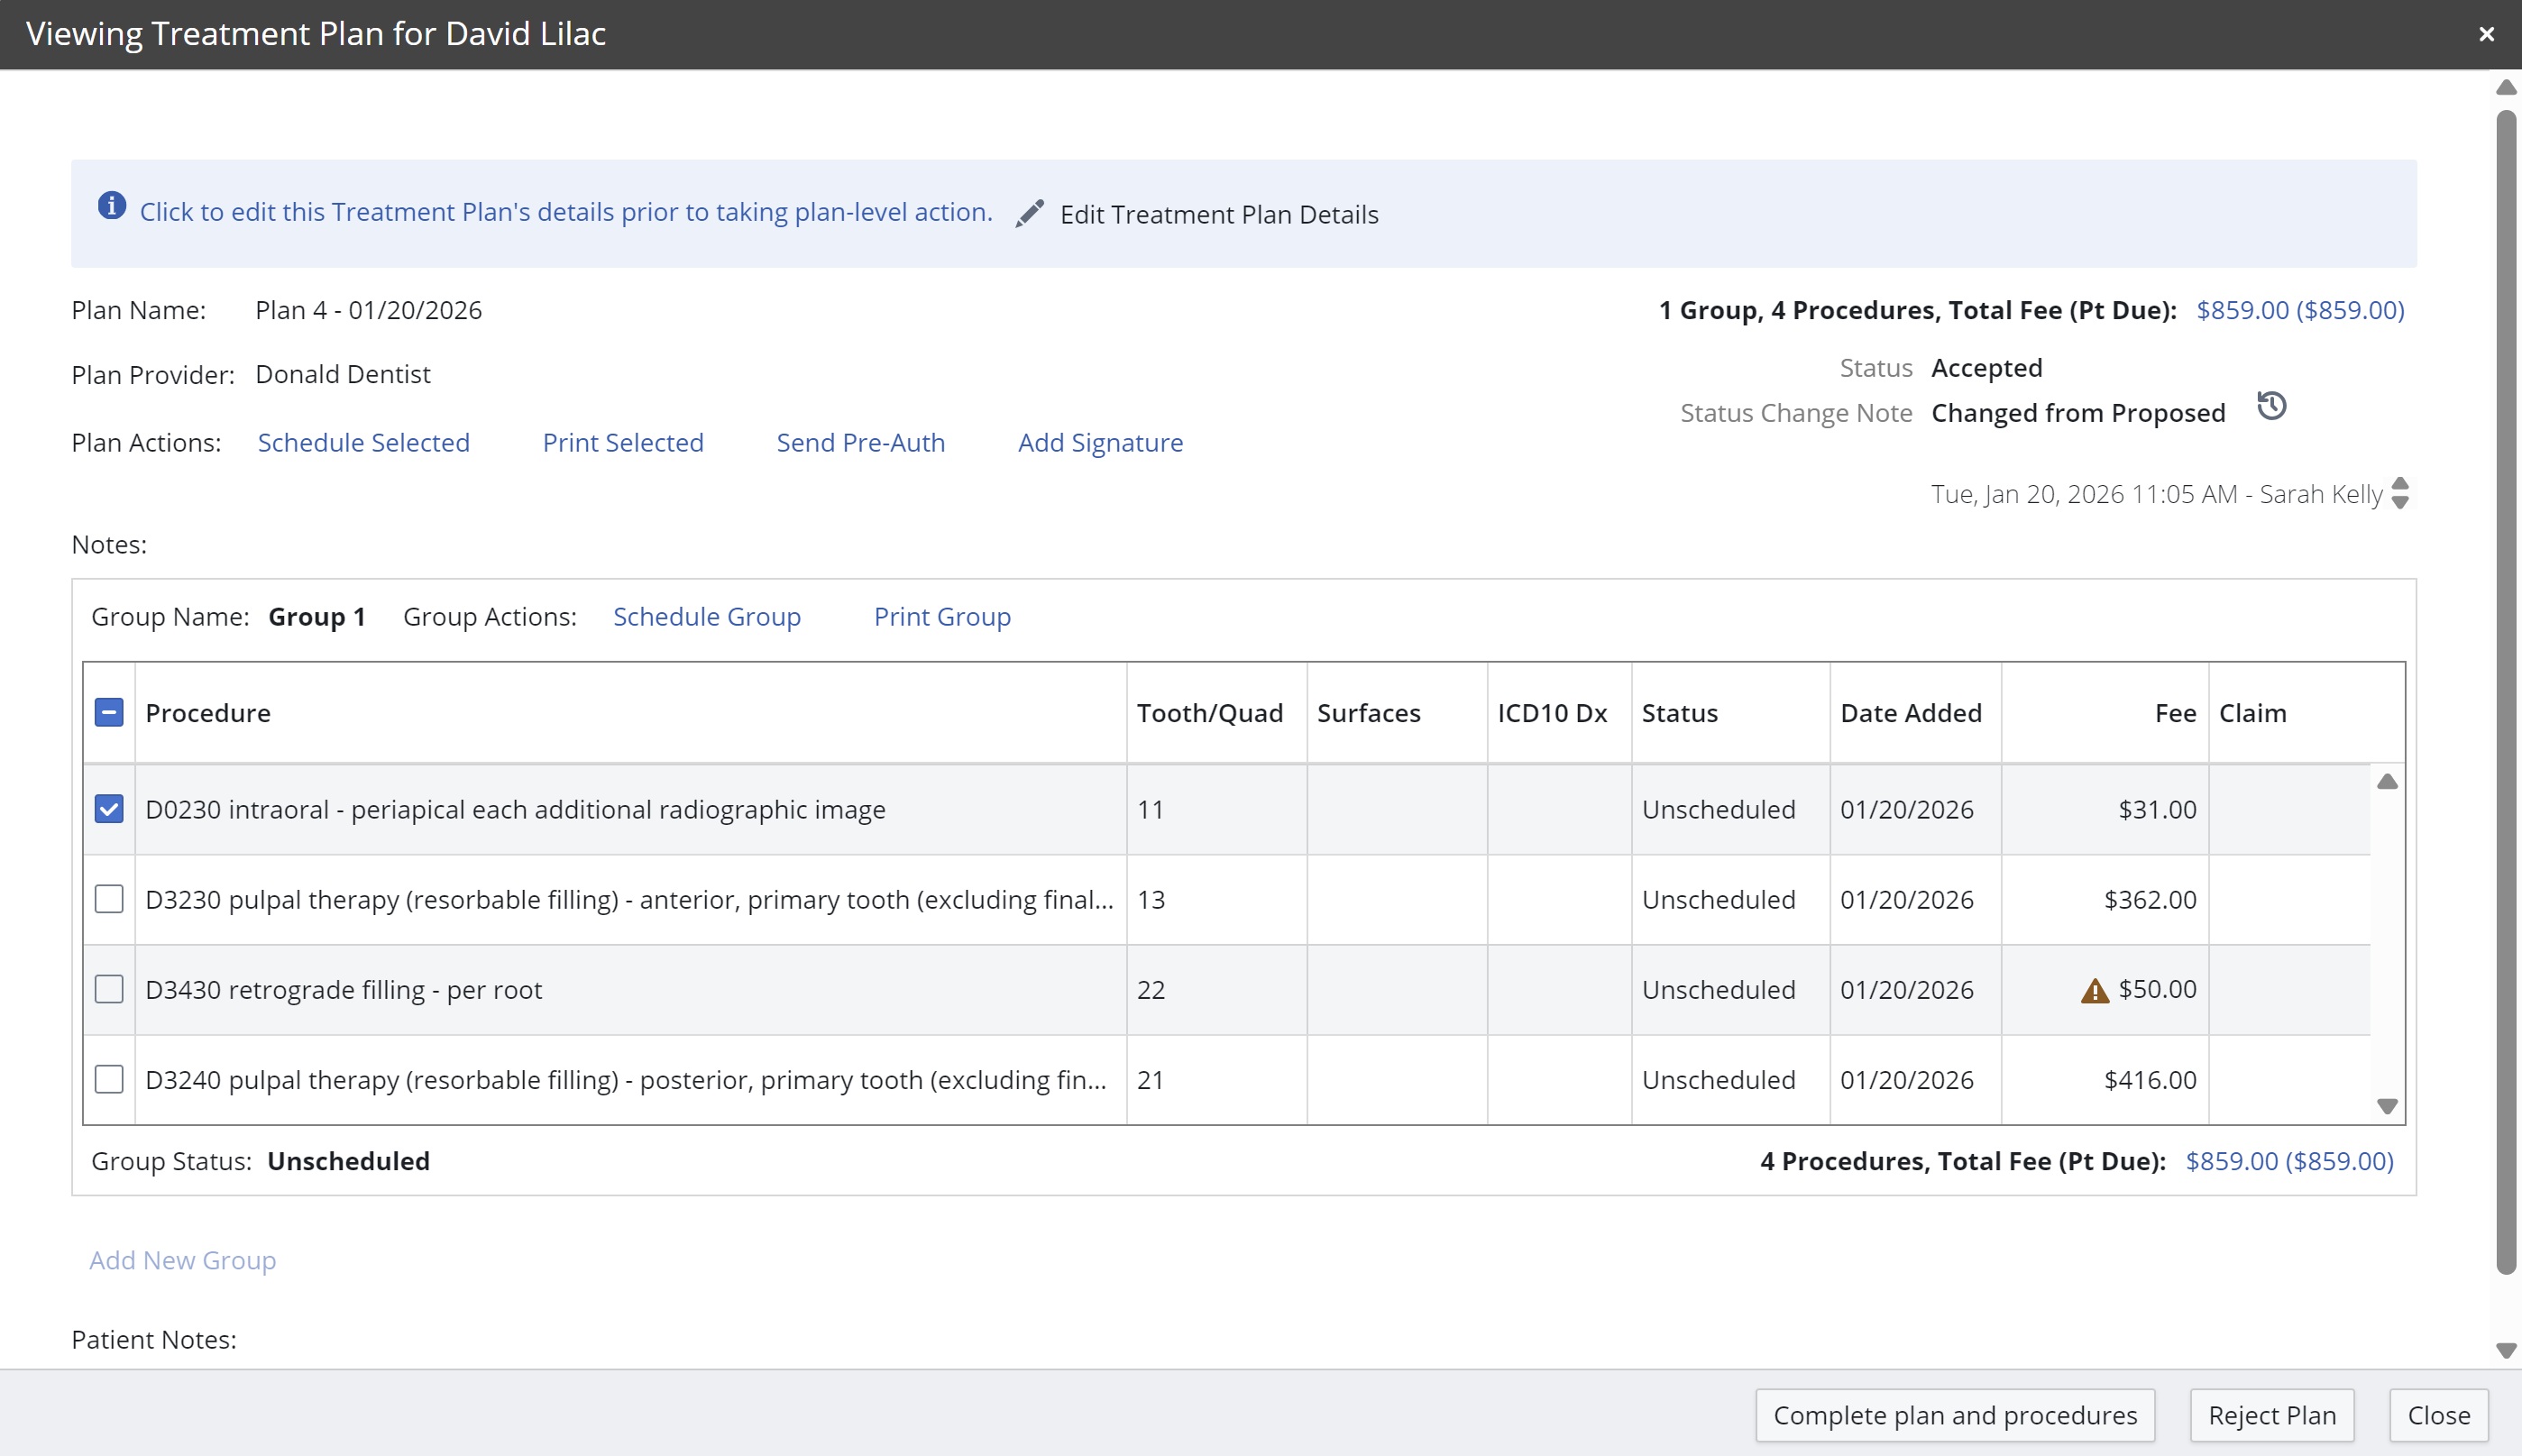
In the Viewing Treatment Plan window, you can select procedures and:
-
Schedule selected procedures.
-
Print selected procedures.
-
Click Send Pre-Auth to create a claim and request pre-authorization.
-
Schedule or print the Group procedures.
-
Post charges.
-
Mark the plan and procedures as complete.
-
Click Reject Plan.
-
Add a signature to the plan.
Printing the Treatment Plan List
To print the list:
-
On the Location tab, select Appt Worklists > Treatment Plan List. The list is displayed.
-
Under Actions, click Print Current View. The Print window is displayed.
-
Select the printer settings.
-
Click Print.
From the Treatment Plans Window