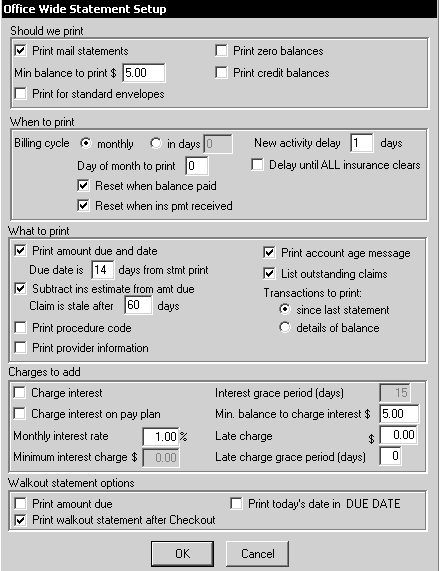
The software provides many ways to customize the process of preparing and sending statements. Statements can be printed and mailed or they can be transmitted electronically.
In the Office-Wide Statement Setup window, you specify when to print, what to print, and the charges to add.

To prepare and print statements:
Select File > Print > Statements > Prepare Statement run. The first time you do this, the software displays a message to remind you that when the statements are prepared, they cannot be undone.
Click Yes. If this is the first time you are running your statements, you must contact a technical support representative for an authorization code. A Status window is displayed while statements are prepared.
When the statements are ready to print, a message is displayed.
Click OK. The statements are added to the Statement Queue.
Select File > Print > Statements > View Statement Queue. The Statement Queue window is displayed.
Select one of the following options:
Print all unprinted—To print statements that were not previously printed.
Print this statement—To print the highlighted statement.
View clipboard—To access the selected patient’s clipboard.
Print from here—To print all the statements in the list from the selected statement to the end of the list.
Remove this statement—To remove the highlighted statement from the queue. You are then prompted for confirmation. The account will not have another statement generated until the next statement date.
Remove all statements—To remove them all from the queue. A warning message is displayed to confirm this action. The accounts will not have statements generated until their next statement date.
Click Close.
To reprint the most recent statement for a patient:
Select Lists > People. The Person Pick List is displayed.
Select the patient whose statement you want to reprint, and click OK. The patient’s clipboard is displayed.
Right-click anywhere on the clipboard. A shortcut menu is displayed.
Click Re-print last statement.
Estimating Insurance During Check Out
Taking a Payment During Check Out