To start the check out process, right-click the appointment, and click Check out. The Check Out Ledger window is displayed.
Use the Check Out Ledger window to enter charges and payments or to make adjustments while the patient is in the office.
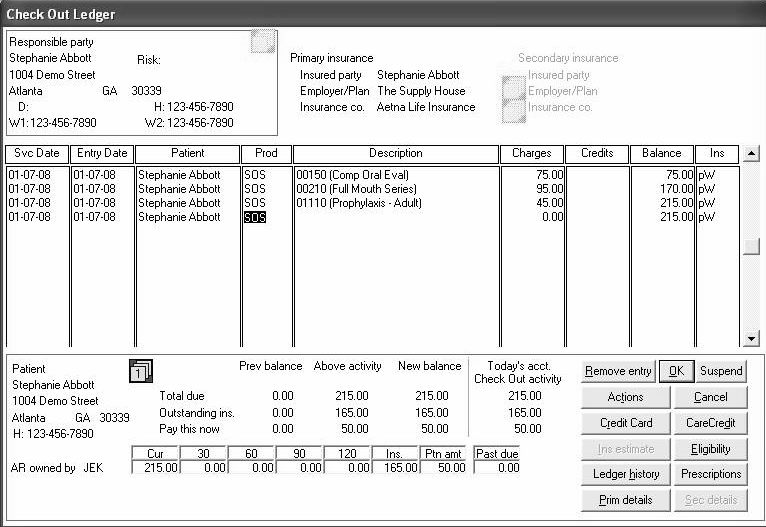
The main section of the Check Out Ledger window contains nine columns:
Svc Date—Date that the activity occurred. Today’s date is the default, but it can be changed to a date in the past.
Entry Date—Date the activity is entered into the system. It is generated automatically and cannot be edited.
Patient—Patient’s name, generated by the software.
Prod—Producer who is credited with the treatment on this patient. Enter the first initial of the producer or press the space bar to cycle through the names of all producers in the system.
Description—Description of the procedures, adjustments, and payments entered into the Check Out Ledger for the appointment. Enter the ADA code or abbreviation to add a procedure, adjustment, or payment. Press Tab in a blank description field to view the transaction code list.
Note: Pess Tab to display a list of procedure codes and abbreviations.
Charges—Amount to be charged for the procedure, automatically generated based on the fee schedule.
Credits—Any amounts in this column decrease the account balance.
Balance—Running total of the account's balance. This amount may contain a prior balance in addition to today's charges.
Ins—Shows the status of insurance for all dental codes.
Tip: Use the Prescriptions button to print prescriptions.
The following status codes can be displayed in the Ins column:
pW—Primary claim waiting to submit
pS—Primary claim submitted
pC—Primary claim cleared or collected
pN—Primary claim no assignment
pR—Primary claim refused
Estimating Insurance During Check Out
Taking a Payment During Check Out