Dental codes are the ADA codes you use in your office. To determine the dental codes for your office, print, evaluate, and edit your current list of codes.
To print the current list of dental codes:
Select File > Print > Other/Misc Reports > Treatment code by list category. The Treatment Code List is displayed
Click OK to print all of the codes. The Report Destination window is displayed.
Click Print to Printer and OK.
To evaluate dental codes:
Highlight each code you do not use in your practice. These should be removed.
Using a different color, highlight any code that requires a different description (a description can be as long as 25 characters, including spaces).
You can have up to three different fee schedules. Multiple fee schedules are appropriate if you have multiple providers, at least some of whom charge different fees. If you have only one fee schedule, write the fees in the column headed Fee 1. The fees entered here are the regular fees that the practice charges. These fee schedules are not used for insurance fees.
Use the Abbrev column if you want to use an abbreviation instead of the ADA code number when entering procedures. Abbreviations are a maximum of eight characters; spaces cannot be used.
Select the procedures most frequently performed in your practice. When you edit the transaction codes, select Print on route slip for these procedures. You are limited to 35 codes on a route slip.
To edit dental codes:
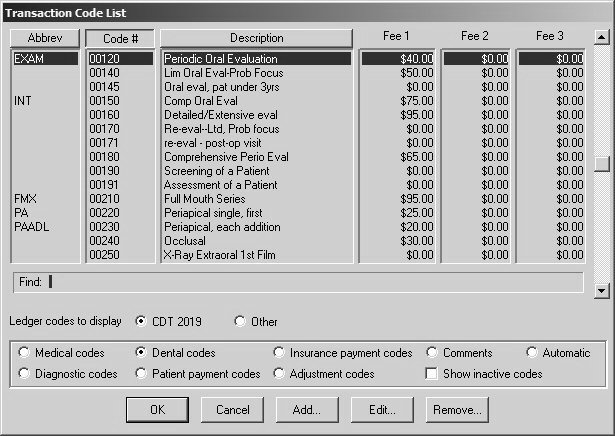
Select Lists > Transaction Codes. The Transaction Code List window is displayed, sorted by Code #. The codes that are displayed depend on the button selected at the bottom of the window in the Ledger codes to display area.

To delete a code, scroll to the code that you want to delete and click Remove.
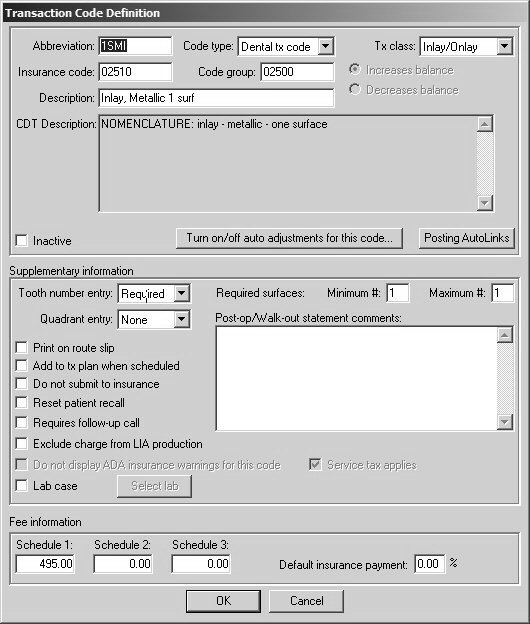
To add a code, click Add. The Transaction Code Definition window is displayed. Enter all of the necessary data, and click OK.
To edit a transaction code, scroll to that code and click Edit. The Transaction Code Definition window is displayed.

Based on the edits indicated on your hard copy of the transaction codes, make the appropriate changes. Use the following guidelines when making changes:
Select Inactive to deactivate a code. You can reactivate it at any time.
Click Print on route slip if this procedure is performed frequently. The procedure is added to the route slip as an optional service.
Click Add to tx plan when scheduled to display the transaction code on a treatment plan.
Click Do not submit to insurance to prevent the transaction code from printing on insurance forms.
Click Reset patient recall to reset a patient’s recall cycle.
Click Requires follow-up call, if appropriate. This information displays on the Daily Production Detail report, in the Call Back Contact Expert, and in Practice Central.
Click Lab case if this procedure always receives a lab case. This option is typically used for delivery codes created by your office. It is not to be used on prep appointments.
To print comments on a walkout statement when this procedure is performed, type the comments in the Post op/Walk-out statements comments field.
Under Fee Information, enter the fees that correspond to the Schedule 1, Schedule 2, and Schedule 3 columns on your printed list.
Leave Default insurance payment % blank, unless this code is estimated for everyone at this percentage.
Click OK.