Working with the Patient Flow Module
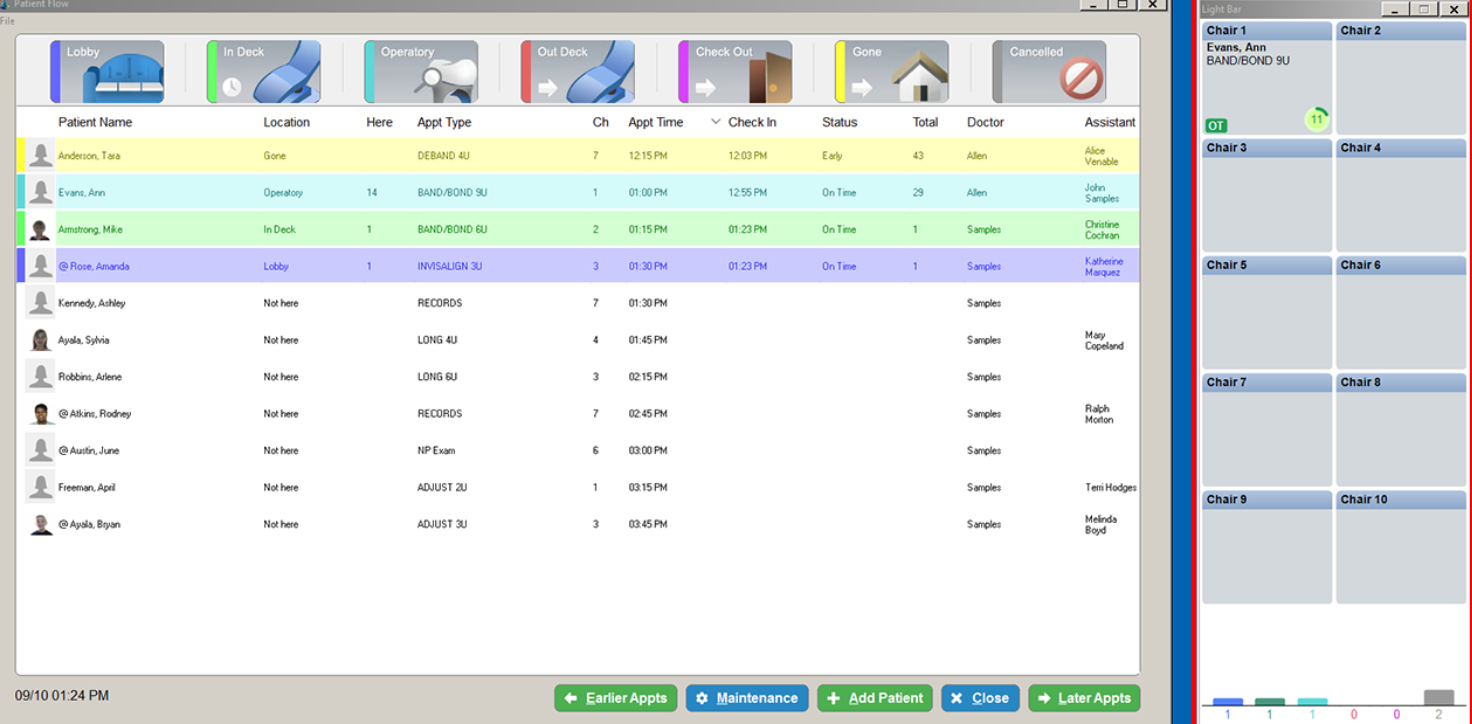
If your office uses the Charting module along with the Patient Flow module, you can display a Light Bar to the right of the Patient Flow grid, or you can display a stand-alone Light Bar. To choose an option, select Maintenance/Set-up > Patient Flow Options > Light Bar Options.
Each block on the Light Bar represents a treatment chair. The name of
the patient assigned to each chair, the appointment type, and the patient’s
early or late status are displayed in each block.

Each chair on the Light Bar includes a dynamic clock icon, which tracks the amount of remaining chair time for an appointment. Blue indicates the amount of appointment time already spent. Green indicates time remaining to spend with the appointment. Red indicates time in the chair beyond the scheduled appointment time.
The Light Bar chairs change colors depending on the action taken for each chair. Chairs are white when vacant and change to light blue when occupied.
Click on a patient in a chair to display the Light Bar menu. Use this menu to call the doctor to a specific chair when a patient is ready or when a patient has an emergency.
Your office may not use all Patient Flow locations.
To use the Light Bar:
Click or right-click on an occupied chair to display the Light Bar menu.
Select Call Dr. (Normal) or Call Dr. (Emergency), and a pop-up window is displayed.
Select Doctor 1, or select the appropriate doctor number from the list, if your office has more than one doctor.
If you click on another chair and select Call Dr., you can select the same doctor or a new one.
If you select Any
Doctor, the top portion of the color bar does not change, while
the bottom portion changes from light blue to dark green and begins
flashing. A time counter is started.
When the doctor answers the call and selects Dr.
Is Here and his doctor number, the top portion of the color
bar stops flashing, and the bottom portion of the color bar changes
to teal.
When you drag and drop a patient,
the location you dropped the patient in is selected in the New
Location section. Click OK.
With the double-clicking or right-clicking methods, the software selects
the next location; for example, if the patient was in the Lobby,
and you use the In Deck option,
then In Deck
is selected. Click the desired location and click OK.
To move from one patient’s treatment card to another, right-click on an occupied chair and select Load Charting.
Checking In Patients with Check-In Messages