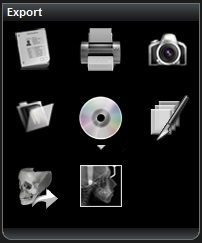
The Export Pane
In the Export section, you can find tools that you can use to export images and tab configurations.

The table below gives a brief description of the tools available in the Export section. These tools are described in greater detail in “Using Export Toolbox Functions”.
|
Tool |
Tab |
|
|
Patient Analyses allows you to save views and settings for a patient, including drawings, measurements and other objects. Available in the following workspace tabs: MPR, Curve, Bilateral, MPR See “Using Patient Analyses”. |
|
|
The Cross-Sections export tool creates a series of slices in the 3D volume of a selected region of interest that can be reviewed on the Review workspace tab or printed using Film Composer. Available in the following workspace tabs: MPR, Curve, Bilateral, MPR See “Generating a Cross-Section”. |
|
|
Generate a patient Implant Planning Report using the dedicated report generation tool located in Export tools. Available in the following workspace tab: Curve See “Generating an Implant Planning Report”. |
|
|
Launches the dedicated print application Film Composer. Available in all workspace tabs. |
|
|
You can use the Volume Converter to export the current 3D volume for use in third party DICOM software. Available in the following workspace tabs: MPR, Curve, Bilateral, MPR |
|
|
You can use the Virtual Ceph export tool to generate integrated lateral, facial and axial views. Available in the following workspace tab: MPR |
|
|
You can use the Workspace Screenshot tool to create a workspace tab screenshot to add the Gallery. Note: You cannot use this tool to create a DICOM image. Available in the following workspace tabs: MPR, Curve, Bilateral, MPR See “Creating a Workspace Screenshot”. |
|
|
You can use this tool to access the folder (directory) on your computer containing images in current view screens, or that you have created using the DICOM Snapshot or Workspace Screenshots tools. Image files are saved to folder as specified in the Export preferences. Available in the following workspace tabs: MPR, Curve, Bilateral See “Opening the Screenshot Folder”. |
|
|
You can use CD Export to burn a copy of the 3D volume to a CD. Available in the following workspace tabs: MPR, Curve, Bilateral, MPR See "Exporting to a Compact Disc". See "Exporting to a USB Key". Note: These tools belong to an icon group. See “Using Icon Groups”. |
 Patient Analyses
 Cross-Sections
 Printing
 Volume Converter
 Virtual Ceph
  Workspace Screenshots
 Screenshot Folders
 CD Export
 USB Export