Setting Preferences in CS Imaging
Service Preferences
To set the CS Imaging Service preferences, follow these steps:
-
In System icons, click
 . The Preferences window is displayed.
 -
Click
 .
. - Contact your CSD Support Representative to modify preferences.
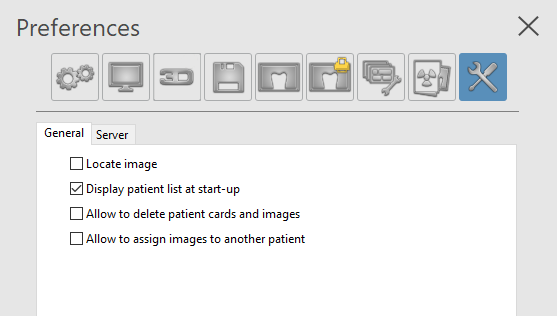
The General preferences are displayed.
-
Configure the following settings:
|
Localize image |
Select so that you can locate images on your computer. See Locating an Image File. |
|
Display patient list at start-up |
Select to see the Patient List in the Patient Browser when you open the software in standalone mode. If this option is not selected, then the Patient List will be blank. |
|
Allow to delete patient cards and images |
Select to allow patient cards and images to be deleted. See Deleting a Patient Card.
|
|
Allow to assign images to another patient |
Select to allow the user to assign images to another patient. See Reassigning Images and Other Objects to a Different Patient. |

-
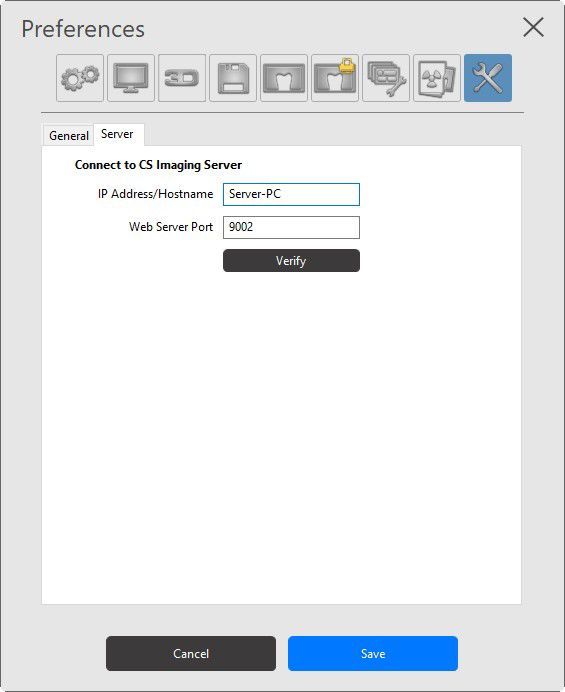
Click on the Server tab. Configure the CS Imaging Server IP address and Web Server Port connection parameters, and then click Verify to confirm good connectivity.

|
|
Note: In any case, if the CS Imaging client loses connection to the CS Imaging Server, an error message will display on the client, and you can update server connection parameters. |
-
Click Save to close the window and save your changes.
