Working with Images > Drawings, Measurements, and Annotations > Using Measurements to Calculate Distances and Angles
Calibrating an Image
In order for CS Imaging to calculate measurement values accurately, the image must be calibrated. The calibration state of an image is shown by the following icons in the lower-left corner of the image.
Image has been calibrated. All measurements are calculated relative to the image calibration. |
|
|
Image has not been calibrated. The image must be calibrated before measurements are taken. |
Note:
To calibrate a measurement, the image must contain a reference segment of a known length.
Calibration is only necessary if it was not done previously. When using cephalometric images generated by hardware such as the CS 8000C, CS 9000C, CS 8100SC, CS 8100 SC 3D, or CS 9300C, most of the images are automatically calibrated and no manual calibration is needed. For the few images that are not automatically calibrated, a warning message requesting it is displayed.
To calibrate an image, follow these steps:
Open the image in the Image Viewing Workspace or Darkroom mode.
In the
 Drawings & Annotations toolbar,
click
Drawings & Annotations toolbar,
click  . The Calibration
panel is displayed.
. The Calibration
panel is displayed.
On an image, click one end of a reference segment of known length.
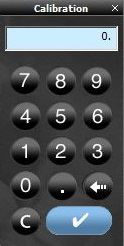
Move the cursor to the second end point of the reference segment, and double-click. A line segment is displayed with a length. The length is also displayed in the Calibration calculator window.
Do one of the following:
If the displayed value corresponds to the known length, in millimeters, of the object, click
 .
. If not, click
 and enter the correct value.
You can use your computer's number keys or click the number keys on
the calculator to enter the value.
and enter the correct value.
You can use your computer's number keys or click the number keys on
the calculator to enter the value.
When you have changed the value, click .
You will be asked to confirm the change. Click Yes.
Using Measurements to Calculate Distances and Angles
Modifying and Deleting Measurements
Using
the Measurements List in the Image Viewing Workspace or Darkroom Mode