Installing the Camera Holder
To install the camera holder, follow these steps:
- Choose a clean area on the wall that you can access easily.
- Clean the surface on which you are going to fasten the camera holder.
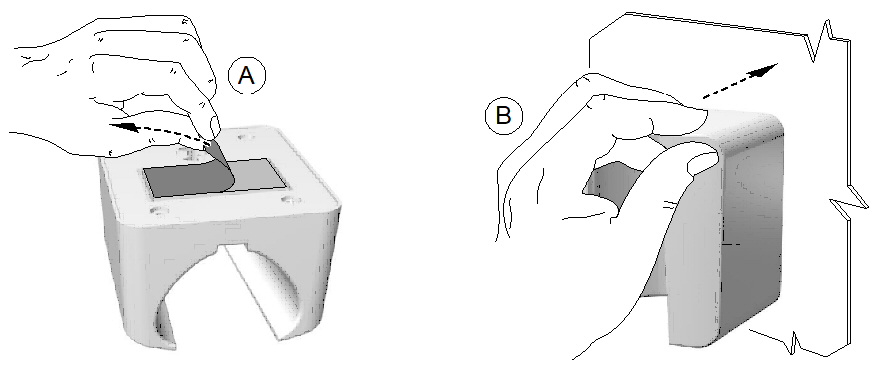
- Remove the adhesive tape protection from the support (A).
- Place the taped side of the camera holder on the clean surface (B) and press firmly several times for correct adherence. The maximum adherence is obtained after two hours.
 |
IMPORTANT: You must avoid all stress on the camera holder during the first 2 hours. |
|
IMPORTANT: Adhesive tape can lose its adherence capability due to environmental and other factors. Check the adherence regularly to ensure that it is secure. |
|
IMPORTANT: Carestream Dental LLC is not responsible for accidents involving the camera falling due to loosening of the adhesive tape. |
 |
Note: The camera automatically goes into sleep mode when inserted into the camera holder or left idle for 1.5 minutes. To use it again, pick it up or press the Capture button. |
|
Note: When the camera is idle for more than 3 hours (default), it powers off. To change the default automatic power-off time, see "General Preferences". |
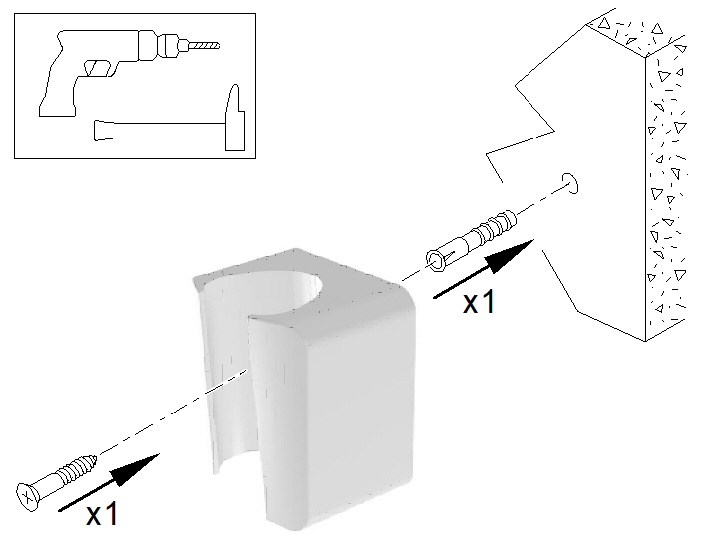
- For places on which you cannot use the adhesive tape, insert a screw through the appropriate hole in the camera holder to affix it to a solid surface.