Using the Documents Tab > Using the Document Manager
To add a new document or image:
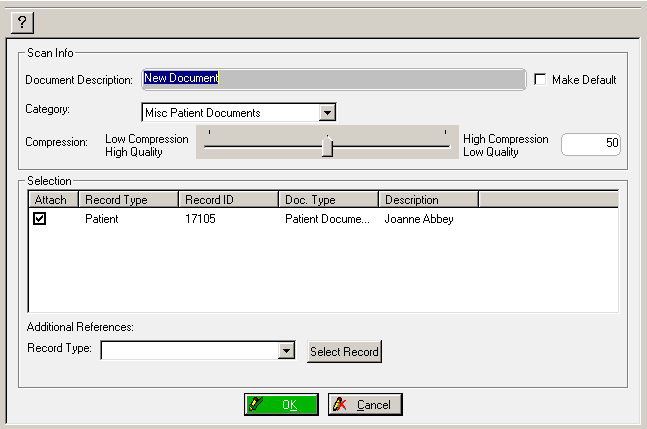
Click Capture New Document. The Scan Info window is displayed.

Type the document’s name in the Document Description field.
To use the name as the default for all new documents of the selected type, select Make Default.
To select a different category, double-click it in the Category drop-down field.
Move the slider to the appropriate compression quality. You can also type the quality in the field next to the slider.
Note: Image files are compressed to save space on the hard drive. When a file is compressed, some information is lost. The greater the compression, the lower the quality of the image.
Deselect any records to which the document is not to be attached from the list in the Selection section. The document is attached to all records selected in the list.
To attach the document to other records, select the type from the Record Type drop-down list, click Select Record, and select the record.
Click OK. The Documents for capture window is displayed.
Select an option:
Click Save Capture. A message asks you to confirm the addition.
Click Yes. The Enter Document Information window is displayed.
Type the page label text in the Page Label field, or leave the default text, which is the original file name.
To make the text the default page label for new documents of the same type, select Make Default.
Click OK and Close.
To edit a document:
In the Documents for window, select the document in the tree, right-click, and select Edit.
Make changes to the document.
Click the Save button.
Tip: When you edit an image, the dental imaging software opens and you make changes there.