Using the Scheduler > Scheduling Appointments
Handling Canceled and Overlapped Appointments
When you cancel an appointment or attempt to schedule an appointment that overlaps another, the appointment is removed from the time slot and displayed in an orange appointment box on the left side of the Daily Appointments and By Book windows. The appointment is displayed until you reschedule, autoschedule, delete, or add it to the Short Call Tickler or Tickler file.
When you close the Daily Appointments window and canceled or overlapped appointments are unresolved, a window containing the option to add appointments to the Tickler file or reschedule them later is displayed. If you do not resolve the problem, the unresolved appointments are displayed whenever you open the window.
Note: You can have no more than ten canceled or overlapped appointments in the window.
Resolving Canceled Appointments
To resolve a canceled appointment:
-
In the Daily Appointments window, select the appointment.
-
Click Cancel Appointment in the Options section of the Express bar. The appointment is canceled and displayed floating on the left side of the window. The default background color is orange, and Reschedule Canceled Appointment is displayed at the bottom of the appointment.
-
To review the details of the appointment, right-click the appointment and select View Appt. When you have finished reviewing, click Close.
-
To resolve the appointment, select an option:
-
To add the appointment to the Tickler fileTo add the appointment to the Tickler file
-
To auto-schedule the appointmentTo auto-schedule the appointment
Resolving Overlapped Appointments
You create an overlapped appointment:
-
When there is a provider scheduling conflict.
-
When the color scheduling requirements are not met.
-
When there are not enough available Scheduler timeslots.
To resolve an overlapped appointment:
-
In the Daily Appointments window, select the overlapped appointment.
-
To review the details of the appointment, right-click the appointment and select View Appt. When you have finished reviewing, click Close.
-
To resolve the overlapped appointment, select an option:
-
To add the appointment to the Tickler fileTo add the appointment to the Tickler file
-
To auto-schedule the appointmentTo auto-schedule the appointment
Adding Overlapped Appointments to the Tickler File Report
To include overlapped appointment information in the Tickler File report:
-
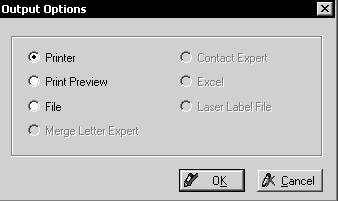
Select Reports > Recall/Appt > Tickler File. The Output Options window is displayed.
-
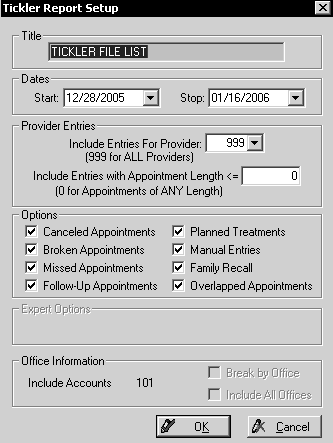
Select an option and click OK. The Tickler Report Setup window is displayed.

-
Select Overlapped Appointments and click OK.
Handling Missed Appointments
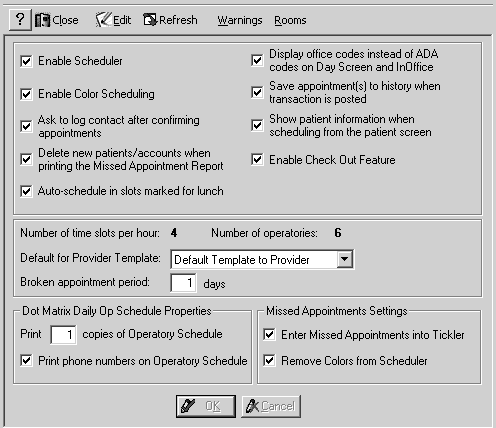
If a patient misses an appointment, the appointment information remains in the Scheduler unless you take appropriate action. You can set the Scheduler to send these appointments to the Tickler file or to delete them. Use the Scheduler Settings window or the Scheduler Wizard to set the missed-appointment properties.
To specify how missed appointments are processed:
-
Select System > Change System Settings > Scheduler. The Scheduler Settings window is displayed.

-
To send all missed appointments to the Tickler file, select Enter Missed Appointments into Tickler. If Enter Missed Appointments into Tickler is not selected, missed appointment information is deleted.
-
To remove Scheduler colors and blocked slots, select Remove Colors from Scheduler. If Remove Colors from Scheduler is not selected, this information is kept in the Scheduler.
-
Click OK.
Generating the Missed Appointments Report
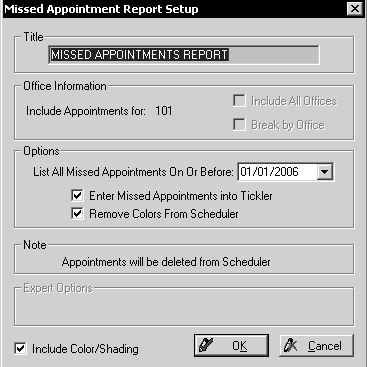
The Missed Appointments report lists patients who missed an appointment that was scheduled within a specified date range. When you generate the report, you can send missed appointments to the Tickler file and remove Scheduler colors and blocked slots. After you generate the report, appointments that were checked out are displayed in the History Appointments window.
To generate the Missed Appointments report:
-
Select Reports > Missed Appointments. The Output Options window is displayed.

-
Select an option and click OK. The Missed Appointment Report Setup window is displayed.

-
To add missed appointments to the Tickler file, select Enter Missed Appointments into Tickler. If this is not selected, missed appointment information is deleted.
-
To remove Scheduler colors, select Remove Colors from Scheduler.
-
Click OK.