Setting Up Orthodontic Treatment
Setting Up Orthodontic Aligner Treatment
![]() Related Training
Related Training
Aligner Tracking Recorded Class
To set up new orthodontic Aligner treatment:
-
Open a patient’s Home tab.

-
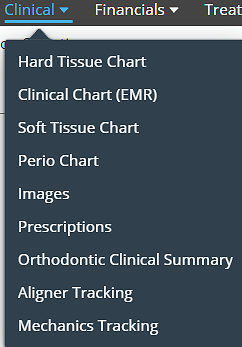
Select Clinical > Orthodontic Clinical Summary.
-
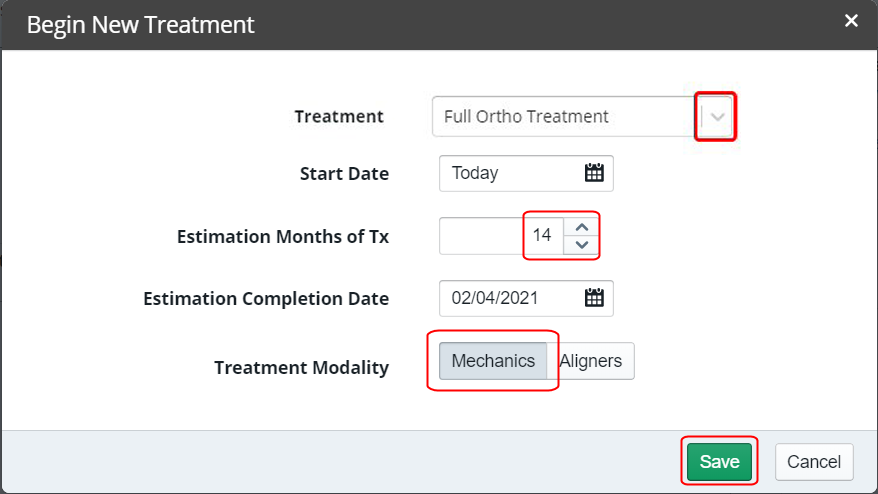
Under Actions, select Begin New Treatment. The Begin New Treatment window is displayed.

-
In the Treatment field, use the list to select consultation, Full Ortho Treatment, or initial.
-
Change the Start Date if you do not want the current date.
-
In the Estimated Months of Tx field, select a number. The Estimated Completion Date is calculated automatically.
-
In the Treatment Modality field, select Aligners.
-
Click Save. An Aligner Tracking section is added to the Clinical Summary.
-
From the Clinical Summary's Aligner Tracking section, click Manage, or select Clinical > Aligner Tracking. The Aligner Tracking window is displayed.
-
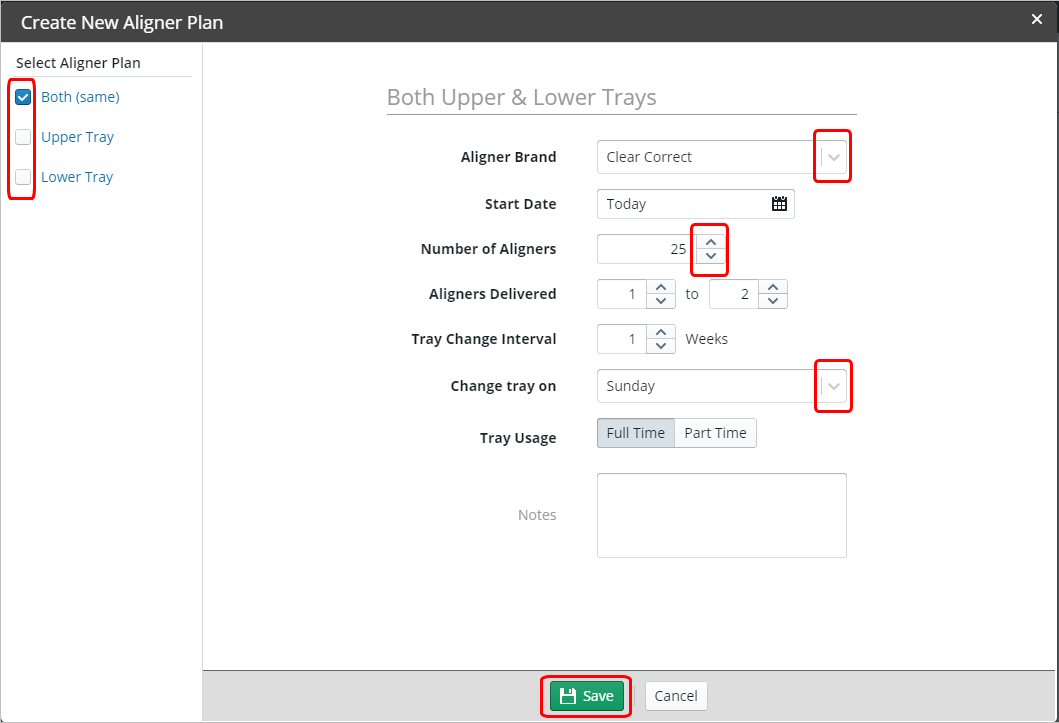
Under Actions, select Create Aligner Plan. The Create New Aligner Plan window is displayed.

-
In the Select Aligner Plan field, select Upper Tray, Lower Tray, or Both (same).
Note: If the recommended treatment is different for the patient's upper and lower arch, create separate aligner plans for each.
-
In the Aligner Brand field, select a brand.
-
Select the number of aligners to be used throughout the treatment, the rate of delivery of new aligners, and the interval for which they should be changed.
-
In the Tray Usage field, set the options.
-
In the Notes field, type any notes.
-
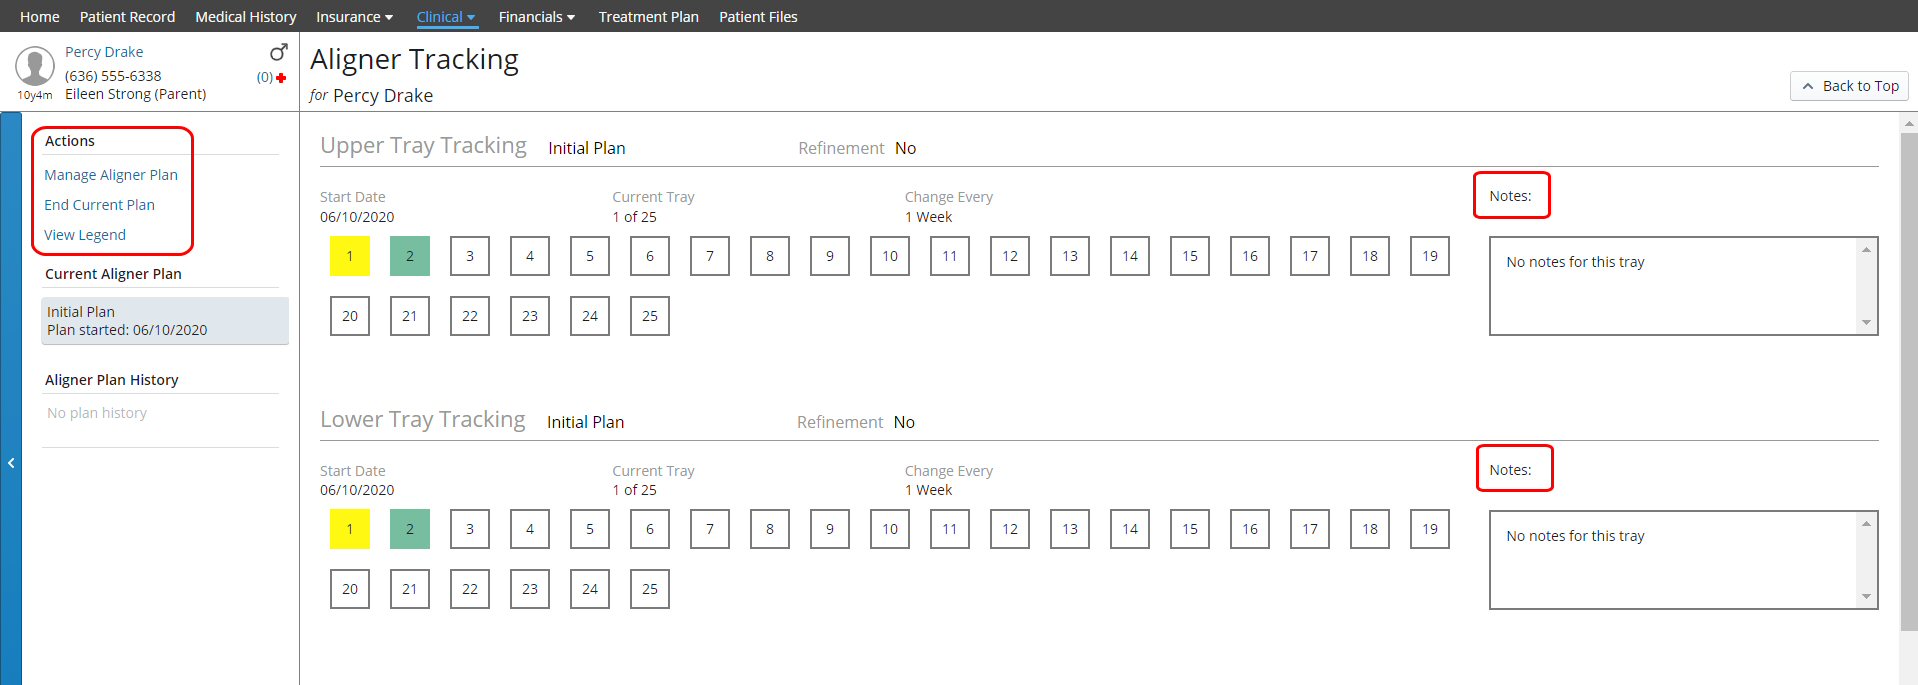
Click Save. The patient's Aligner Tracking window is updated with the new plan.

-
Use this window to select, manage, refine, and track the patient's plan.
-
Use the Notes field to add clinical notes for the plan.
-
Click View Legend to see the Aligner Tracking Legend:

-
Click an individual aligner square for options.
Note: You can add tooth numbers and usage indicators when defining a new Elastic Type.
Setting Up Orthodontic Treatment
Setting Up Orthodontic Treatment with Mechanics