Creating Payment Plans
To create a payment plan:
-
From the Patient tab, select Financials > Payment Plans.
-
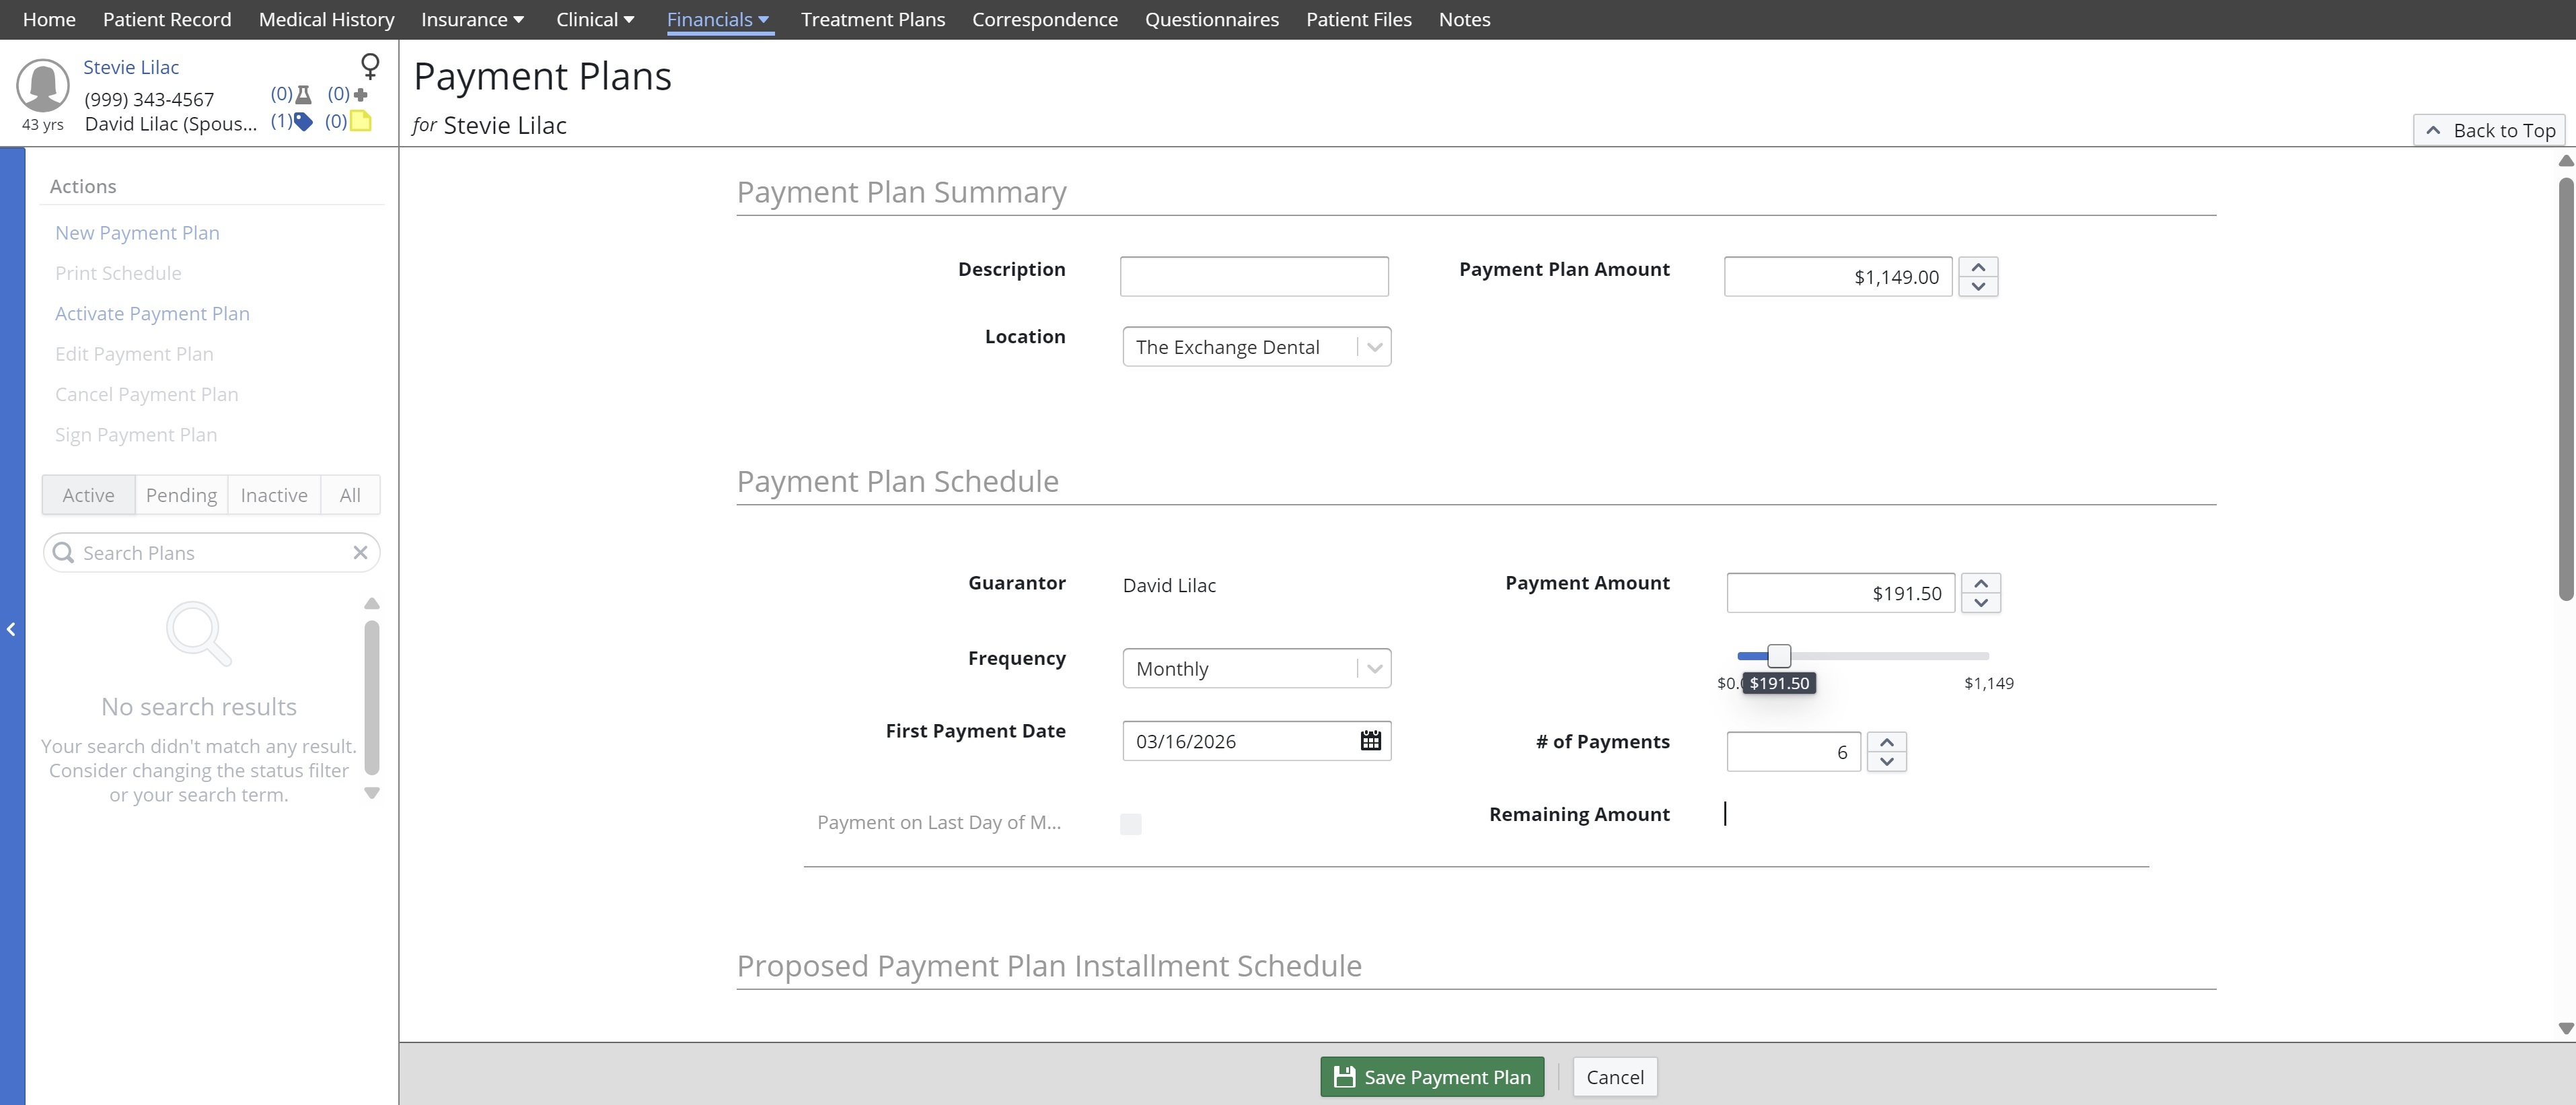
Under Actions, click New Payment Plan. The Payment Plan is displayed.
-
Under Payment Plan Summary:
-- Enter the plan description. Note: When choosing a description, keep in mind that the payment plan description is displayed on payments in the patient ledger and within statements.
-- Select a location. Note: To select a location, the patient must have a balance for that location. The patient can have one active payment plan per each location in which they have a balance.
-- Confirm the payment plan amount (this defaults to the total Patient Share balance for the location but can be decreased). -
Under Payment Plan Schedule:
-- Confirm the Guarantor (this can be updated in the patient record as needed).
-- Select a payment frequency of Monthly, Quarterly, Semi-Annually, or Annually.
-- Enter the first payment date (this defaults to a month from today's date, but you can also select a future date). Note: If you select the 31st of the month, the Payment on Last Day of Month option is automatically selected, and every payment is scheduled for the last day of each month. However, if you select a last day of the month that is less than 31 (e.g., February 28), then this option needs to be manually selected. If deselected, the payments are made on the 28th of each month.
-- Confirm or change the payment plan amount or the number of payments (if one is changed, the other adjusts accordingly). -
For practices using Payment Manager, use the Automatic Payments section to add an automatic payment method for the payment plan, if applicable.
Note: See the Sensei Cloud Payment Manager Getting Started Guide for more information. -
Review the proposed payment plan installation schedule. This schedule is automatically generated based on the selections in the previous fields, and you can adjust these selections as needed.
-
Click Save Payment Plan. You are prompted to activate the plan now or later.
-
Click Activate Now to activate the payment plan right away and begin the payment plan schedule or click Activate Later. The plan is saved.
Note:
-- To activate a pending plan, select the plan, and then from the Actions menu, click Activate Payment Plan.
-- A patient can only have a single, active Payment Plan associated with each location. You can create as many payment plans as you want, but they will only be at a Pending state since you can only activate a single plan per location. Any other pending payment plans (associated with that same location) have to be manually cancelled.
--It is a good idea to cancel any Pending payment plans associated with a location when a payment plan has been activated for that location.
-- A payment plan icon is displayed at the top of the patient's ledger to alert you that they have one or more active payment plans.
You can view existing payment plans by clicking on them from the left side panel. When you click on a plan, you can view details such as the number of remaining payments, the remaining amount due, and the status of each scheduled payment.
You can also perform the following from the Actions menu:
-
Print Schedule: Create a PDF of the schedule for the selected payment plan, and you can then print or email it to the patient.
-
Activate Payment Plan: Activate the selected pending payment plan.
-
Edit Payment Plan: Edit the selected payment plan. You can only edit the automatic payment method for a payment plan (if you are using Payment Manager). If you want to change details such as how many payments, the frequency of the payments, or the amount of payments, etc., you have to close the existing payment plan and create a new payment plan with a new charge schedule.
-
Cancel Payment Plan: Cancel the selected pending payment plan.
-
Close Payment Plan: Close the selected active payment plan.
Note: If a payment plan is closed, the Pay By (due now) amount on the next billing statement reflects the patient's associated balance based on the Statement settings (e.g., Current Balance or Patient Share). -
Sign Payment Plan: Select a plan and click this option to display the Sign Below window.
The payment plan list can also be filtered to display Active, Pending, Inactive, or all plans.
Note: If a patient has an active payment plan for a location, it is important to associate a patient payment with the payment plan when you are posting a payment to that location. This association is needed to properly update the payment plan schedule and its balance (which is used and displayed on statements). For information on how to allocate a patient payment to a particular payment plan, see Posting Payments.
As payments are made, the payment plan installment status and schedule is updated for the payment plan. The remaining amount updates as the scheduled payments are made, and the patient also has the option to pay ahead on the payment plan.
The status of the payments update from Scheduled to Paid or Partially Paid depending on the payment amount.
Obtaining a Patient Signature on a Payment Plan