Designating an Image Storage Location
To specify where clinical images are to be stored:
-
Click the User menu in the upper-right corner of the window, and select Administration.
-
On the Administration tab, click Imaging.

The Imaging Settings are displayed.

-
Under Select Location, select the location you want to set up or edit.
-
Under Actions, click Edit Imaging Settings.

-
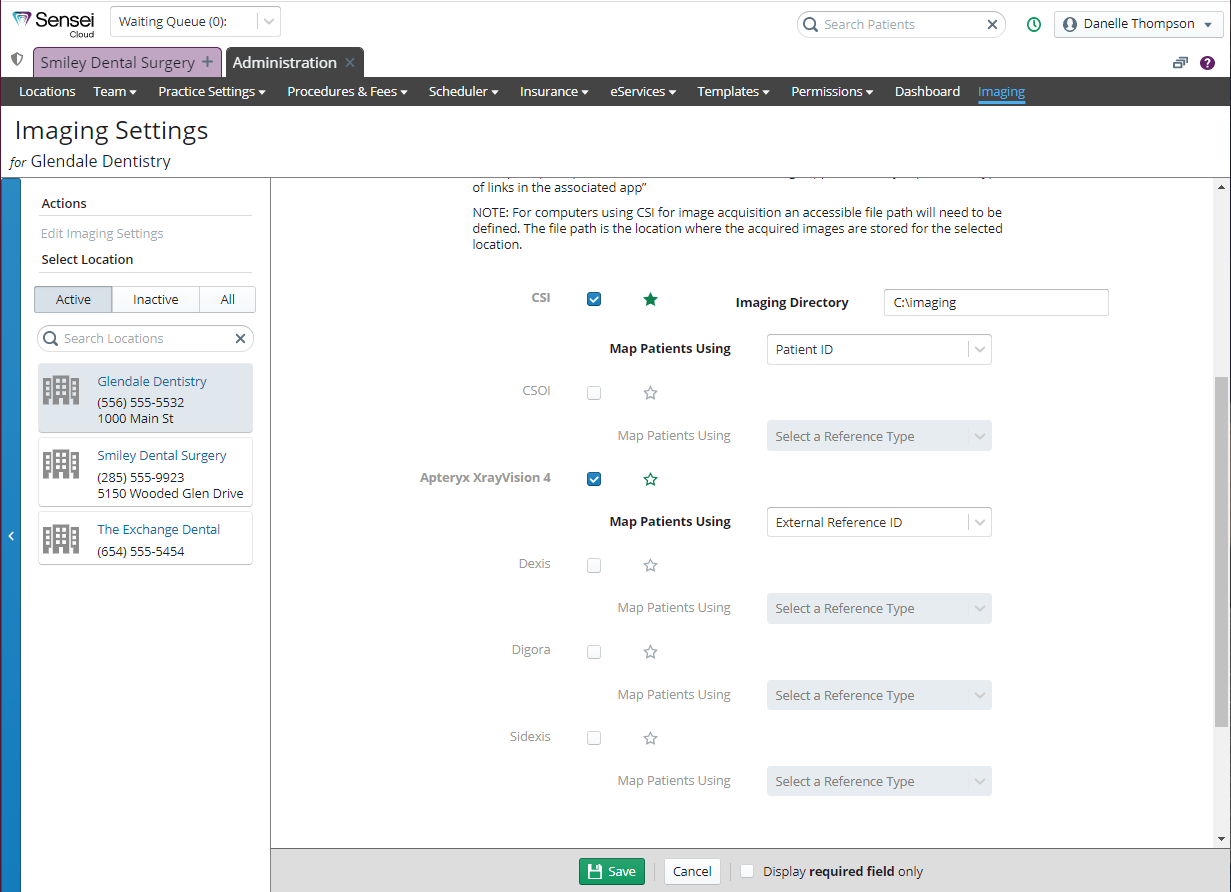
Select the options to enable the appropriate solutions.
-
In the Imaging Directory field, enter the location for images to be stored. Typically, a network accessible location should be used; however, a local drive can be used.
-
Select a Star to set the default storage location.
-
Set the Map Patients Using field, which is the ID that Sensei Cloud uses to map patient records to the bridged imaging database.
-
Click Save.
-
For offices that have undergone a conversion, additional reference IDs are mapped to your converted patient records. When you configure the image acquisition systems you use in your location, ensure that you select the correct mapping reference for patient records.