When you access Charting, the Hard tissue tab is active by default. Charting consists of the following tabs:
Hard tissue—Used to document all pathologies and conditions, missing teeth, restorations, existing procedures, completed treatment, proposed treatment, clinical notes, forms, and prescriptions.
Soft tissue—Used to enter the current periodontal condition of the patient, to view previous periodontal conditions, and to compare the periodontal conditions on different dates.
Prog notes—Displays exam results, completed dental treatment, proposed treatments, and so forth. You can sort the entries by date or area. If you sort by area, the progress notes are grouped by tooth number, quadrants, and area of the mouth.
Tx Plan—Displays the procedures in one or more treatment plans that have been, or will be, presented to the patient. The term treatment plan is abbreviated as TxPlan on tabs and buttons.
Attach(ed) img—Used to attach images to the patient’s chart and to view existing attached images.
Capture—Acquires images from external devices and associates them with a patient’s chart.
Layout—Used to organize, view, and print different images together. You can also integrate x-ray and digital images into a single presentation.
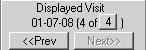
The Displayed Visit area is on several of the tabs.
Each time you open Charting, the Displayed Visit area shows the current date and the visit number. If this is the first time you have seen the patient or if you have never charted anything for this patient, the Displayed Visit area indicates that this is visit 1 of 1. If you make no changes to the chart, when you exit the software the chart is not saved. A visit is created when either an entry has been made on a chart or a note has been entered.
When you chart something for a patient, the chart is saved. The next time you open a chart for the patient, the Displayed Visit area indicates that this is visit 2 of 2. Use the <<Prev>> and <<Next>> buttons to move through the charts.
The Hard tissue tab and Soft tissue tab have separate charts. If there is a charting entry on the Hard tissue tab (composite, crown, and so forth), it creates a new soft tissue chart as well, even if no perio charting was done.
If note entries exist on the hard tissue charts without any actual charting, the number of charts vary.
The Hard tissue tab, the Soft tissue tab, the Prog notes tab, and the Attach img tab display the Arch/Quad view.
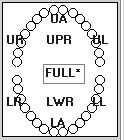
Note: The Arch/Quad view is referred to as a pictograph.
To see all progress notes for an area, right-click the area of the Arch/Quad view and select All Progress Notes.
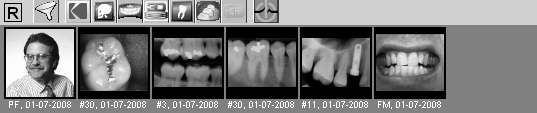
The Image Viewer is displayed on the Hard tissue tab, the Soft tissue tab, the Attach img tab, the Capture tab, and the Layout tab.
Information about the patient is displayed on several of the tabs.
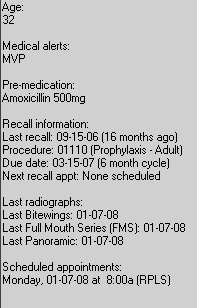
A portrait of the patient, if one is available, is displayed on every tab except the Tx Plan tab, the Layout tab, and the Capture tab.