Using the CS 7600 Intraoral System
To acquire an image:
Select or create a patient record.
Access the Imaging window.
Select the tooth to x-ray.
Insert an imaging plate into a hygienic sheath and seal it.
Position the imaging plate into the patient's mouth in the region of interest.
Expose the imaging plate to the x-ray.
Remove the imaging plate from the patient's mouth.
Disinfect the hygienic plate.
Scan the imaging plate.
Review the image.
Store the image in the CS Imaging software.
See the CS 7600 User Guide for information about using the Scan & Go device.
To start the imaging software:
On your desktop, double-click the Imaging Software icon.
OR
In Windows 10, select Start > Carestream_folder > CS Imaging Software.
Open or create a patient record.
Access the Imaging window. An icon on the toolbar indicates the CS 7600 is connected to the workstation and is ready to acquire an image.
To prepare an intraoral imaging plate and acquire an image:
Choose an appropriately sized imaging plate for the examination.
Note: Use only CS 7600 intraoral imaging plates and hygienic sheaths. Third-party sheaths may cause a system malfunction and void the warranty.
Important: Use a new hygienic sheath for each patient to avoid contamination.
Tip: If a plate has not been used recently, erase it.
Insert the plate into a sheath with the inactive side of the plate facing the adhesive strip. The imaging plate's size (number) can be seen through the transparent side of the sheath, and its orientation mark is visible in the bottom corner. Handle the imaging plate by holding the hygienic sheath's empty edge, where the silicone strip is located.
Peel the adhesive strip's protective paper to expose the adhesive, and seal the hygienic sheath.
Select an appropriate positioner for the region of interest and size of the plate.
Select the exposure time according to the region of interest and the patient type. Follow the user instructions of your x-ray generator.
Position the imaging plate in the mouth of the patient.
Move the x-ray BID head close to the patient, and align it with the patient's teeth, perpendicular to the imaging plate.
Tell the patient to remain still and not to move her tongue.
Position yourself at least two meters/six feet behind the x-ray generator or outside the door.
Trigger the x-ray with the remote switch.
Remove the imaging plate from the patient's mouth.
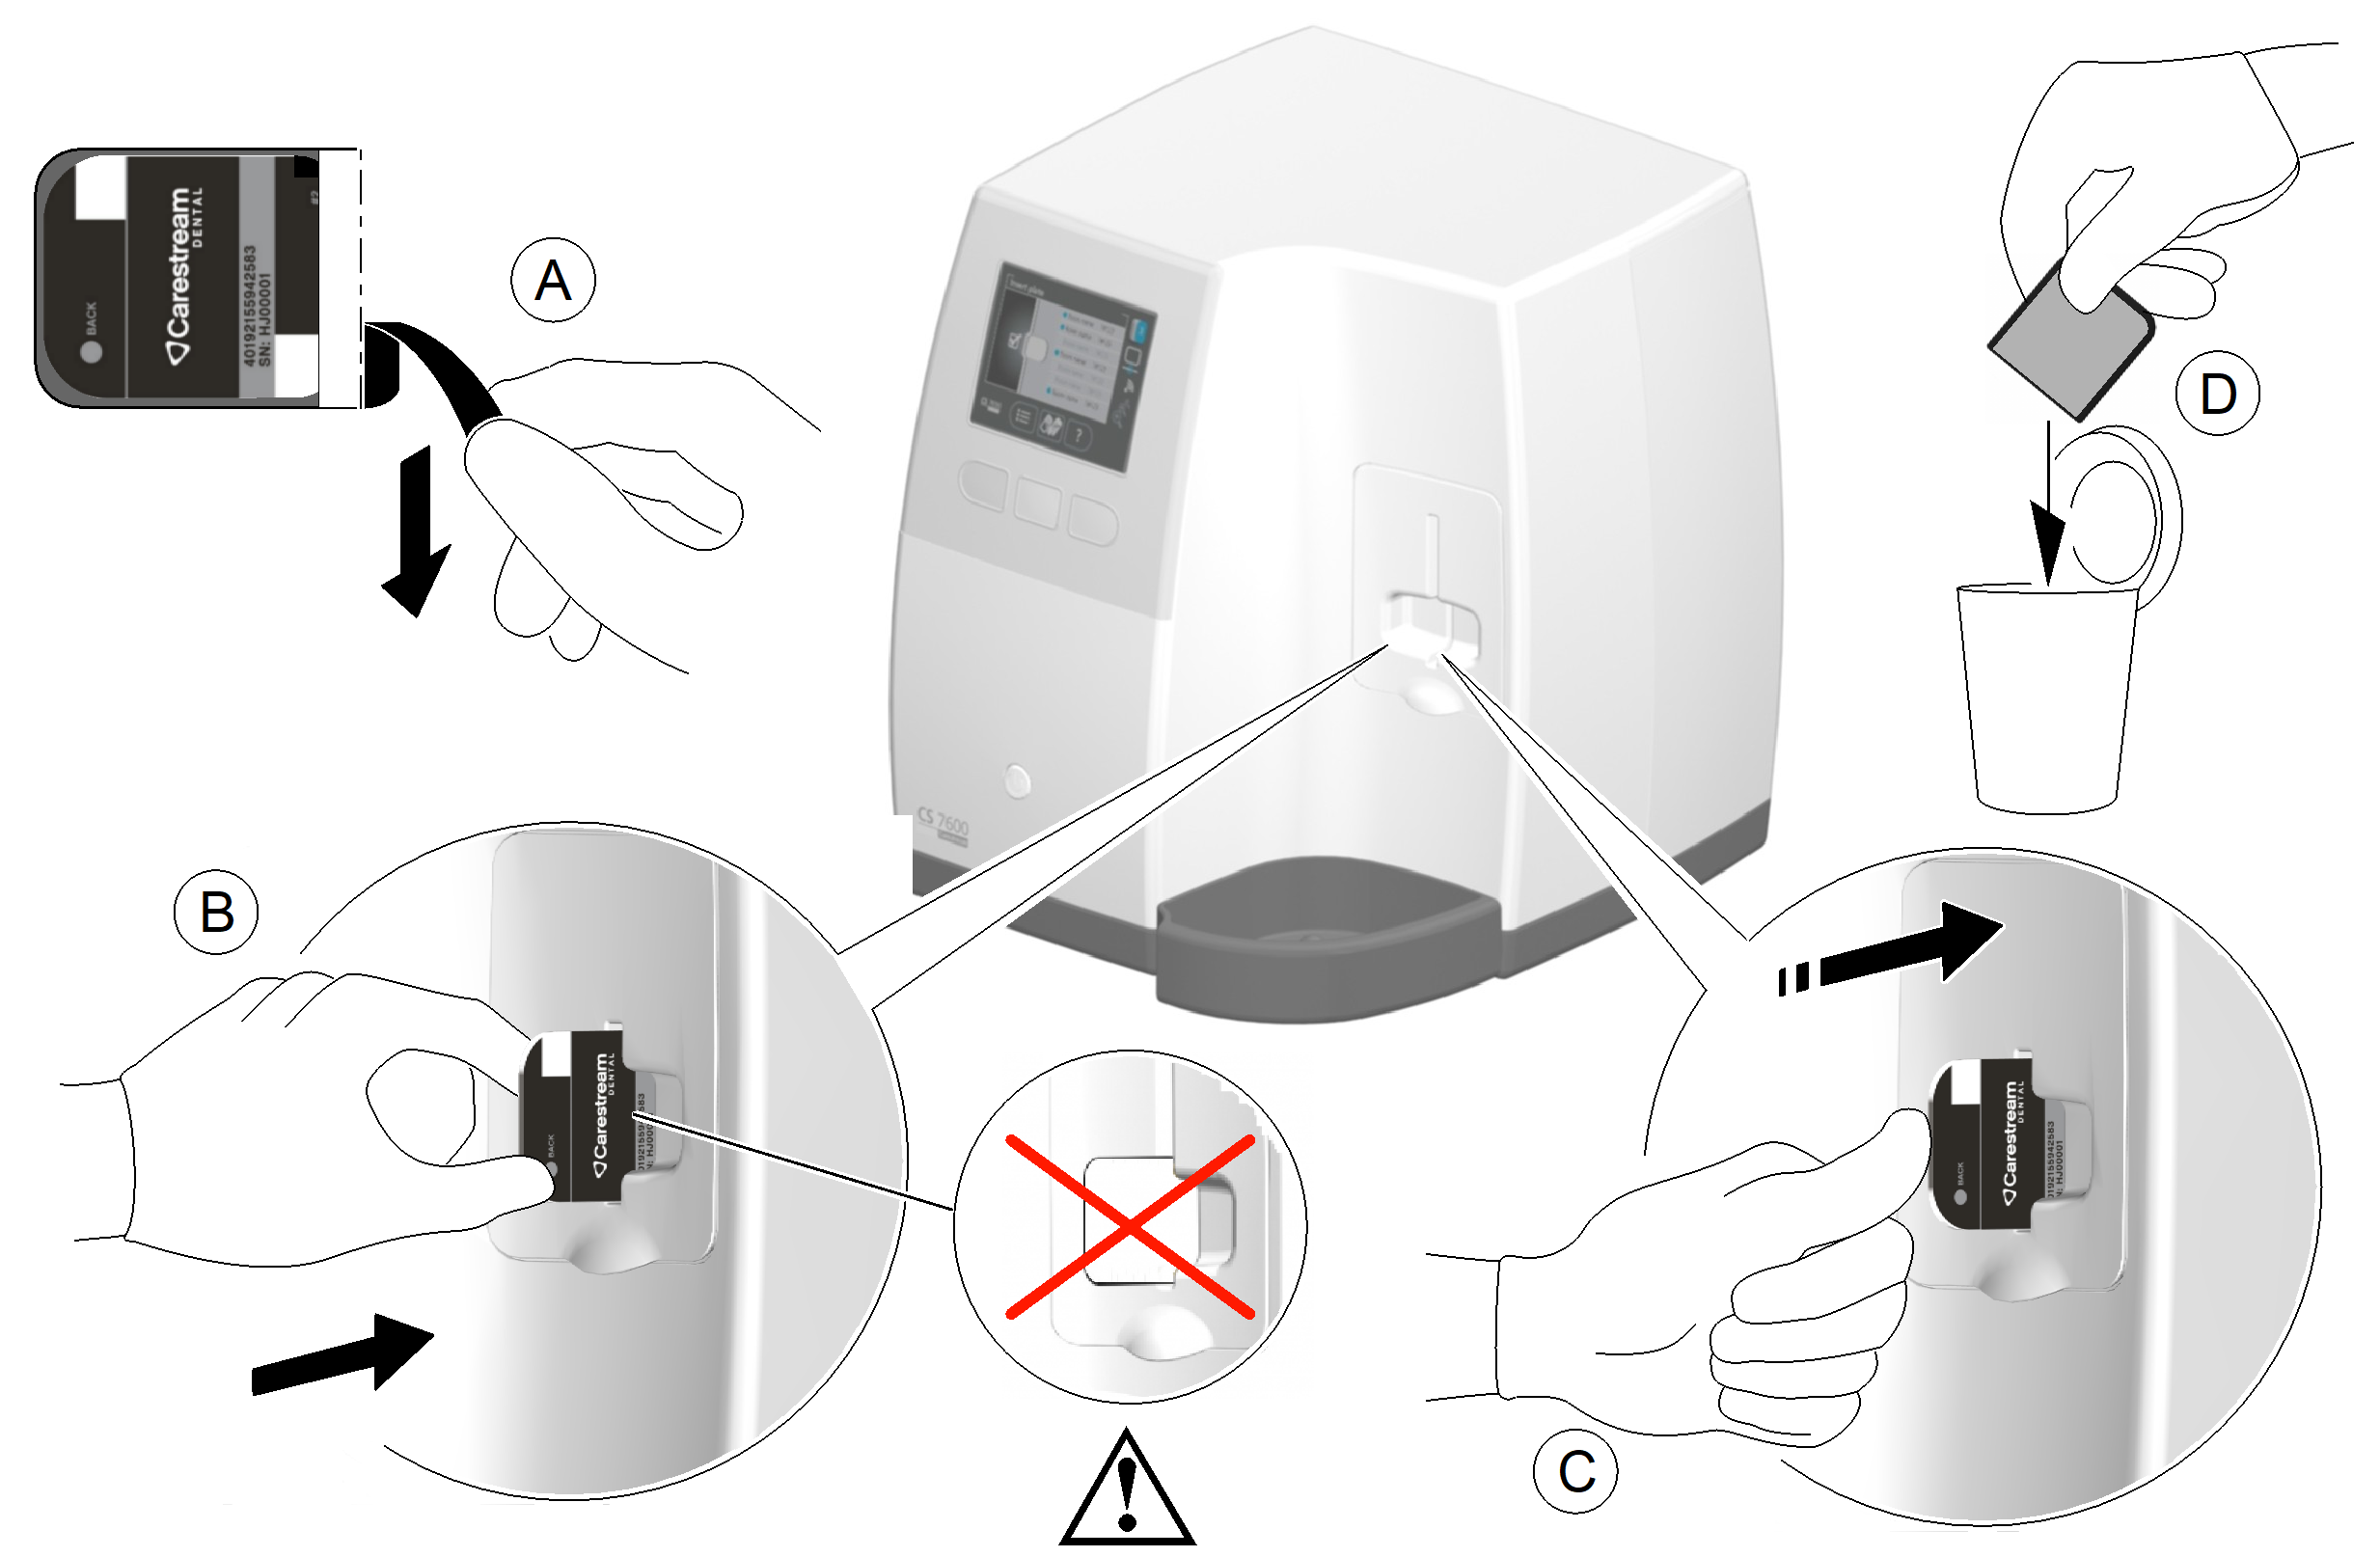
At the scanner location, tear open the hygienic sheath (A) and insert the exposed imaging plate into the scanner by positioning the open side of the sheath in the insertion panel slot (B) with the foam side to the right. Push out the tip of the imaging plate from its hygienic sheath (C). The imaging plate (without its protective sheath) is drawn into the insertion slot by the scanner and the scanner preview shows the scan progress.
Check the image to determine if it is satisfactory. The ideal image is indicated by a full green bar in the control panel. Under-exposed or over-exposed images are indicated by a partial or full red bar.