Using the Custom Region of Interest Tool (2D)
The 2D region of interest tool allows you to customize region of interest (ROI) shapes in 2D MPR images. These shapes combine together to build up a region of interest that customizes your 3D view.
|
A C D |
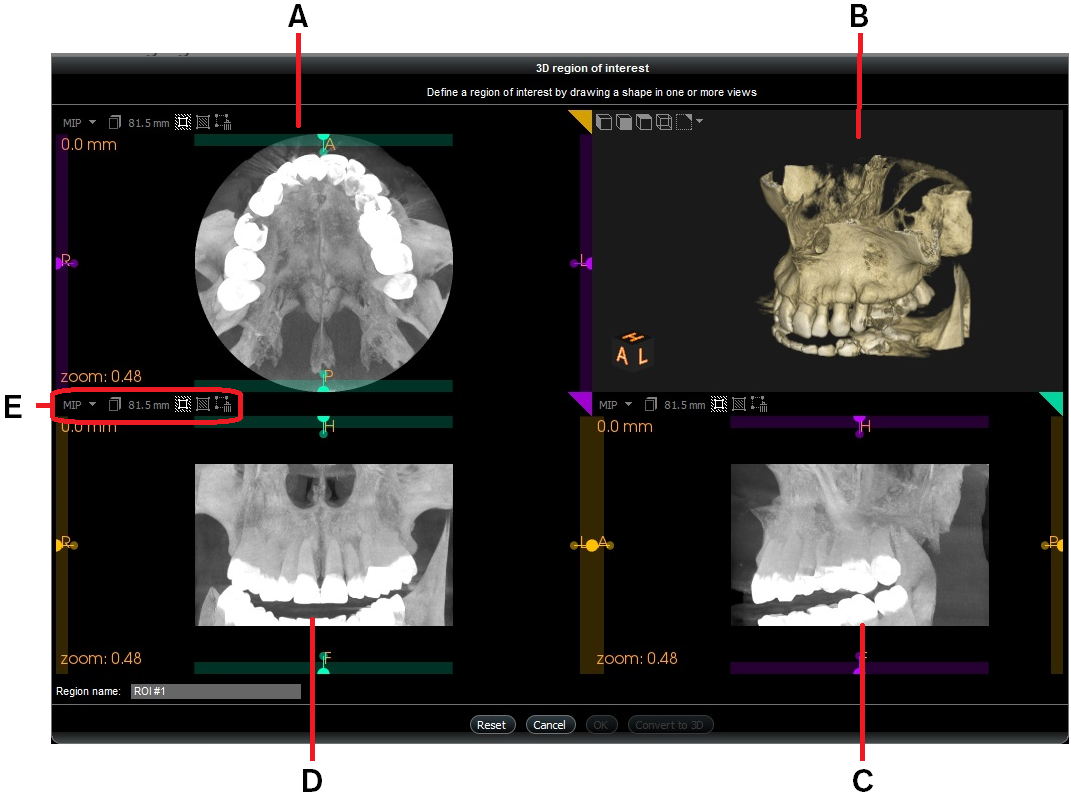
2D MPR Views Each 2D MPR view is set to the maximum slice integration (slice thickness is same as the dimension of the volume). Use these views to draw ROI shapes. The 2D MPR views have individual toolbars (E) that allow you to manage slice settings and manage ROI shapes drawn in the view. Note: You can zoom these views using your mouse scroll wheel. |
|
B |
3D View This is displayed in parallel projection, not perspective projection, so near-field objects appear the same size as distant objects. Use this view to examine the results of the combined ROI shapes drawn in A, C and D. Note: You can zoom, pan and rotate in the 3D view. |
|
A |
View Screen Toolbar Use this to manage slice settings and ROI shapes for the selected view. |
Once a shape has been drawn, if required you can click the Convert to 3D button to continue editing in the 3D region of interest tool. See “Using the Custom Region of Interest Tool (3D)”.
|
|
Important: Each 2D MPR view screen is set to the maximum slice integration (slice thickness is same as the dimension of the volume). |
