Setting Up CS 3D Imaging Preferences
MPR Preferences
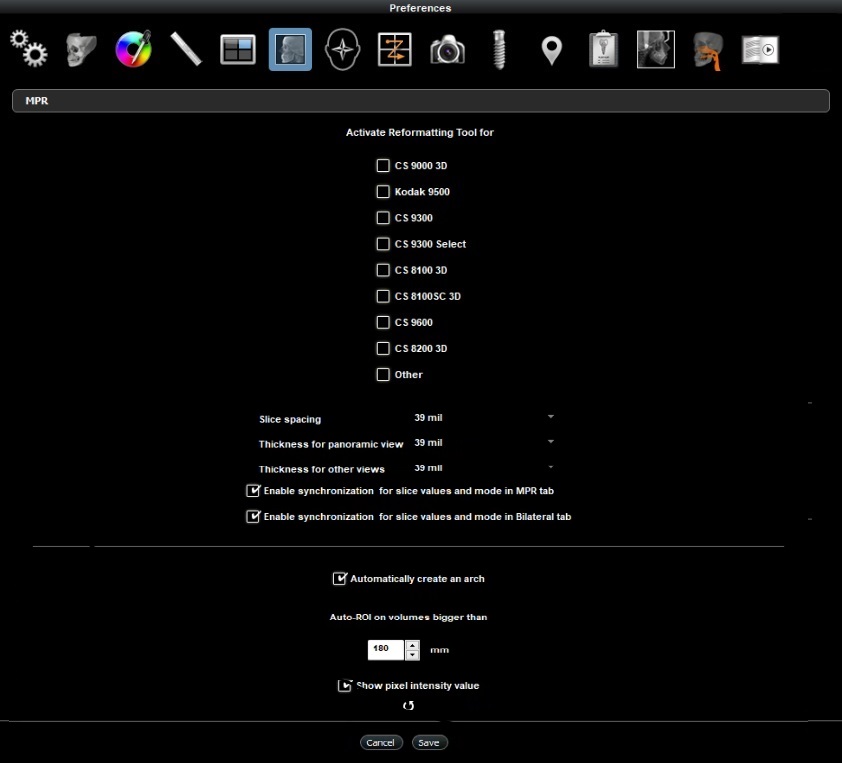
 In the MPR preferences, you can do the following:
-
Select Reformatting Tool options. See “Using the Reformatting Tool”.
-
Select the default slice spacing for 2D MPR view screens.
-
Set the thickness for views.
-
Activate automatic arch creation.
-
Select the automatic Region of interest setting.
|
|
Note: Updates to these preferences are only applied to 3D volumes acquired after these changes are applied to the CS 3D Imaging software. |
To set the MPR preferences, follow these steps:
-
In the Main Toolbar Icons, click
 .
.
The Preferences window appears.
-
In the Preferences window, click
 .
.
The MPR preferences are displayed.

Do any of the following.
|
To specify which image acquisitions should activate the Reformatting Tool.... |
Select an acquisition device type. The Reformatting Tool will be applied to images acquired from the selected device types the next time you open the images. |
|
To set the default slice spacing for split views in 2D slice views... |
Select a slice spacing value from the drop-down list. Important: If Split Views are already displayed in the 2D MPR view screens when you change this setting, you must restart the software for the spacing changes to take affect. |
|
To set the thickness for panoramic views... |
Select a thickness from the Thickness for panoramic view drop-down list. |
|
To set the thickness for views that are not panoramic... |
Select a thickness from the Thickness for other views drop-down list. |
| Enable synchronization for slice values and mode in... | MPR tab |
| Enable synchronization for slice values and mode in... | Bilateral tab |
|
To activate automatic arch creation... |
Click Automatically create an arch. To deactivate the automatic arch creation function, click the activated option. |
|
To set the default volume size applied by the Basic Region of Interest tool... |
Use the Auto-ROI on volumes bigger than picker to specify the size of the volume that you want to automatically crop. Note: This setting must be between 30 to 180 mm. |
|
To reset the preferences to the installation defaults... |
Click |
3. Click Apply.
