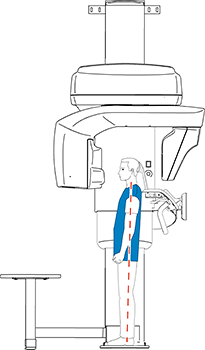
Preparing and Positioning Patients for 3D Face Scan Images
To acquire a 3D face scan image, follow these steps:
-
On the Main toolbar of the CS Imaging window or the Image acquisition window, click
 .
.
The 3D Face Scan Acquisition interface appears, and a brief pop-up illustration window is displayed, to remind you that:
- The patient must remove and place all metal objects in the jewelry tray.
- The patient's hair must be tucked behind the ears.
- You must remove the temple supports.
-
Position the 3D face scan support (make sure that it clicks fully into place).
 |
IMPORTANT:  will appear on the interface. When you click on it, the 3D face scan support will appear in green. The incorrect accessory will appear in red. will appear on the interface. When you click on it, the 3D face scan support will appear in green. The incorrect accessory will appear in red. |
-
On the Touch Screen Control Panel:
- Click
 . The rotative arm rotates to a 90 degree angle. Remove the temple supports.
 - Click
 to position the unit to the patient entry mode. Ask the patient to enter the unit.
 - Press and hold
 to adjust the unit to the height of the patient.
 - Click
 . The rotative arm will turn and be ready for acquisition.
 |
Note: If |
-
To align the patient to the Frankfort position:
- Click
 . The horizontal positioning line will turn green if the patient is in the Frankfort position.
- If the patient is not in the Frankfort position, follow the on-screen illustrations:

-
Ask the patient to do the following:
|
|
|
IMPORTANT: It is IMPORTANT that you tell patients to look straight ahead and to NOT follow the movement of the rotative arm with their eyes during acquisitions. |
Acquiring 3D Face Scan Images for Adult and Pediatric Patients