3D Object Acquisition Interface Overview
 |
IMPORTANT: The 3D Object image features described in this chapter are not intended for diagnostic, treatment planning, or treatment guidance purposes. |
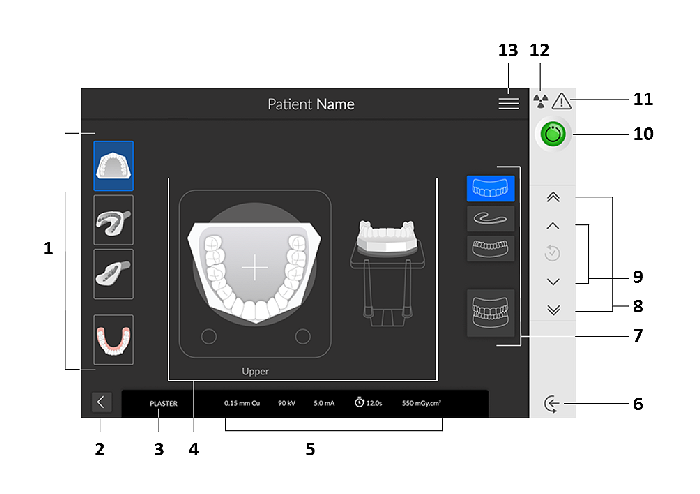
Figure 8 3D Object Acquisition Interface Overview
|
1 |
Acquisition modes: Plaster, impression, triple tray impression, and appliance modes. |
|
2 |
Exit button |
|
3 |
Current acquisition mode |
|
4 |
Illustration screen: Guides you on how to position an object before an acquisition. |
|
5 |
Exposure parameter display |
|
6 |
Object entry mode: Positions the unit in the object entry mode. |
|
7 |
Acquisition object options: Provide the various combination of acquisition objects (lower jaw, bite index, upper jaw, or full jaw). |
|
8 |
Fast Height Adjustment button: For fast adjustment of the height of the unit to the height of the object. |
|
9 |
Slow Height Adjustment button: For slow adjustment of the height of the unit to the height of the object, especially for the final adjustment. |
|
10 |
Ready indicator:
|
|
11 |
Warning: Indicates that you must consult the accompanying document. |
|
12 |
Ionizing radiation:
|
|
13 |
Menu: Provides access to the following sub-menus: General Settings, DICOM Settings, Reset to factory, Patient history, Shutdown/Restart, About. See Displaying User Preferences. |
Acquiring Images of 3D Dental Objects
Acquiring Images of Plaster Objects
Acquiring Images of Impression Objects