Working with Lab Cases
After you add a lab, you can:
Create a lab case.
Create a reminder to be displayed on the day the lab case is expected.
Mark a lab case as returned.
Mark a lab case as closed.
Adding a Lab Case
To add a lab case:
From the main menu, select List > Patient. The Patient List window is displayed.
Select the appropriate patient.
Select Clinical Management > View Lab Cases from the Options section of the Express bar. The Lab Case List window for the patient is displayed.
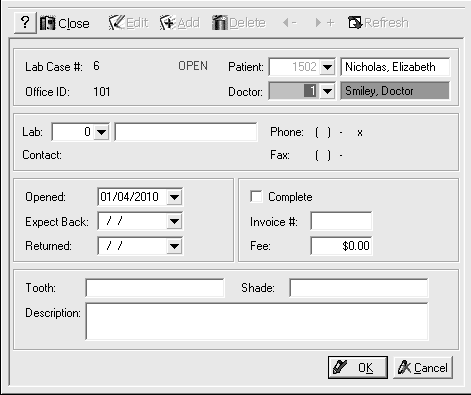
Click Add. A blank Lab Case window is displayed.

Select the lab to which the case is assigned and type a case description.
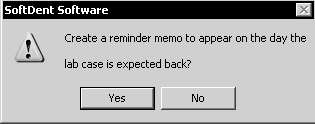
Click OK. You are asked to display a reminder on the day the lab case is expected.

Click Yes and Close.
If the patient has an appointment scheduled and the lab case has been linked to the appointment, a red L is displayed at the bottom of the appointment in the Daily Appointments window to indicate an open lab case.
Marking a Lab Case as Returned
After a lab case is returned to your office, mark it as returned.
To mark a case as returned:
From the main menu, select List > Patients. The Patient List is displayed.
Select the patient whose lab case is returned.
Select Clinical Management from the Options section of the Express bar. A submenu is displayed.
Select View Lab Cases. The Lab Case List window is displayed.
Select the appropriate case, and select Mark Returned on the Options section of the Express bar. The Enter Lab Fee and Invoice # window is displayed.
Enter the invoice number and lab fee in the appropriate fields.
Click OK. The Returned column displays the current date; the lab case is displayed in blue.
If the patient has an appointment, a green L is displayed.
Marking a Lab Case as Complete
After all of the clinical procedures associated with a lab case have been performed, mark it as complete.
To mark a lab case as complete:
From the main menu, select List > Patients. The Patient List is displayed.
Select the patient whose lab case is returned, and select Clinical Management > View Lab Cases from the Options section of the Express bar. The Lab Case List window is displayed.
Select the appropriate case, and click Edit. The window for the lab case is displayed.
Select Mark Completed from the Options section of the Express bar and click OK.
Click Close.
Tip: You can also access lab cases from the new Labs tab in charting.