Setting Up Routing Slips
Some practices use routing slips to help track, guide, and verify the details of patient appointments. When routing slips are enabled, you can determine what information is printed on the slips, such as scheduled procedures, referral info, insurance, treatment plans, and use them to verify what is posted during checkout.
To enable and configure routing slips:
-
From the Administration tab, select Practice Settings > Routing Slips.
-
Under Actions, select Edit Routing Slips.
-
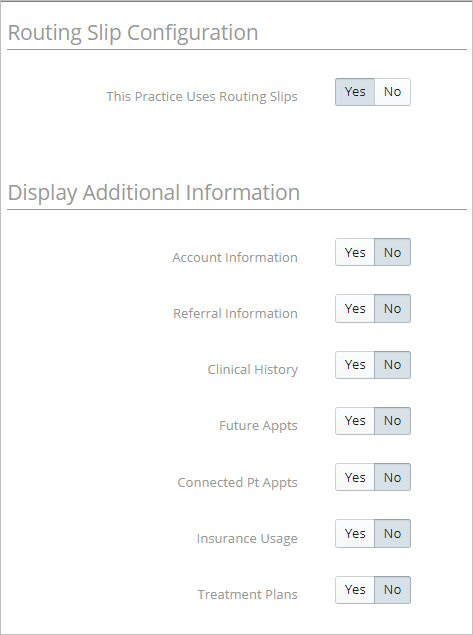
Next to This Practice Uses Routing Slips, click Yes. The Display Additional Information selections become active.

-
Select Yes for each type of information you want displayed on routing slips.
-
Click on an option to display a brief explanation.
-
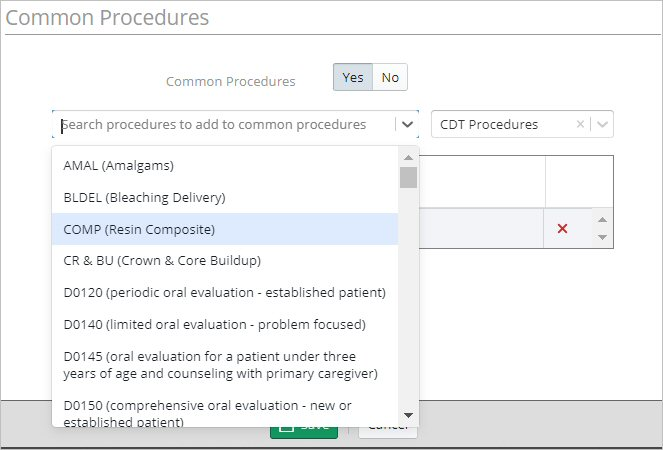
Scroll down to Common Procedures and select Yes if you want to include a list of procedures commonly performed in addition to scheduled procedures, so they can be checked on the routing slip and added to the appointment during checkout. When this section is enabled, additional blank options are provided for write-in procedures.

-
Use the Search procedures field to select the common procedures you want to display on the routing slip.

-
You can drag the procedures to determine the order they are displayed on the routing slip, or click x to remove them.
-
Click Save.