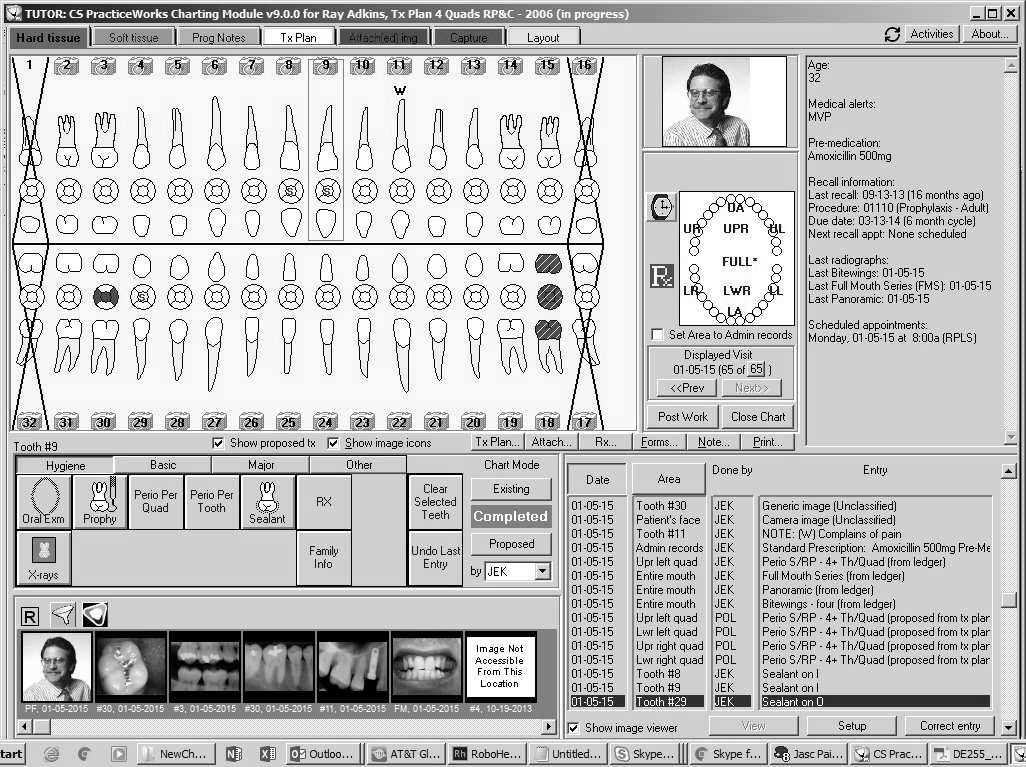
When you open Charting, the Hard tissue tab is displayed by default.
The Hard tissue window is made up of the following areas:
Tooth chart
Charting palettes
Charting modes
Progress notes
The largest part of the window displays the tooth chart, in which you select individual teeth for charting.
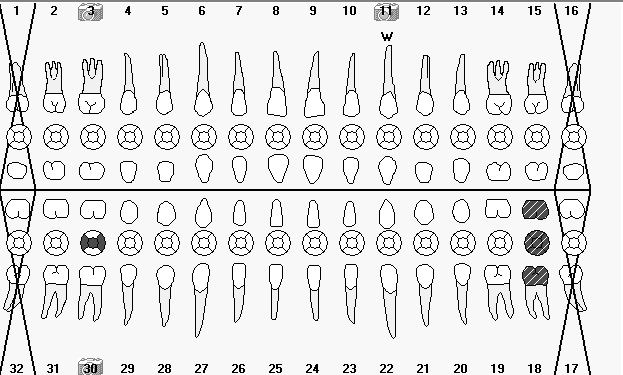
By default, charts for patients under 10 years of age automatically display deciduous teeth. The age, however, can be customized. This enables you to track the loss of primary dentition.
Charting buttons can be configured to your preferences. Below the tooth chart are the Charting palettes, which display buttons to document restorations and conditions for a tooth, quadrant, or area of the mouth.
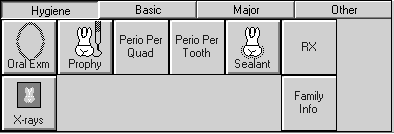
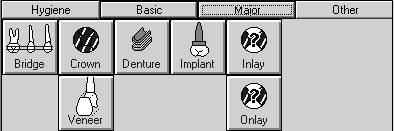
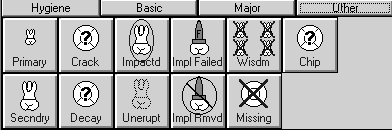
At the top of the toolbar are four tabs—Hygiene, Basic, Major, and Other. These tabs can be customized.
Select Hygiene, and the following buttons are displayed:
Select Basic, and the following buttons are displayed:

Select Major, and the following buttons are displayed:
Select Other, and the following buttons are displayed:
Over forty system-defined buttons are available, including Bridge, Fracture, Impacted, and Sealant.
To add a system-defined button to a palette:
Right-click on a blank area of a palette. A menu is displayed.
Select Add Button. The Select Type of Button to Add window is displayed.
Scroll through the list to select the button you want to add.
Highlight the selection, and click OK. The button is added to the palette.
To delete a button:
Right-click on the button you want to delete. A menu is displayed.
Click Remove Button.
Selecting the Appropriate Charting Mode