Working with Images > Drawings, Measurements, and Annotations > Using Measurements to Calculate Distances and Angles
Making Measurements
A measurement can show, for example, the distance between two points in an image.

|
|
Tip:
|
|
|
Note: Units of measurement are Standard International (SI) units, millimeters (mm) for length, and degrees (°) for angles. |
The following types of measurements are available in the ![]() Drawings & Annotations toolbar in the Measurements icon group:
Drawings & Annotations toolbar in the Measurements icon group:
-
Straight line measurement
-
Multi-segment line (Polyline) measurement
-
Angle
-
Orthogonal (Perpendicular) measurement on a line, axis or plane
|
|
Note: If a white triangle is displayed in the lower corner of the icon, you can access the different tools in the icon group. See Using Icon Groups. |
To add a measurement to an image, follow these steps:
-
Open the image in the Image Viewing Workspace or Darkroom mode.
-
In the
 Drawings & Annotations toolbar, in the Measurement icon group, select one of the following.
|
|
Tip: You can show or hide measurements using the Display Measurements Window option in the Screen Options menu. |
|
To draw a straight line measurement... |
The line is displayed with its measurement (in millimeters.) |
|
To draw a multi-segment line (polyline) measurement... |
Measurements are displayed for each segment of the polyline. The total length is displayed in the tooltip and measurements list. |
|
To draw an angle measurement... |
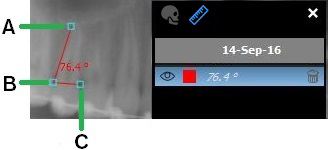
The sequence of clicks for drawing angles is shown below.
|
|
To draw an orthogonal (perpendicular) line... |
Note: This function only works with an existing line measurement.
The pointer displays as a “+” to show that the orthogonal measurement tool is active.
A perpendicular (orthogonal) line is displayed, with its length (in millimeters).
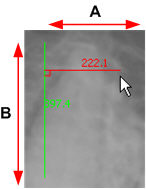
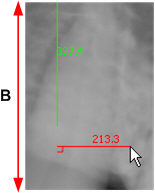
A: Move the pointer in this direction to set the length of the new perpendicular line (red). B: In this direction, the pointer is constrained to move only along the plane of the starting line measurement (green). You can draw the new line measurement beyond the range of the starting line measurement; it will still move along the same perpendicular plane.
|
Using Measurements to Calculate Distances and Angles
Modifying and Deleting Measurements
Using the Measurements List in the Image Viewing Workspace or Darkroom Mode


