General Imaging Functions > Importing and Exporting Images > Importing Images
Importing DICOM Images
You can import images from removable media such as a flash drive or DVD if they are stored with a DICOMDIR file structure.
Icons for importing images are available:
-
In the Patient Browser or Dashboard, in the Import icon group.
-
In the Image Viewing Workspace or Darkroom mode, in the
 Share toolbar.
Prerequisite:
-
If you are in the Patient Browser standalone mode, select a patient in the Patient List. All image thumbnails for the selected patient are displayed in the Patient History.
-
From your DPMS, launch CS Imaging.
The current patient's name is displayed in the title bar in CS Imaging.
To import a DICOMDIR, follow these steps:
-
From the Import icon group, select
 . The Open window is displayed.
 -
In the Import dialog box, select the DICOMDIR file you want to import and click Open.
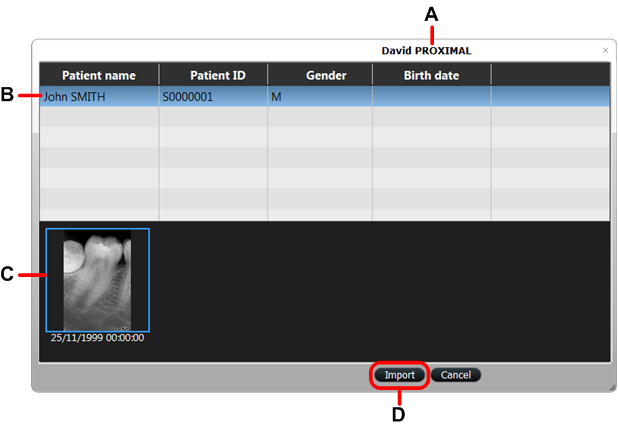
A DICOMDIR viewing window is displayed, containing the contents of the DICOMDIR file.
 |
A |
Name of the Patient Card into which you are importing images. |
|
B |
Patient name in the DICOMDIR file. |
|
|
C |
Image thumbnails for the selected patient name (B) in the DICOMDIR file. |
|
|
D |
Import button (grayed out until you select an image thumbnail (C)) |
-
In the Open window, browse to the folder that contains the images you want to import.
-
Select the images that you want to import, and click Open or OK. The file or files you selected are imported and display in the Patient History.
|
|
Important: Make sure you are associating the imported images with the correct patient. |
When you start the import, you will be prompted to confirm that you want to import images into the specific patient's file.
-
To continue with the import, click OK.
